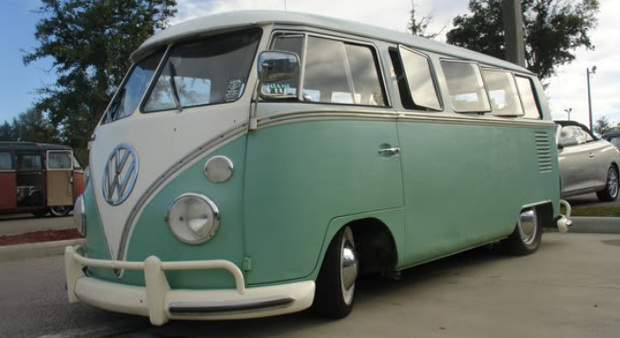
1964 Volkswagen Deluxe
The Beginnings...
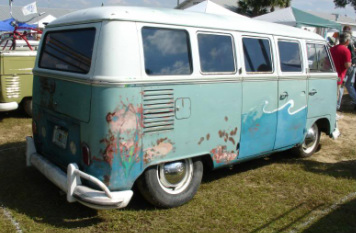
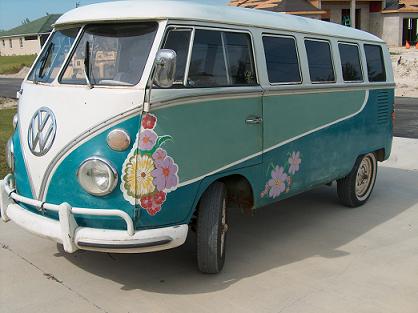
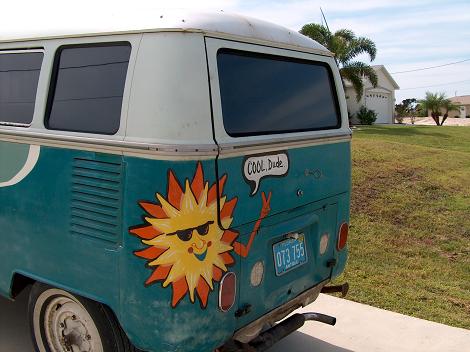
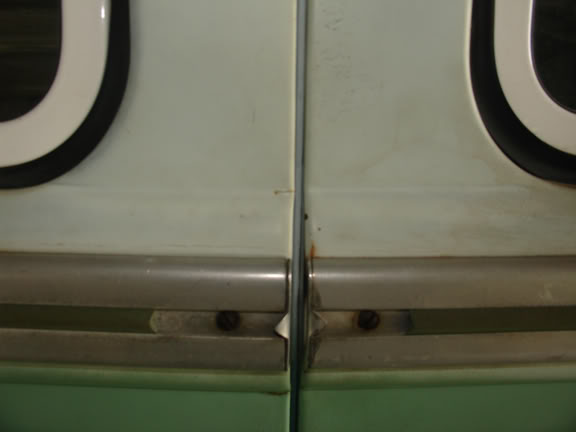
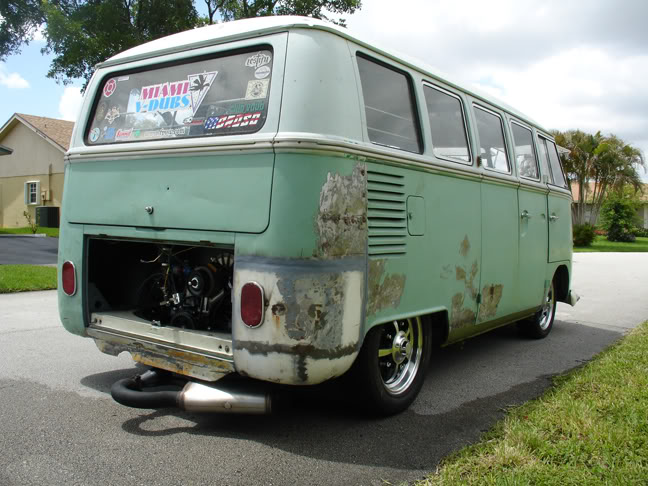
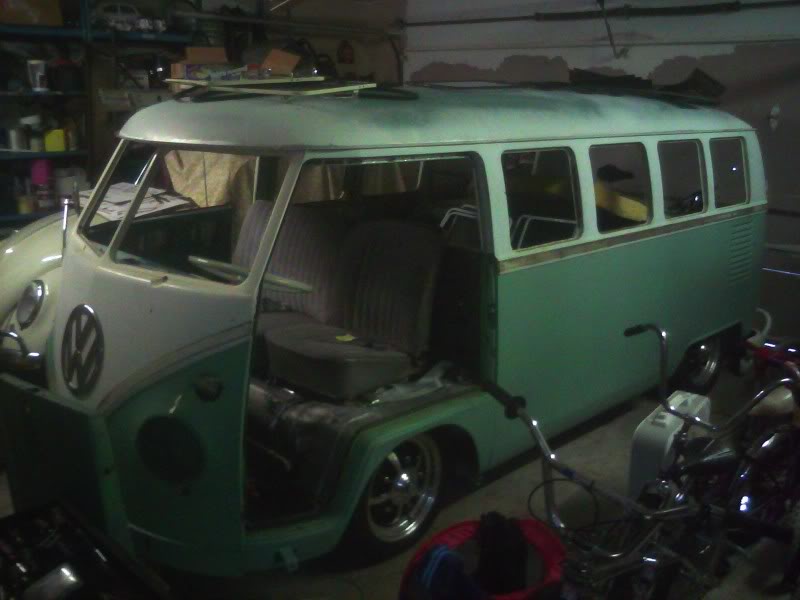
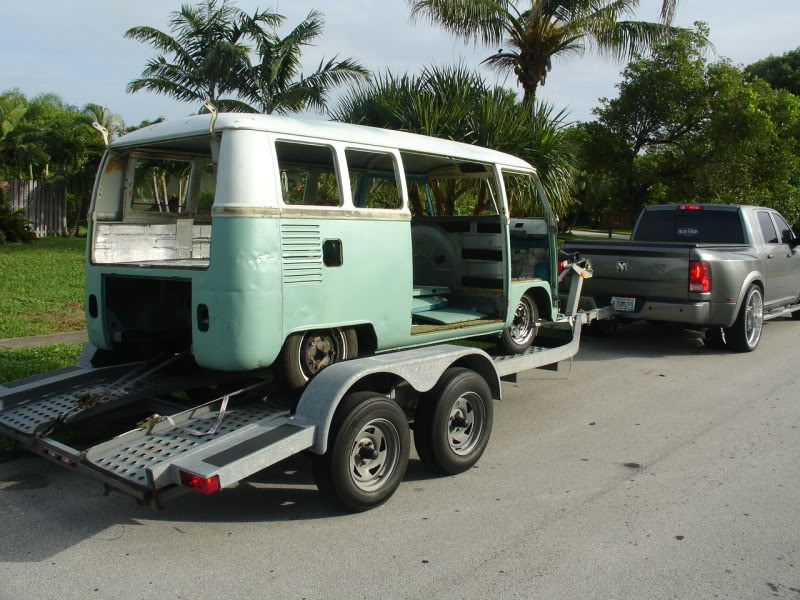
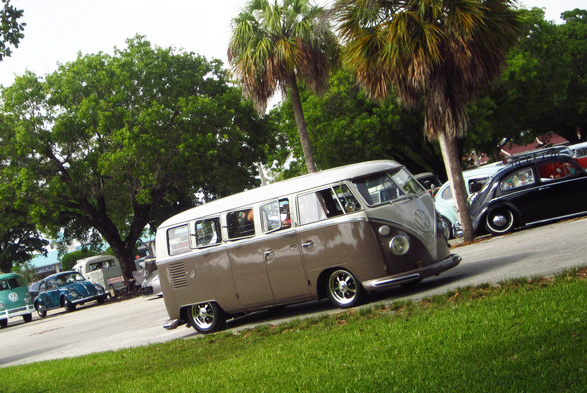
I've had this bus for a few years now. It was known as the "Mermaid Bus" throughout Florida. When I acquired it, it was lowered with a narrowed 4" Wagens West front beam with flipped spindles and the rear still had the RGBs with turned spring plates. The windows were tinted and about half of the Mermaid mural had been removed already. Bus was acquired from a guy in Ft. Myers who was into fabricating 3D "molded" stuff for movie props and promotional vehicles. I'm glad I rescued this bus before the bondolization began! He sold the bus because he claimed the clutch was broken. After a few times of manually lifting the clutch pedal with my hand after depressing it, it became free and the clutch issue was solved! Drove the bus to Miami and the rest is history! Most pics can be clicked on to enlarge.
I've had this bus for a few years now. It was known as the "Mermaid Bus" throughout Florida. When I acquired it, it was lowered with a narrowed 4" Wagens West front beam with flipped spindles and the rear still had the RGBs with turned spring plates. The windows were tinted and about half of the Mermaid mural had been removed already. Bus was acquired from a guy in Ft. Myers who was into fabricating 3D "molded" stuff for movie props and promotional vehicles. I'm glad I rescued this bus before the bondolization began! He sold the bus because he claimed the clutch was broken. After a few times of manually lifting the clutch pedal with my hand after depressing it, it became free and the clutch issue was solved! Drove the bus to Miami and the rest is history! Most pics can be clicked on to enlarge.
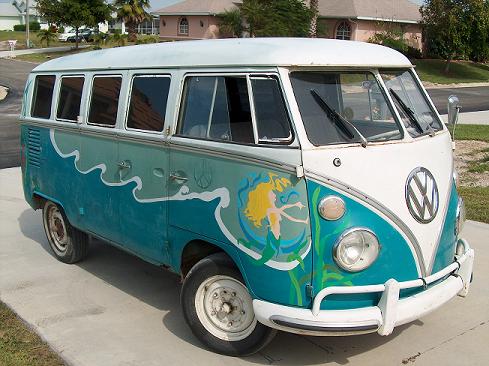
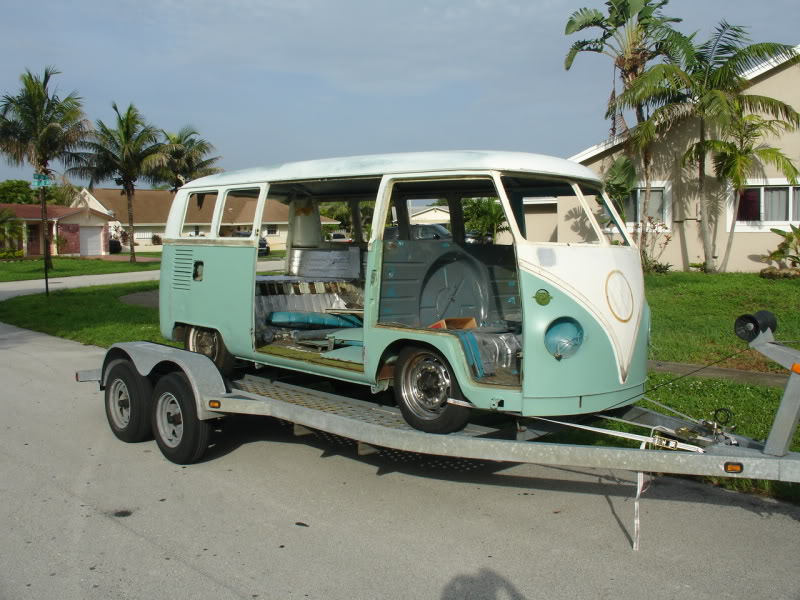
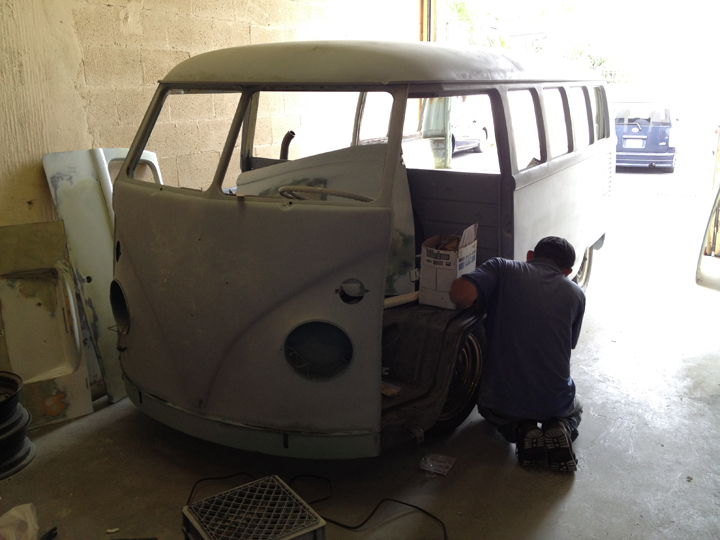
 At BugJam in Tampa days after I purchased it! |
 At BugJam in Tampa days after I purchased it! |
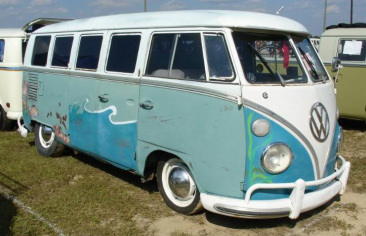
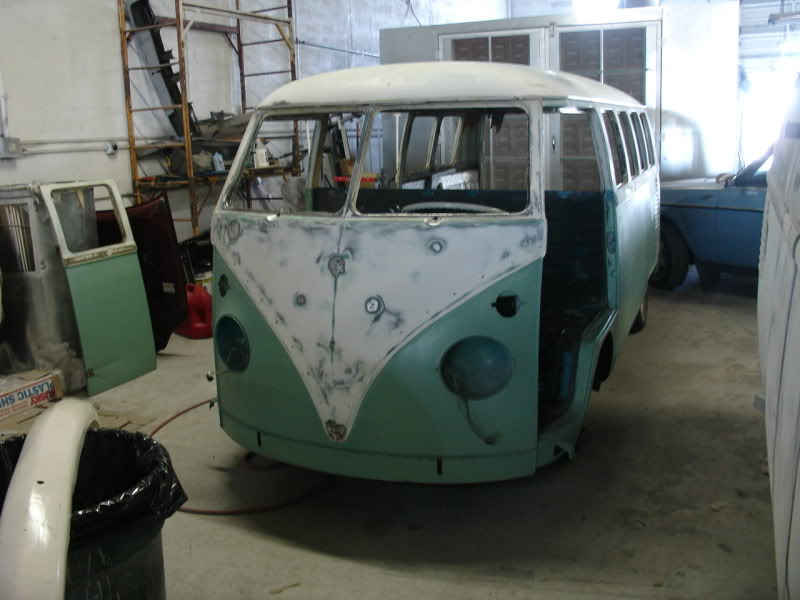
This is what the bus looked like originally as the "Mermaid Bus" from the previous owner who I bought it from in Ft. Myers. Turns out the bus was originally brought in to Cape Coral, FL from Ohio by another previous owner. Making me the 3rd owner in Florida. http://www.thesamba.com/vw/forum/viewtopic.php?t=140477

IRS Conversion...
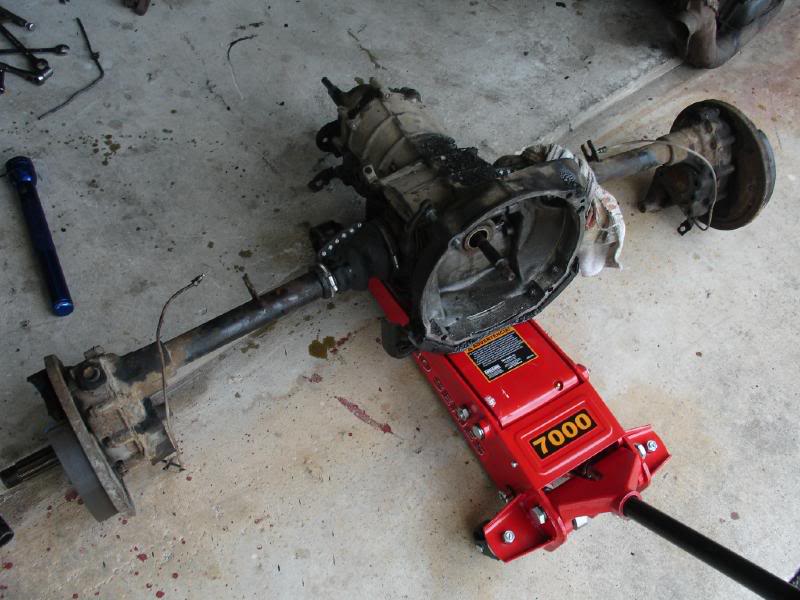
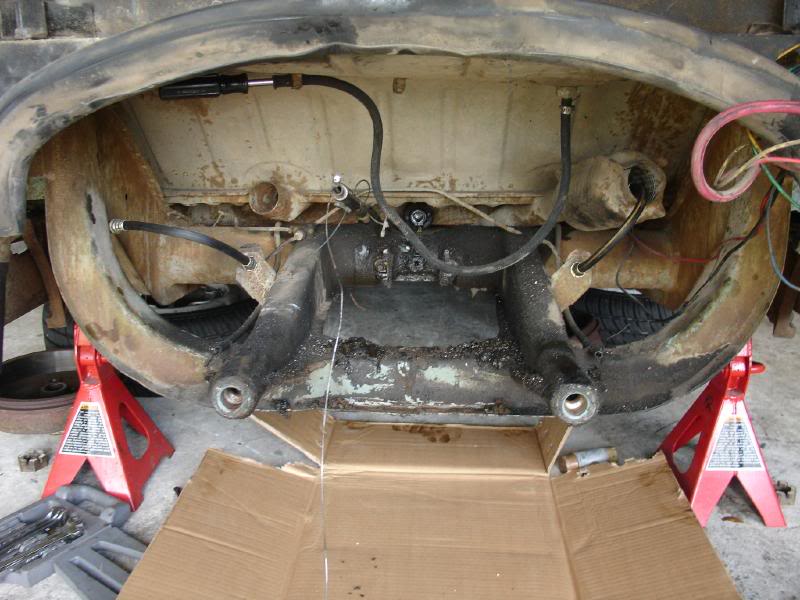
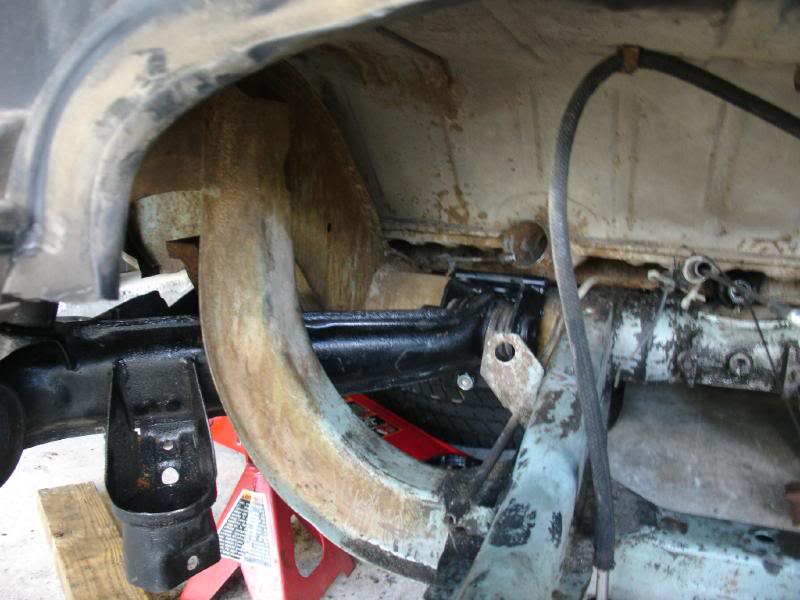
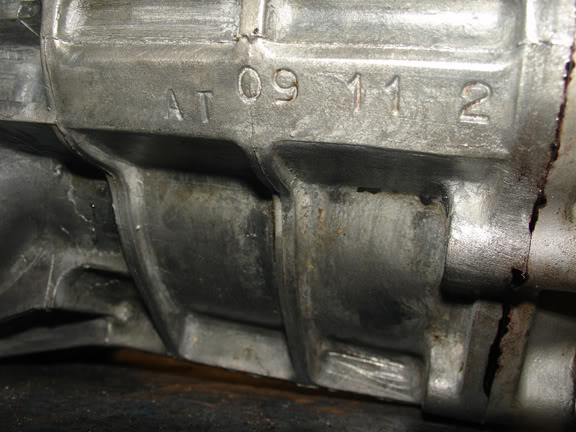
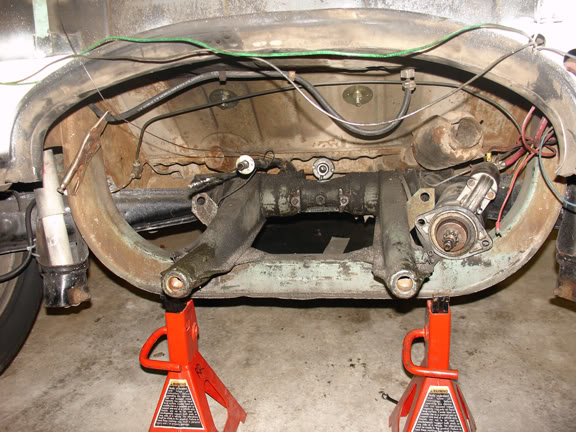
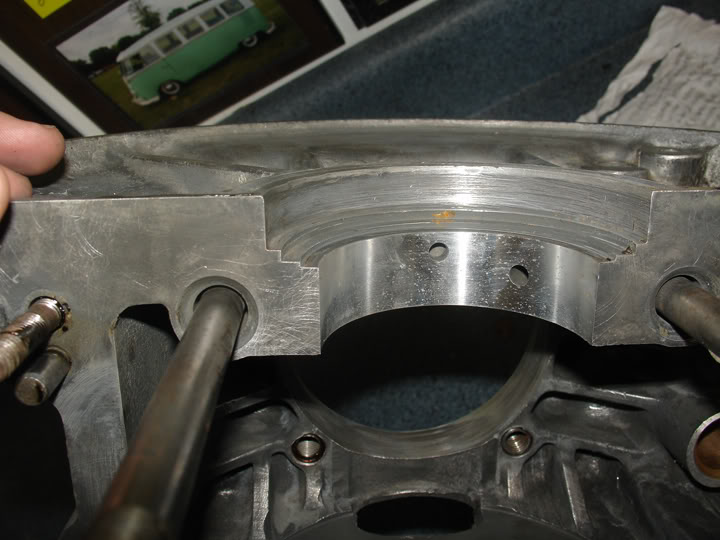
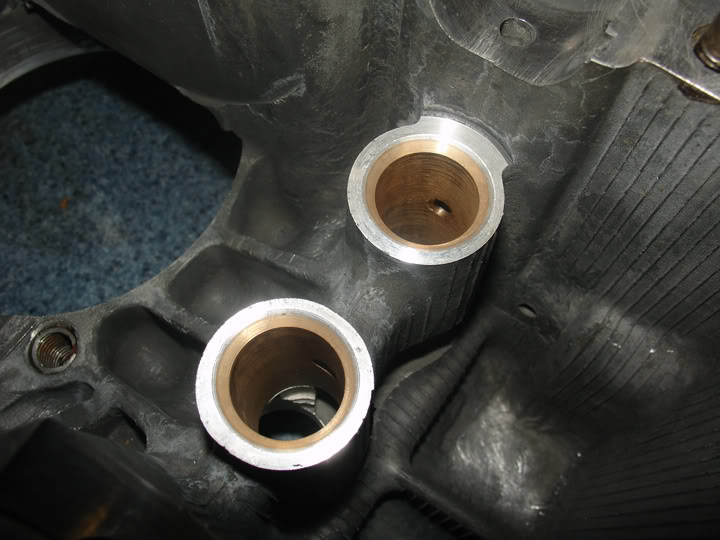
First modification was to convert the rear lowered RGBs to IRS suspension from a late Beetle. Transmission is a good-used Beetle single side plate cover 3.88 R&P.
First modification was to convert the rear lowered RGBs to IRS suspension from a late Beetle. Transmission is a good-used Beetle single side plate cover 3.88 R&P.

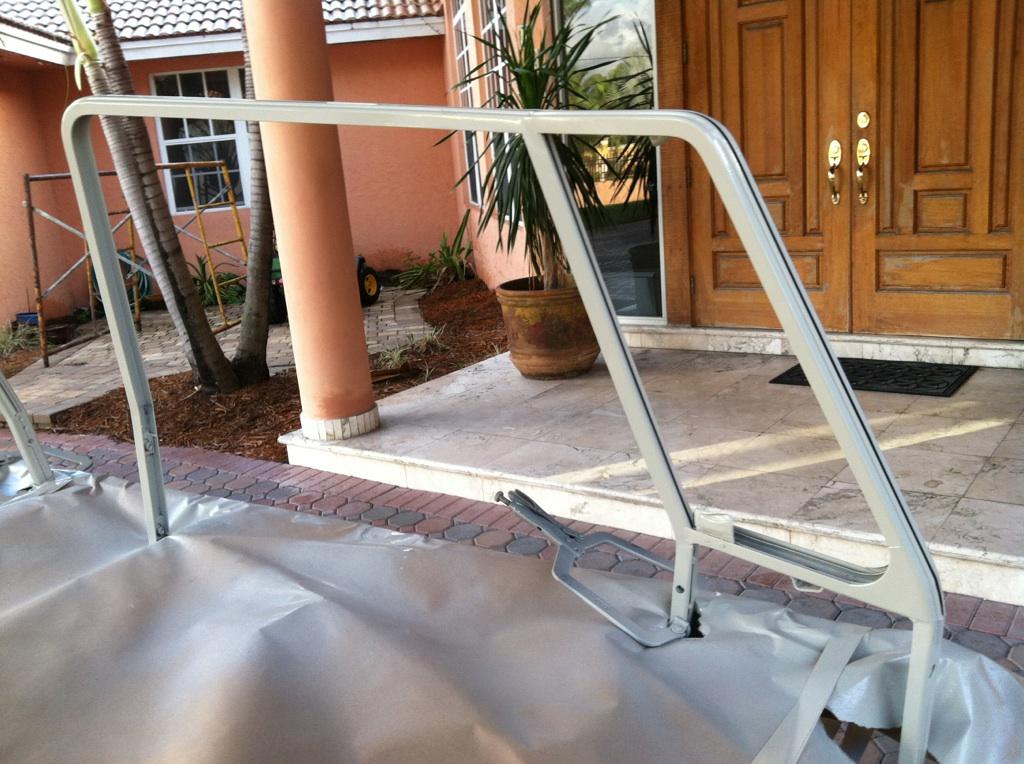
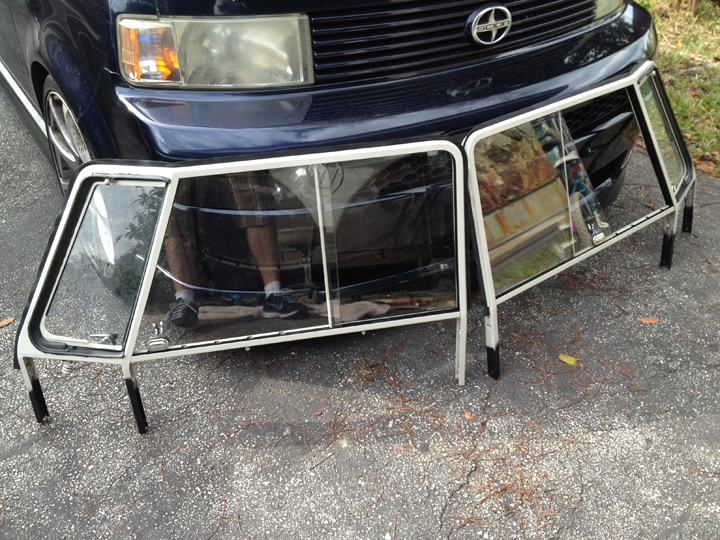
Front Safaris...
Next project on the list was to install n'used Wolfgang Int. powdercoated front safaris I scored in the swaps on my visit to the VW Classic in California. It was a brand new in the box kit, never used for a used price!
Next project on the list was to install n'used Wolfgang Int. powdercoated front safaris I scored in the swaps on my visit to the VW Classic in California. It was a brand new in the box kit, never used for a used price!


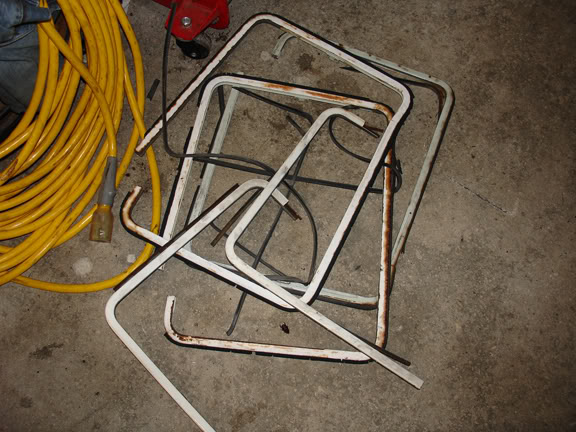
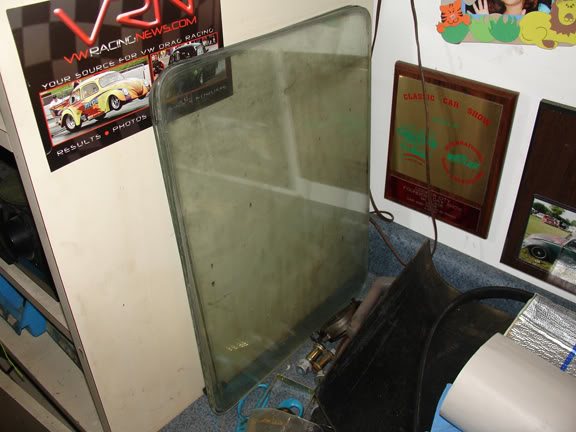
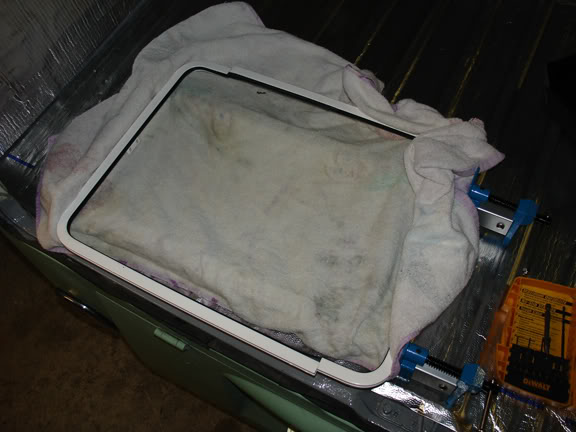
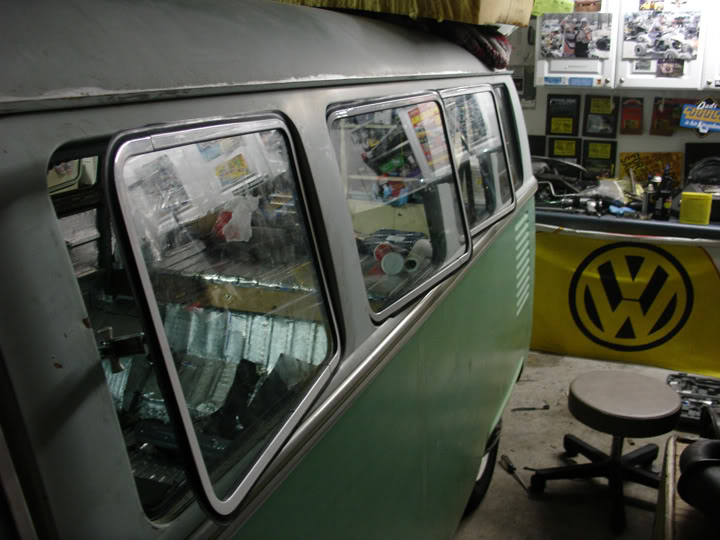
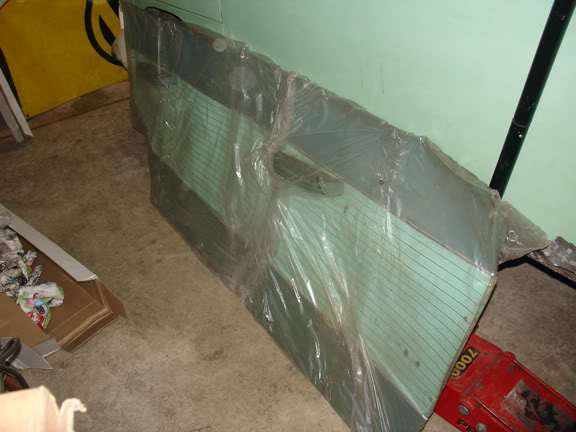
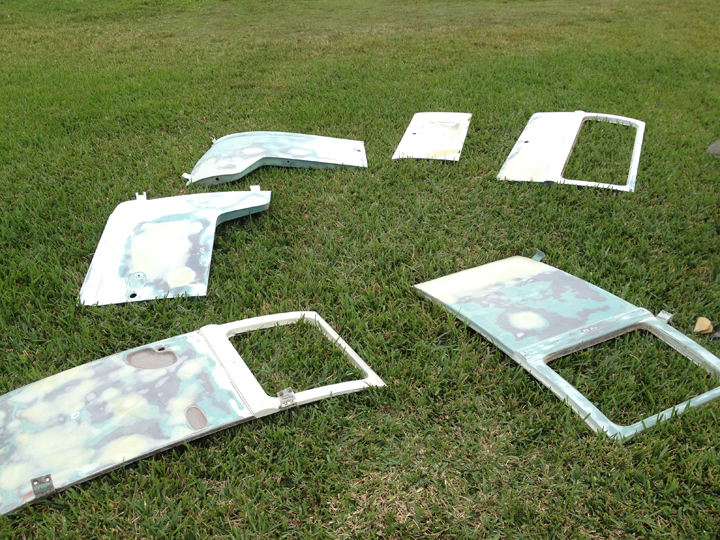
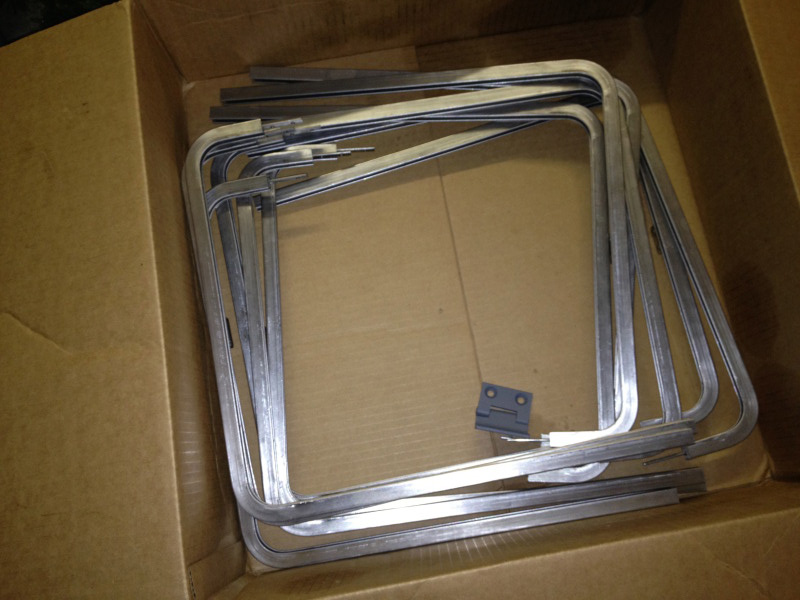
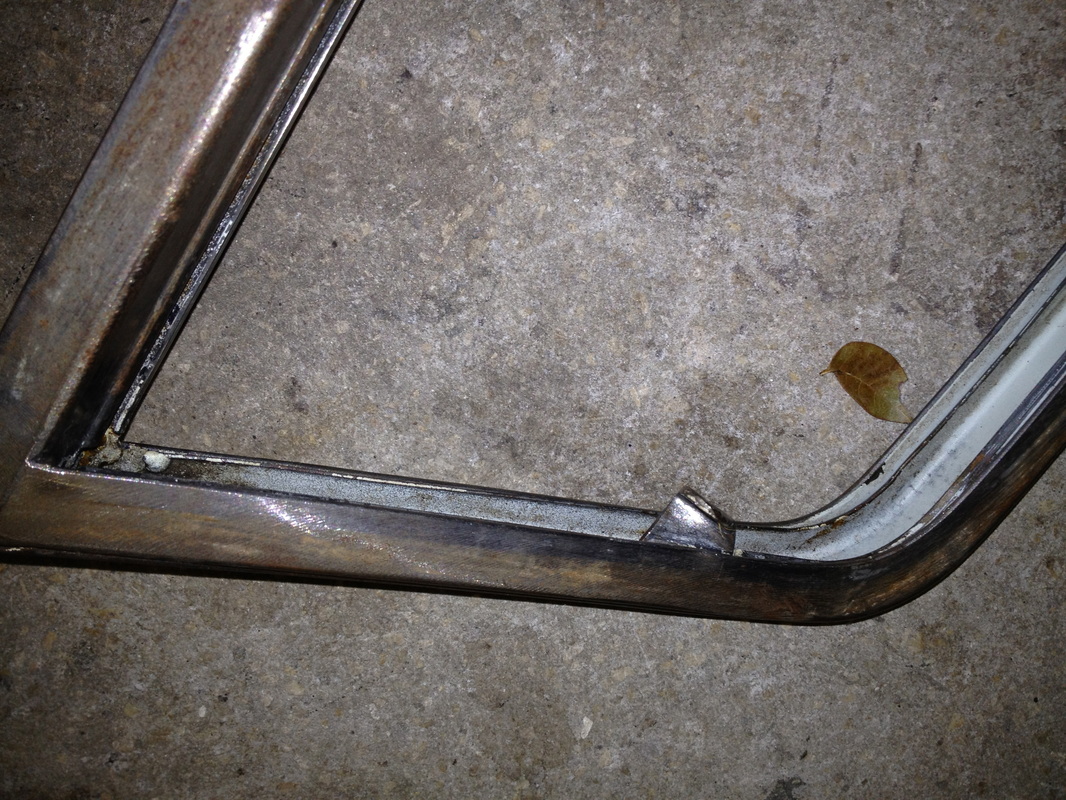
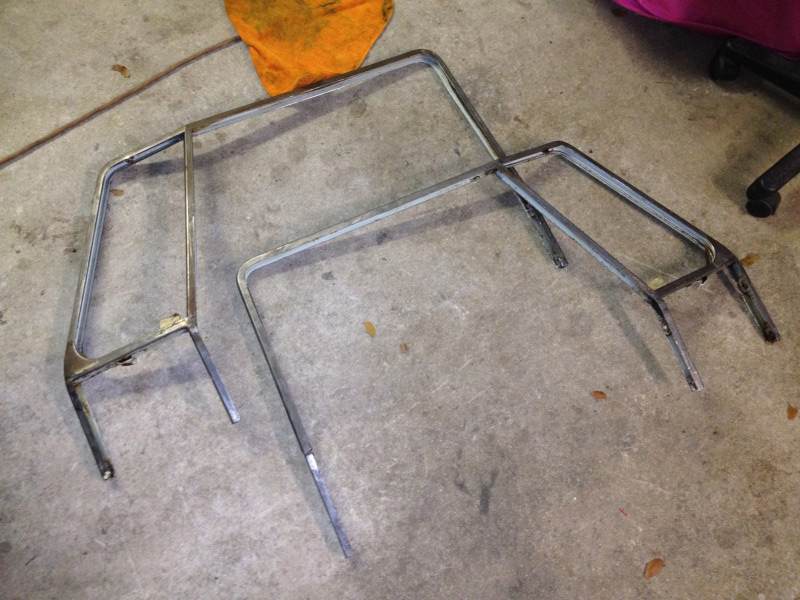
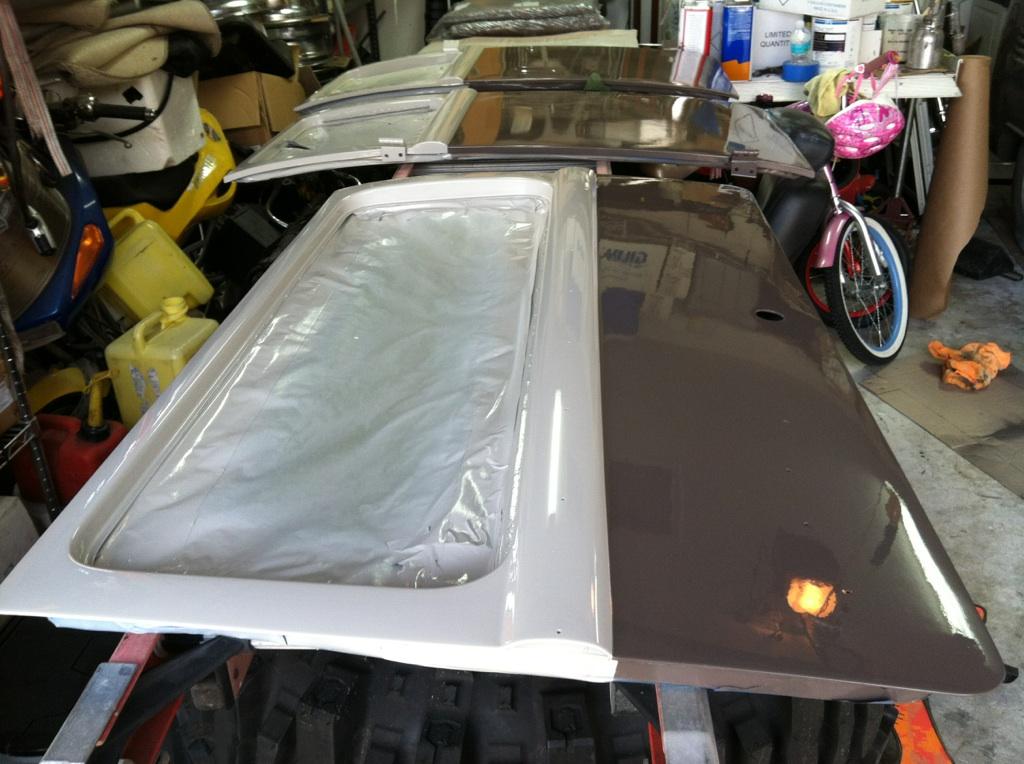
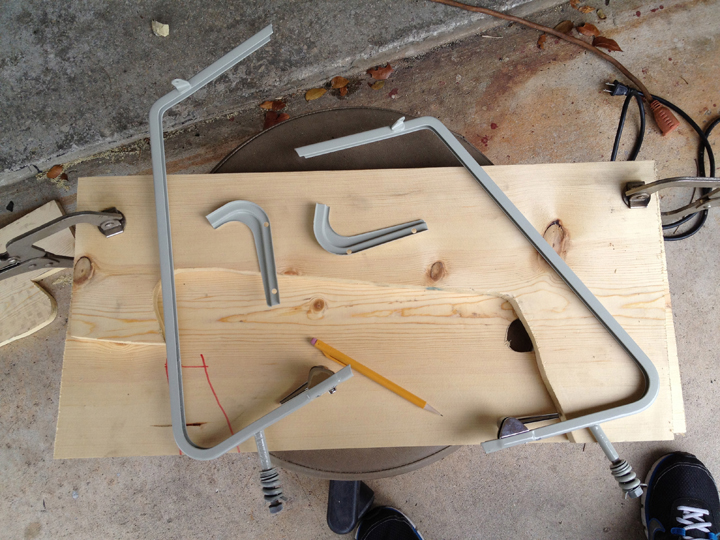
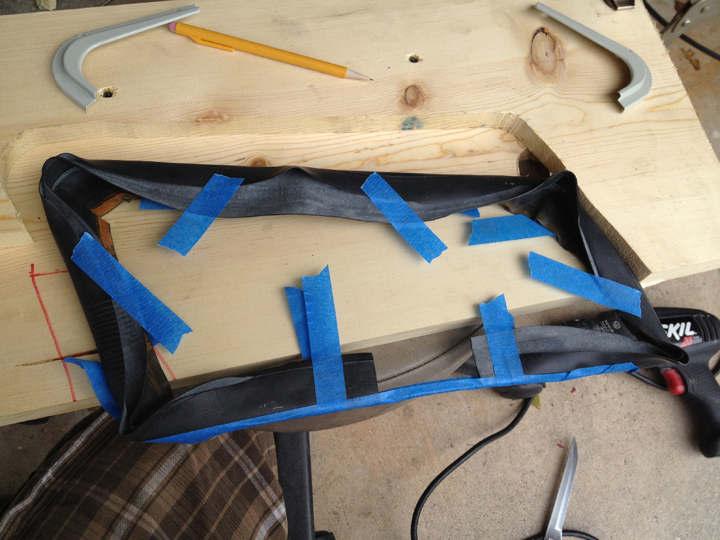
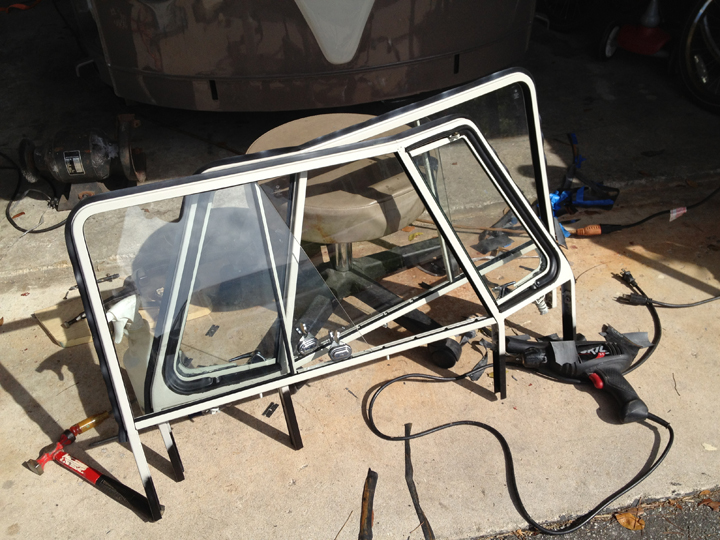
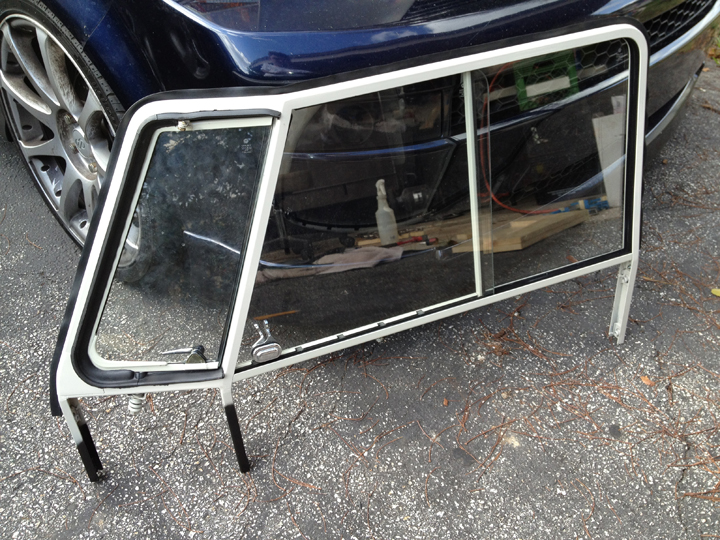
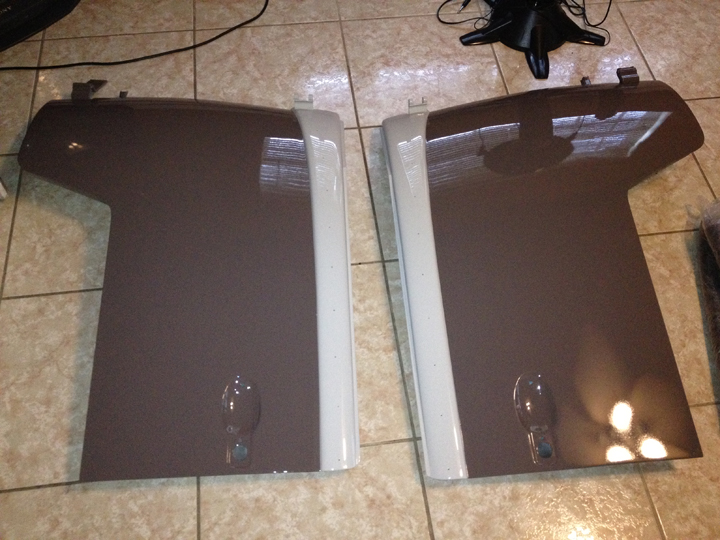
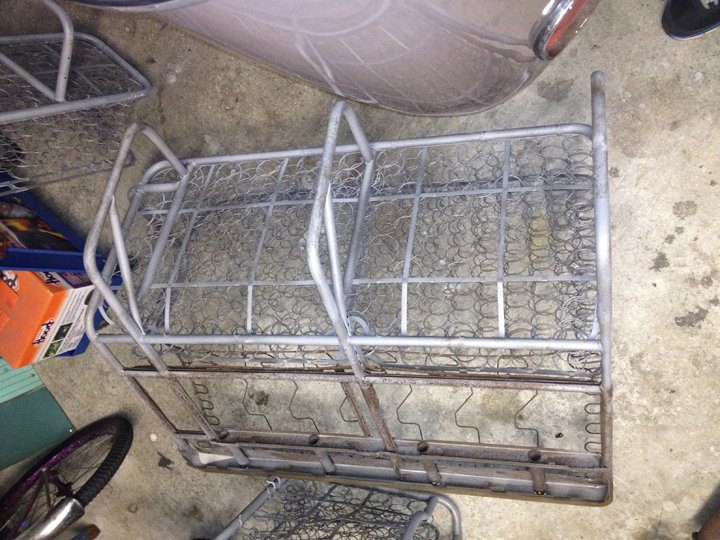
Side Popouts...
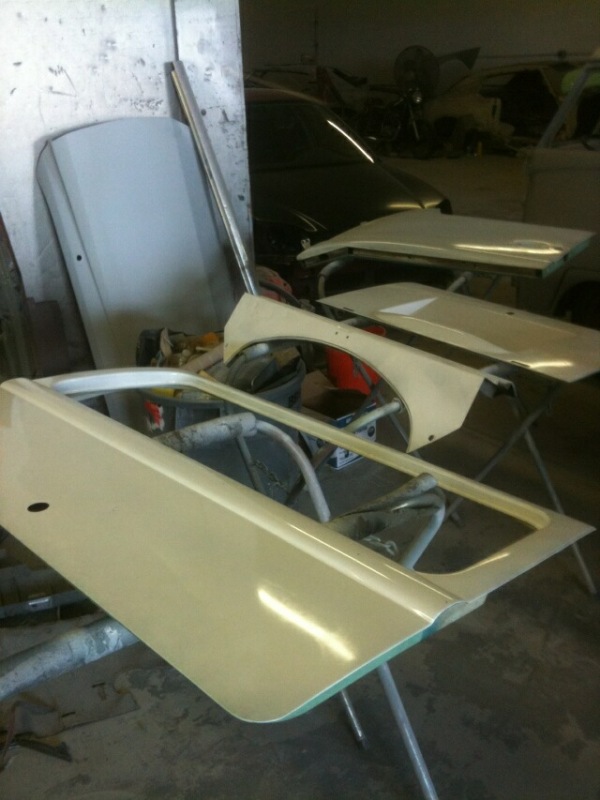
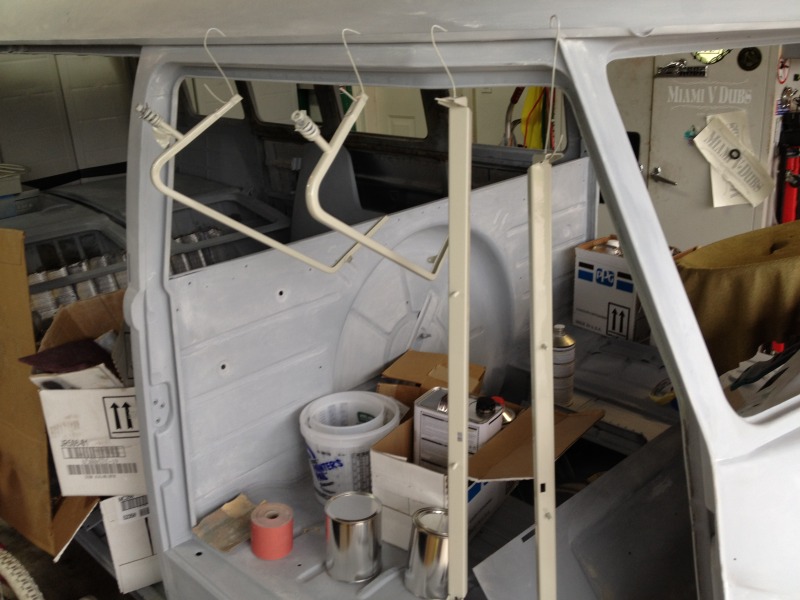
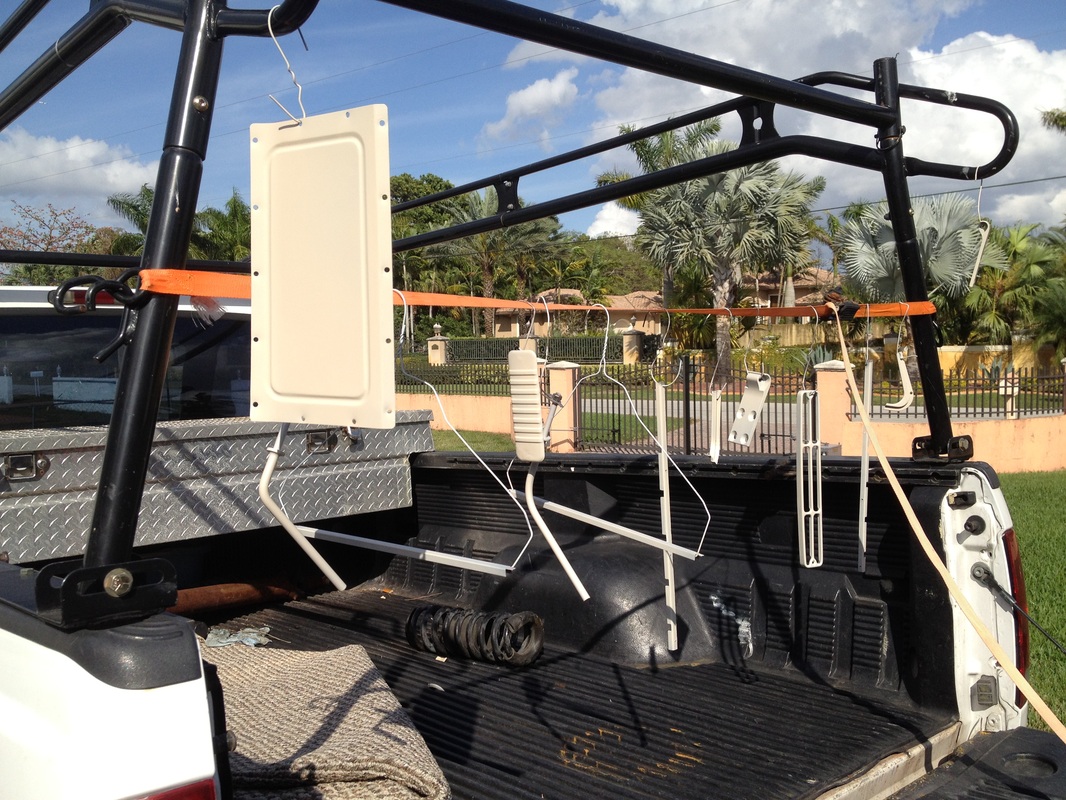
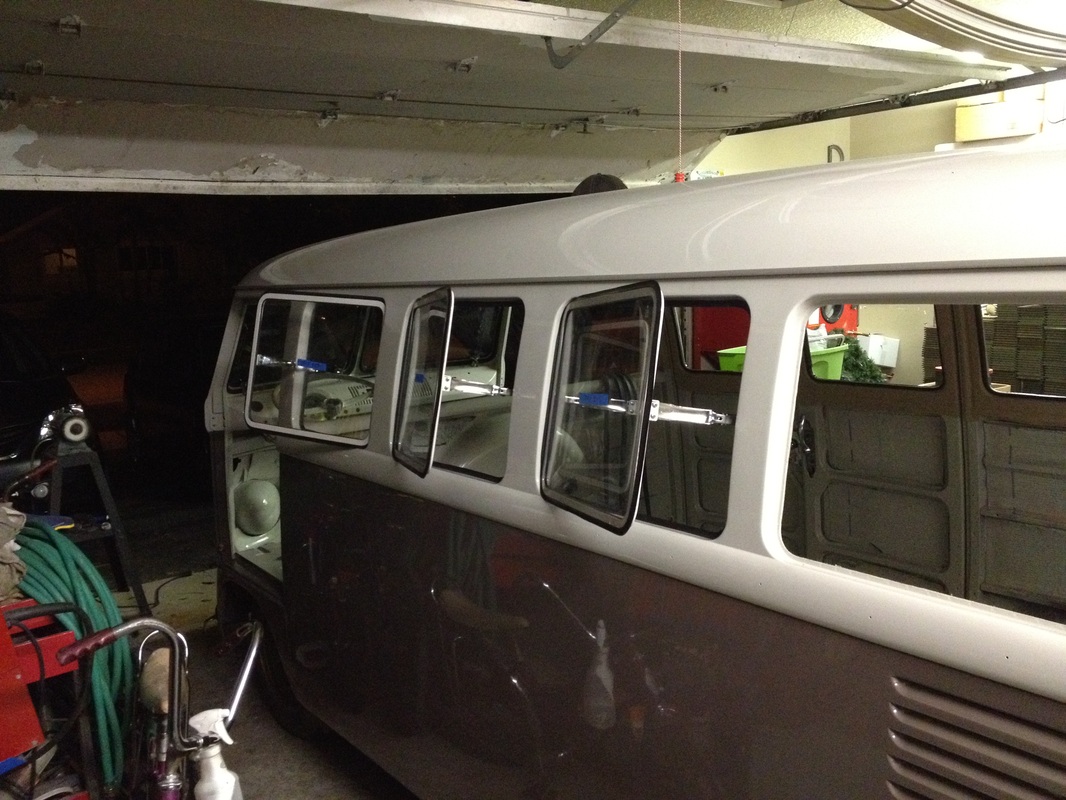
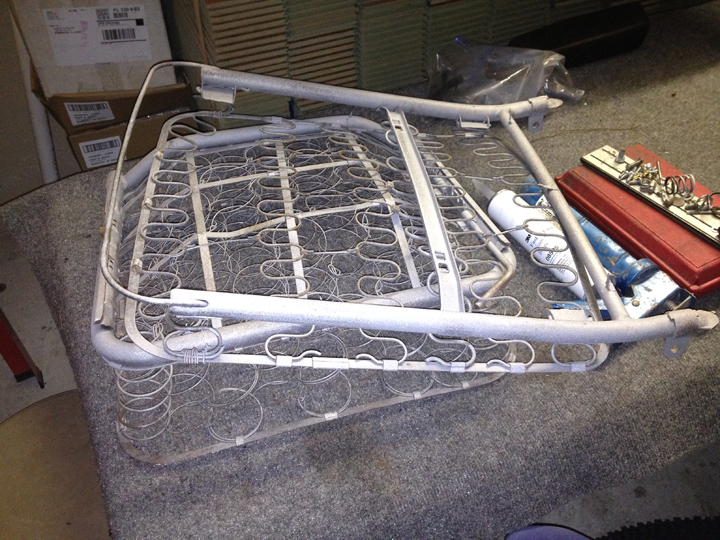
Popout frames were in bad shape so I purchased 6 new raw frames from PIMPRIDE and had them powdercoated white here locally. I scored all the popout seals from my brother and I re-used the existing glass. I purchased some clamps from Harbor Freight to make the installation of glass easier. Drilled out my old frames from the bus as they were crusty! I also had to cut open the frames to remove the glass because the little screws were rusted and stripped...
Popout frames were in bad shape so I purchased 6 new raw frames from PIMPRIDE and had them powdercoated white here locally. I scored all the popout seals from my brother and I re-used the existing glass. I purchased some clamps from Harbor Freight to make the installation of glass easier. Drilled out my old frames from the bus as they were crusty! I also had to cut open the frames to remove the glass because the little screws were rusted and stripped...


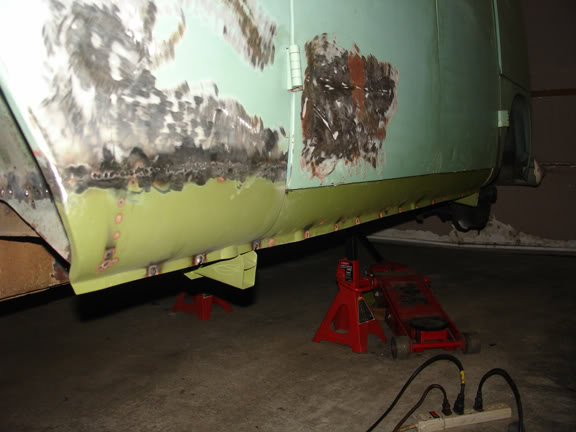
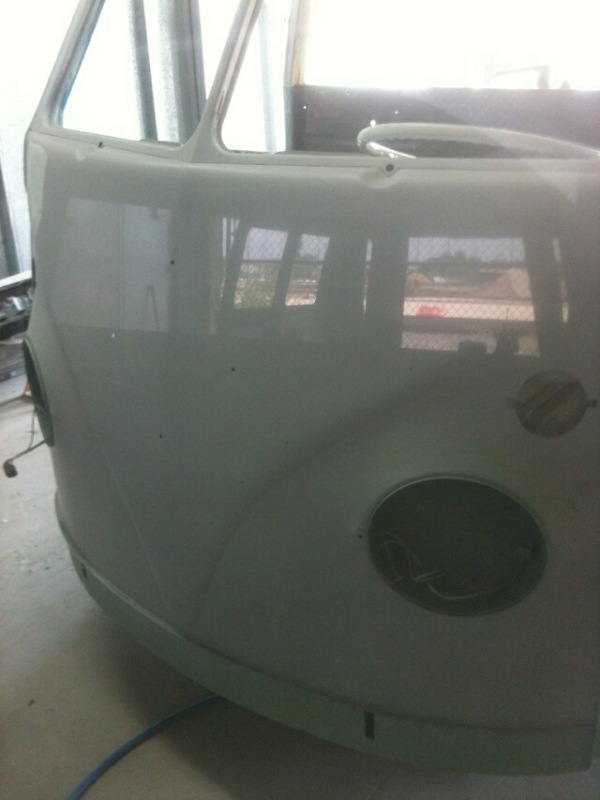
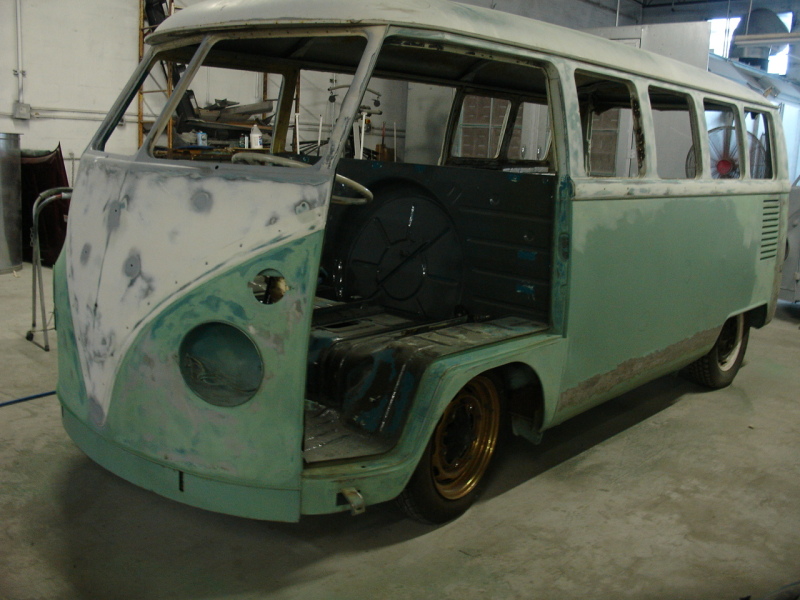
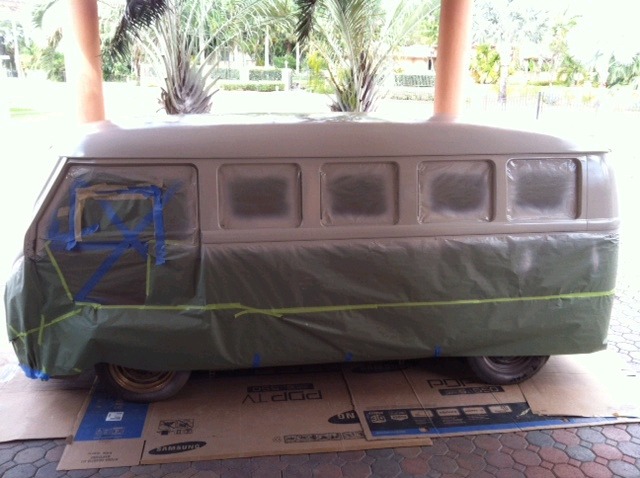
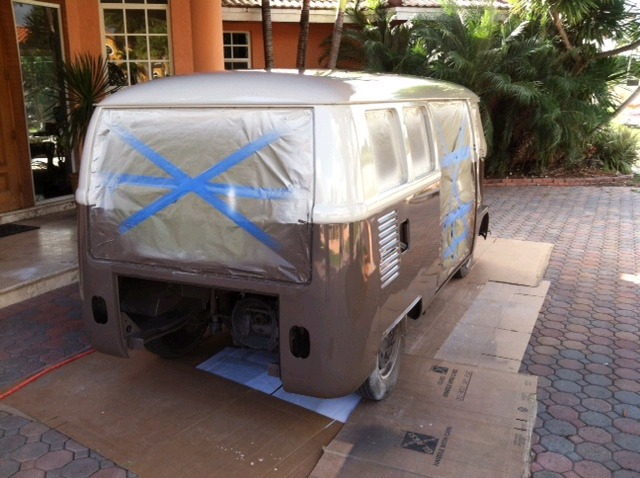
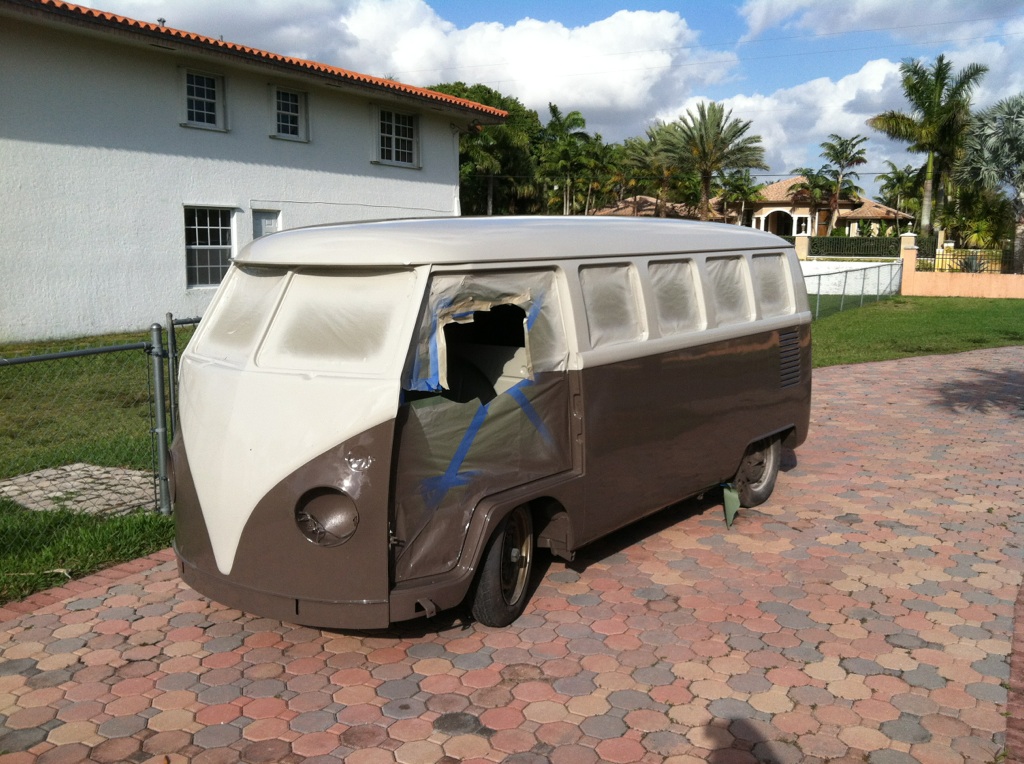
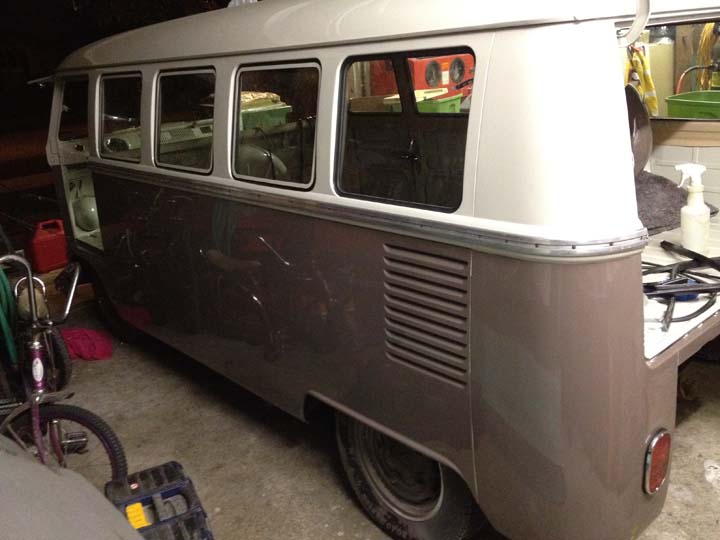
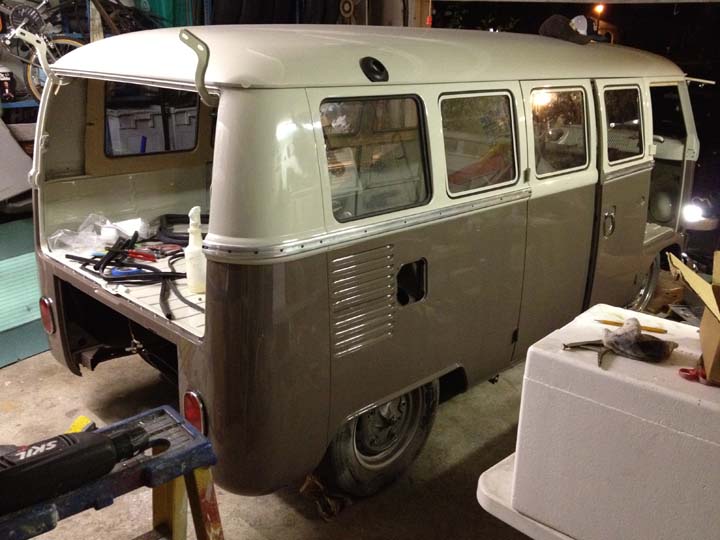
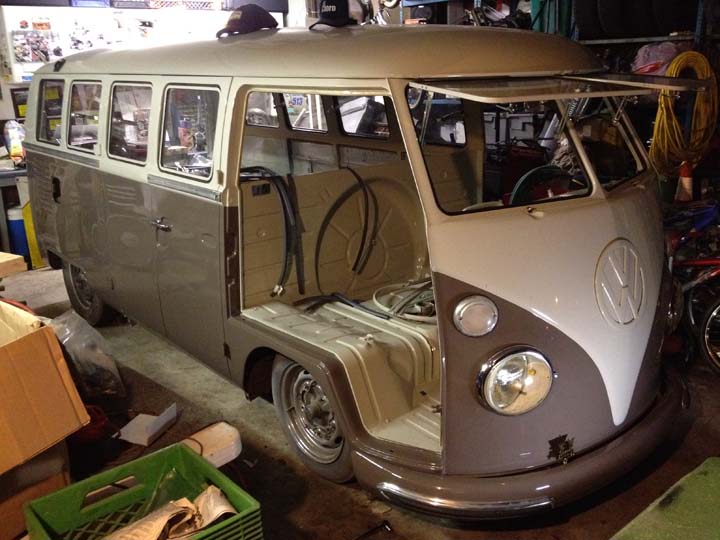
How it sits now!
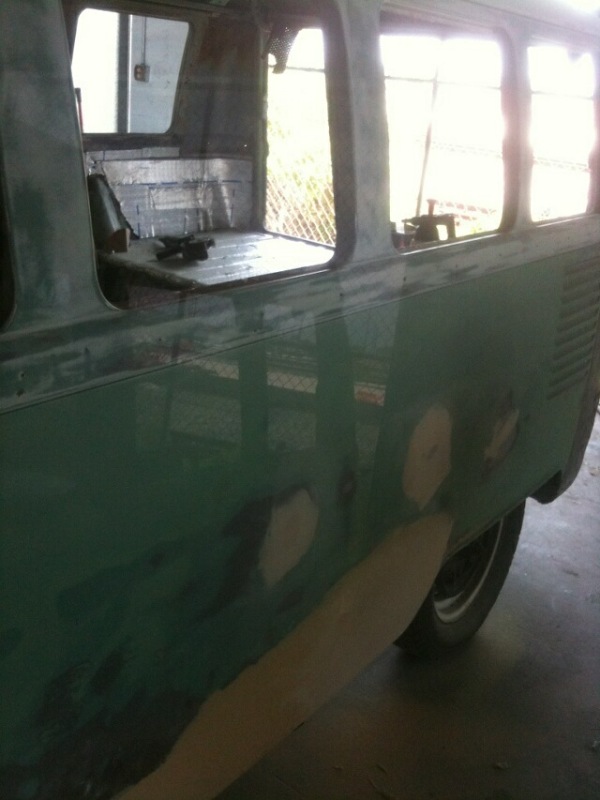
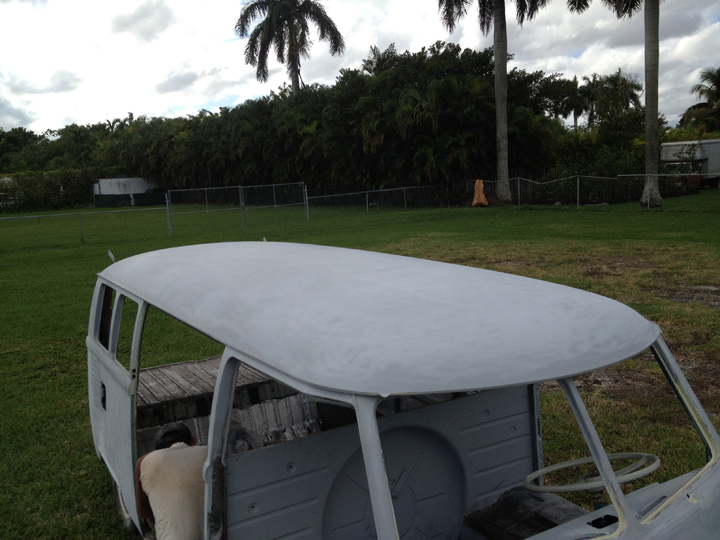
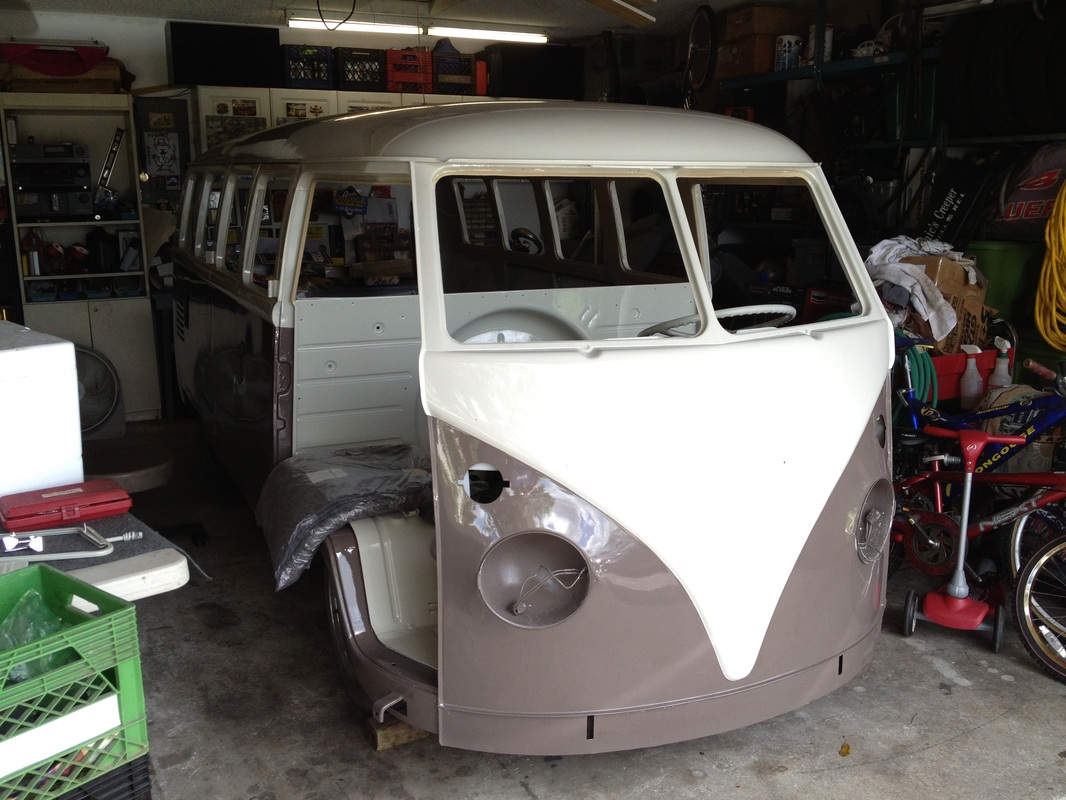
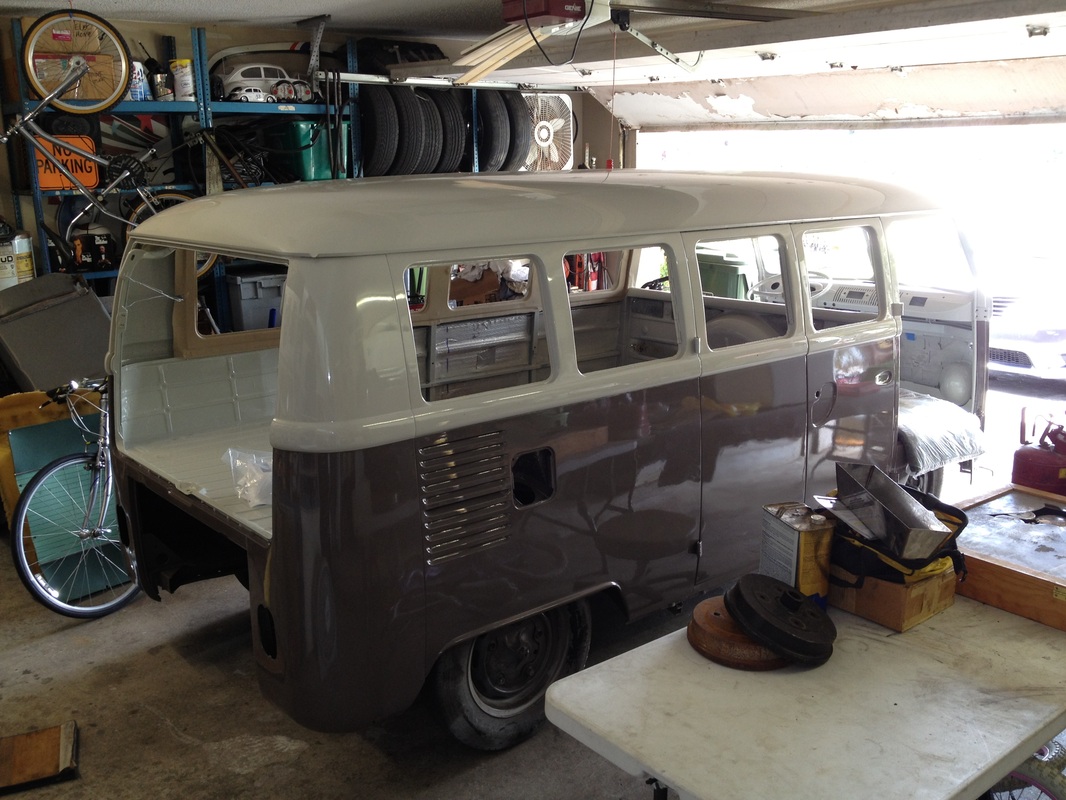
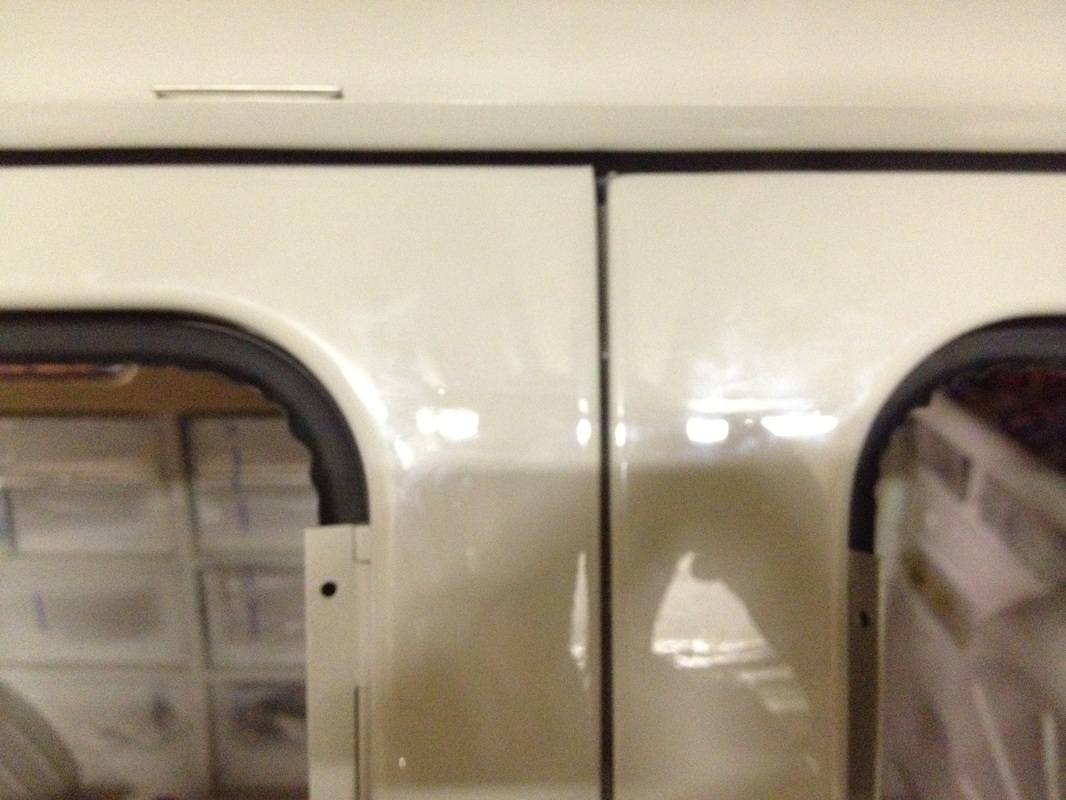
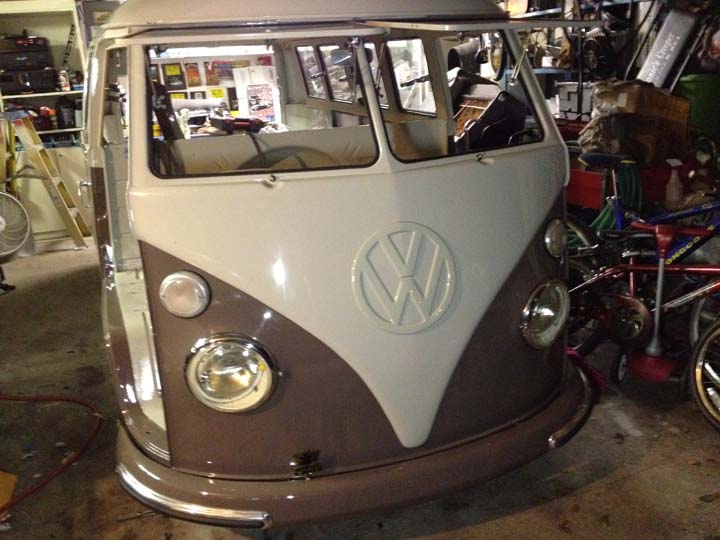
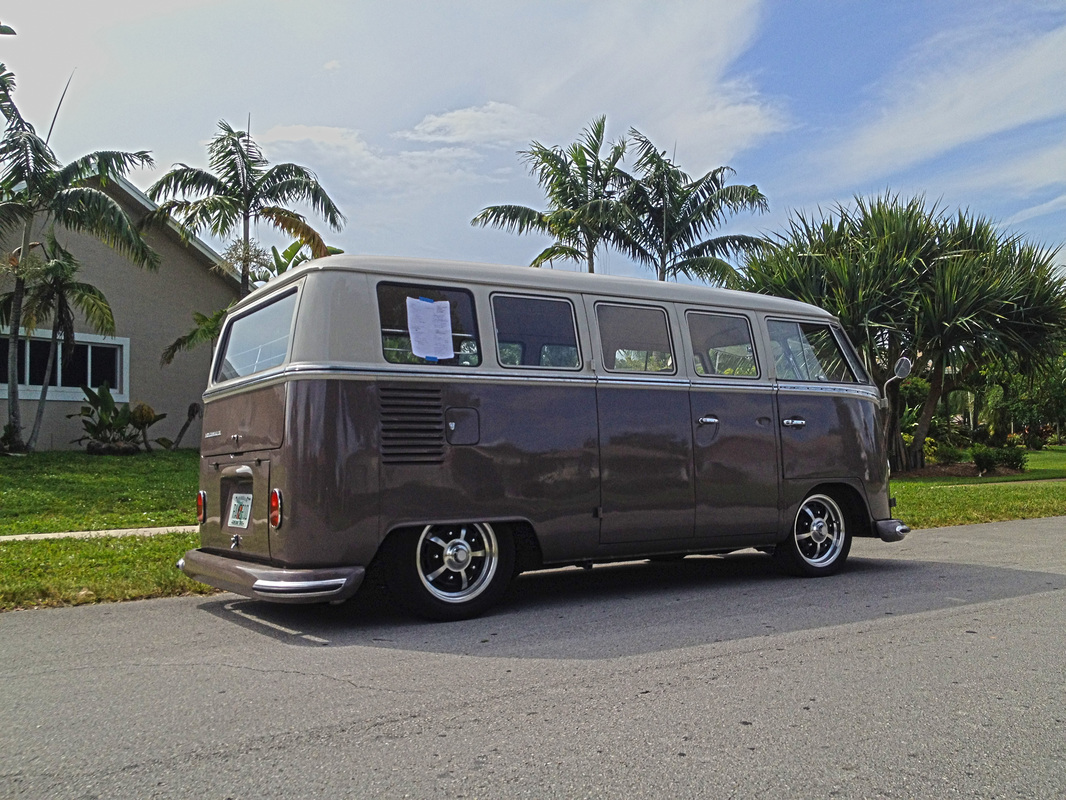
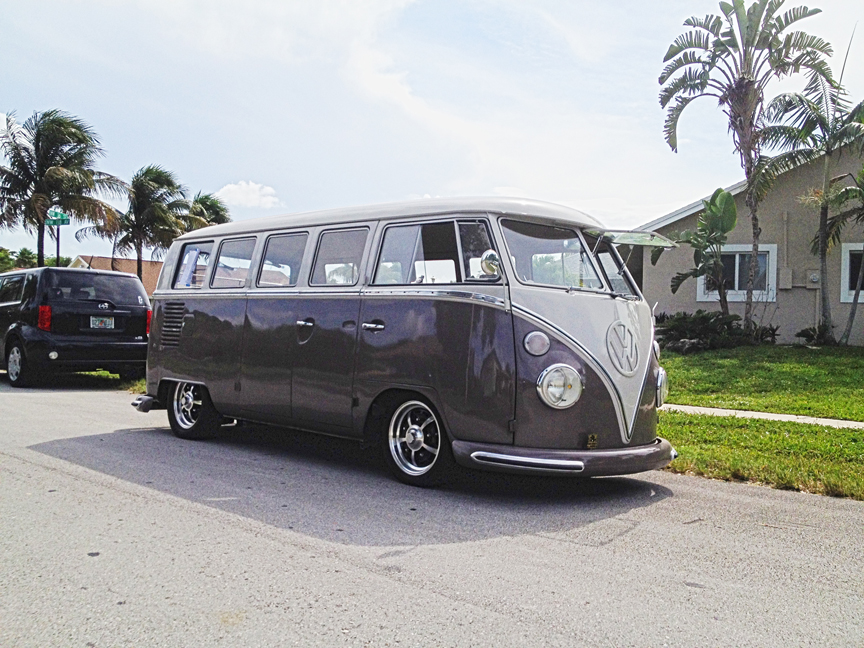
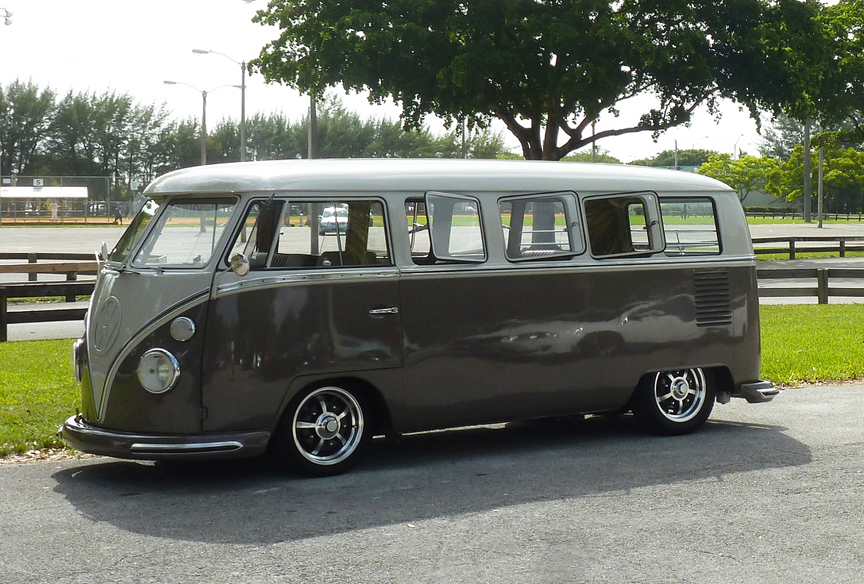
This is how she sits to this point. Great stance and a solid paint color! (Thanks to 4 rattle cans and Home Depot!) Top part is still OG white (BlauWeiss). Bumpers were sprayed as well. My plans were never for a full resto, so the rattle can paint will do just fine. If I ever paint this bus correctly, I'll strip it down to metal anyway.
This is how she sits to this point. Great stance and a solid paint color! (Thanks to 4 rattle cans and Home Depot!) Top part is still OG white (BlauWeiss). Bumpers were sprayed as well. My plans were never for a full resto, so the rattle can paint will do just fine. If I ever paint this bus correctly, I'll strip it down to metal anyway.

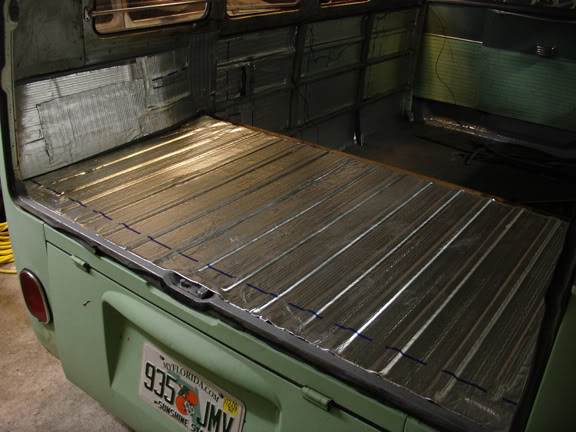
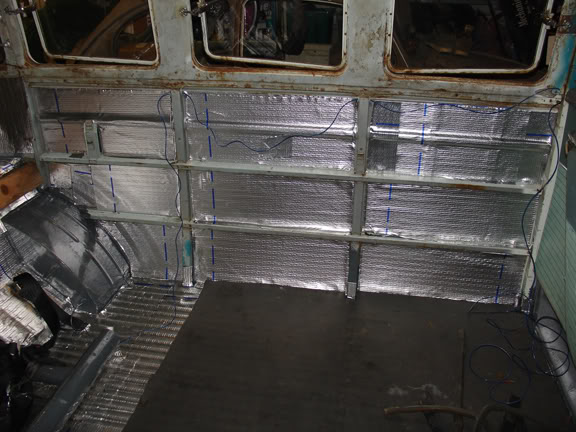
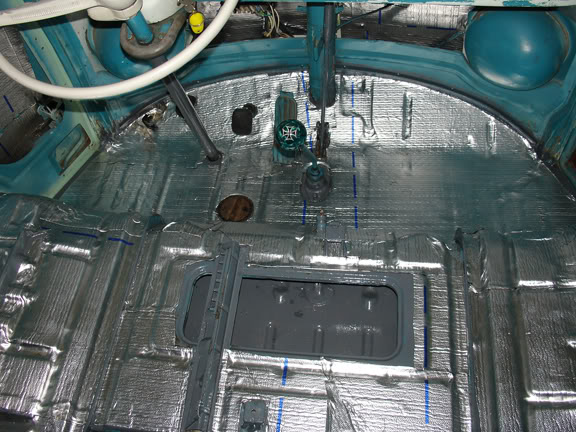
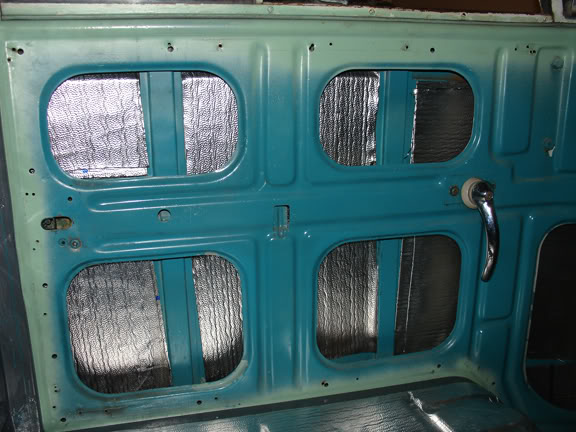
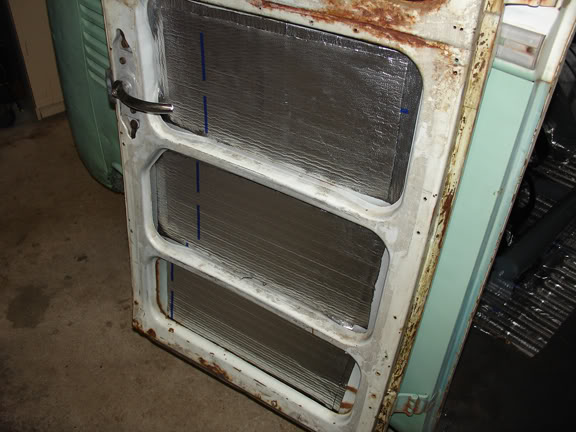
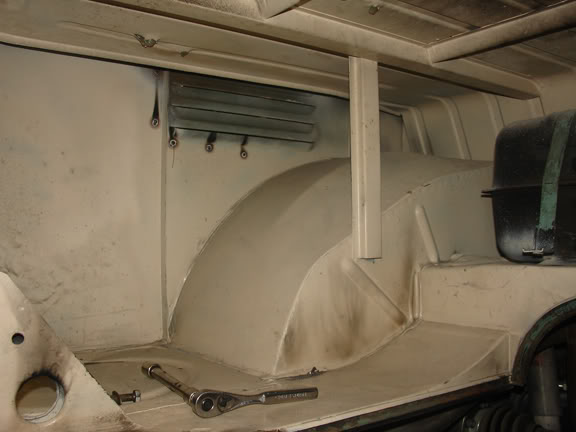
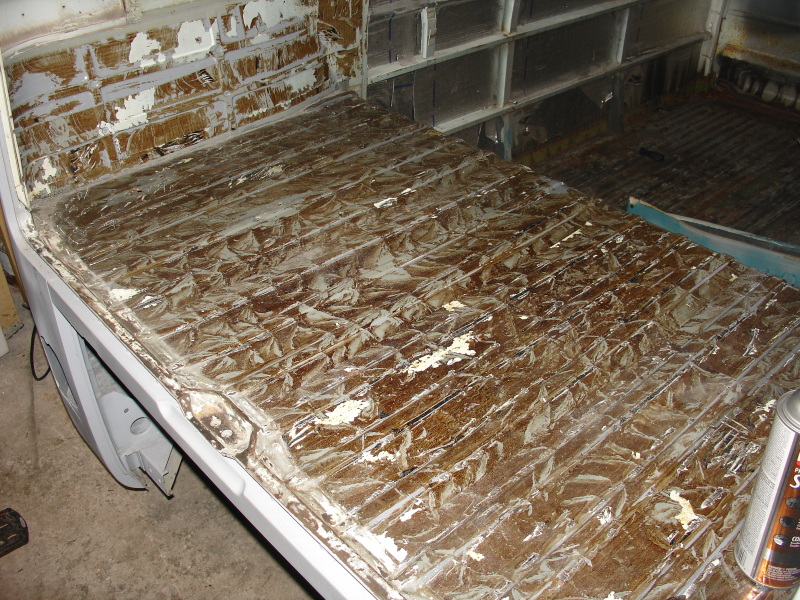
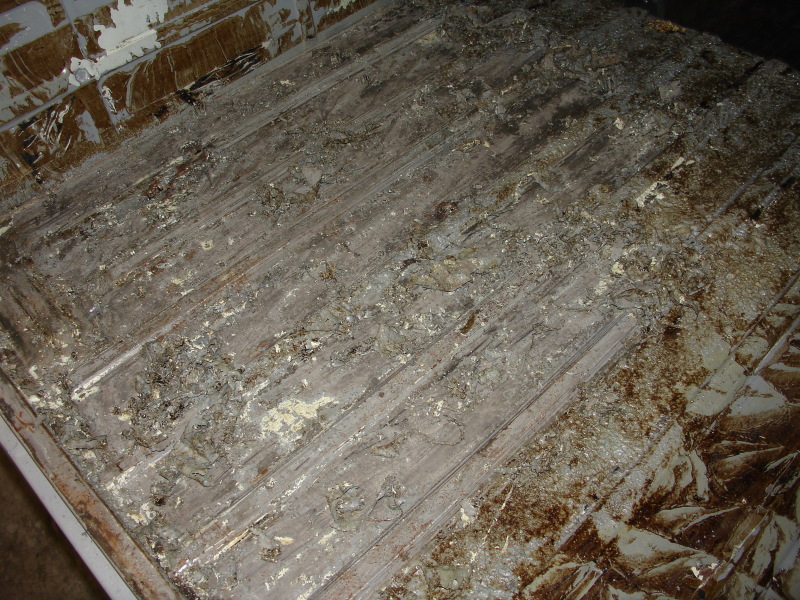
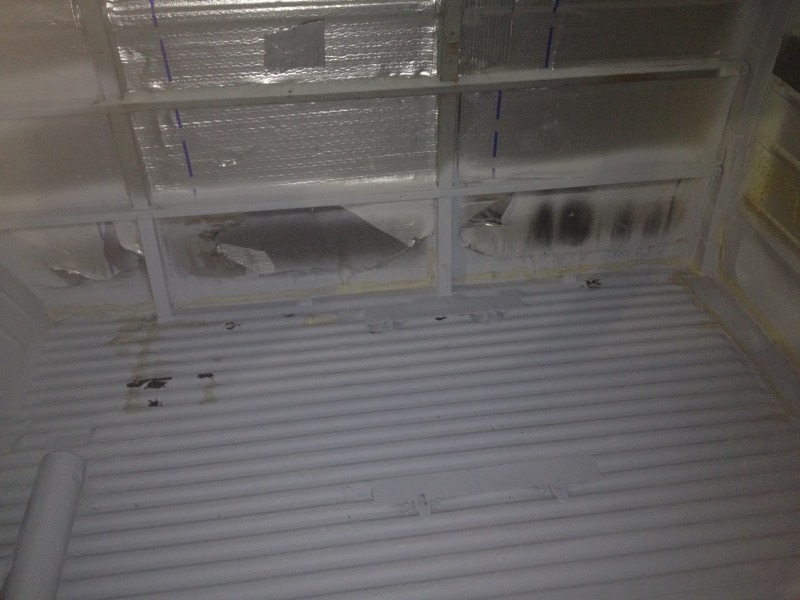
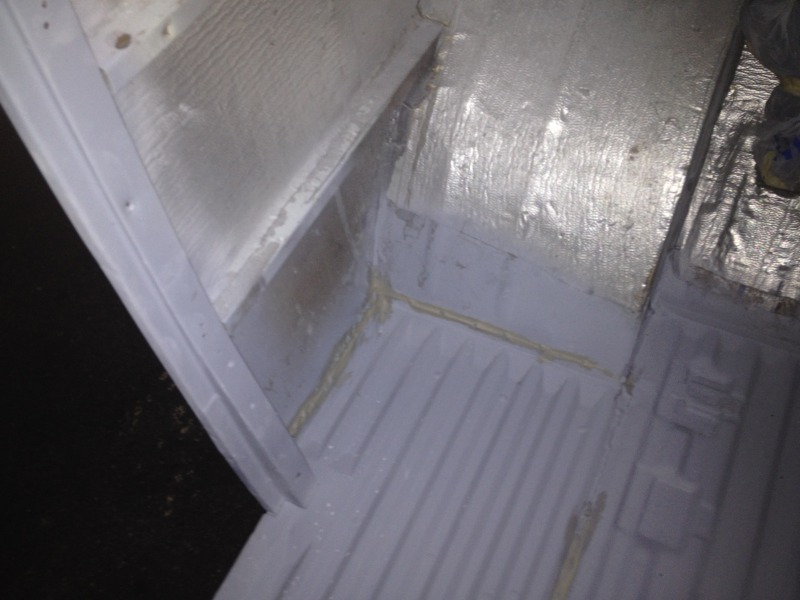
Insulation...
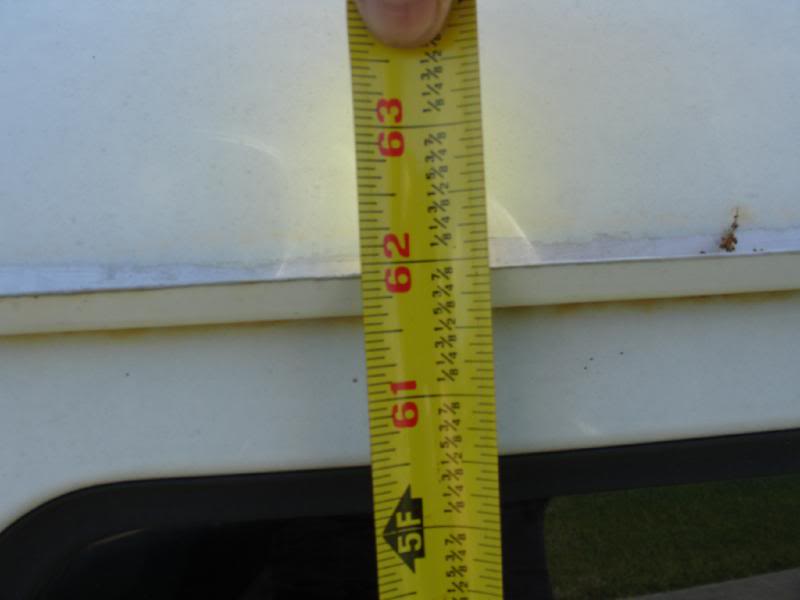
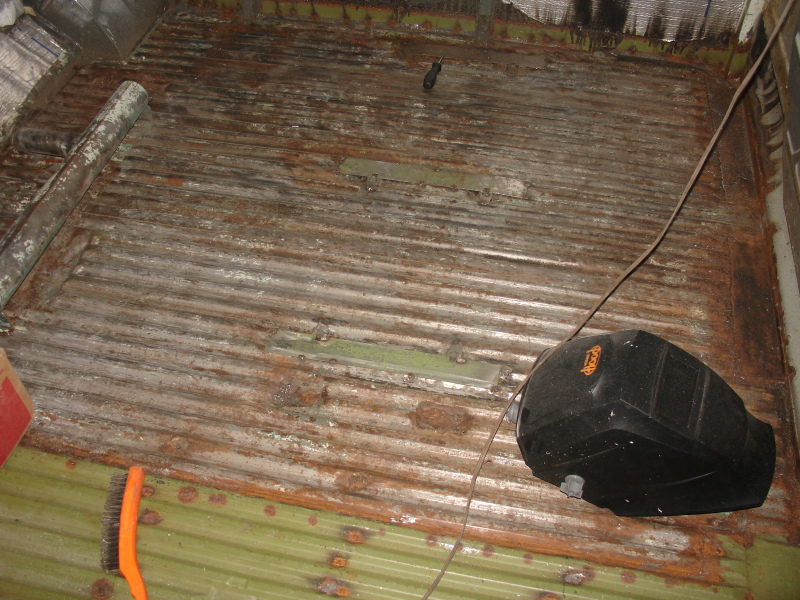
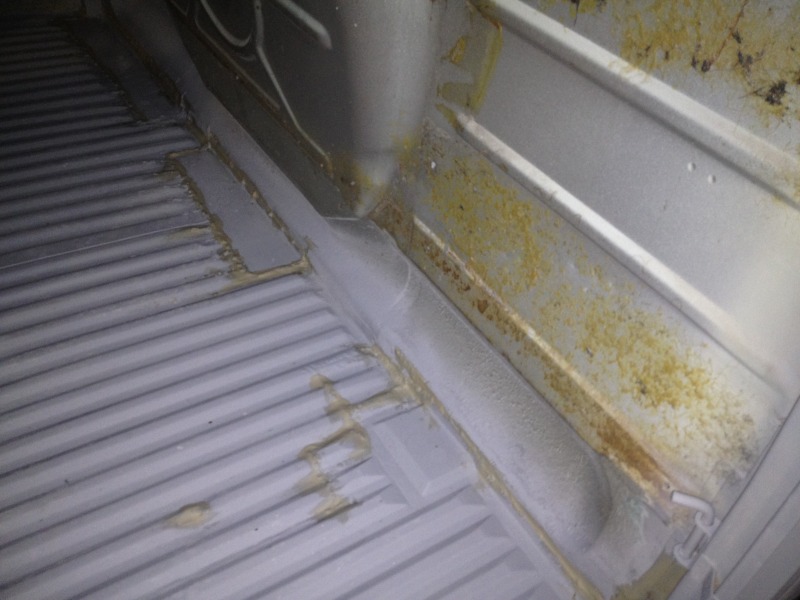
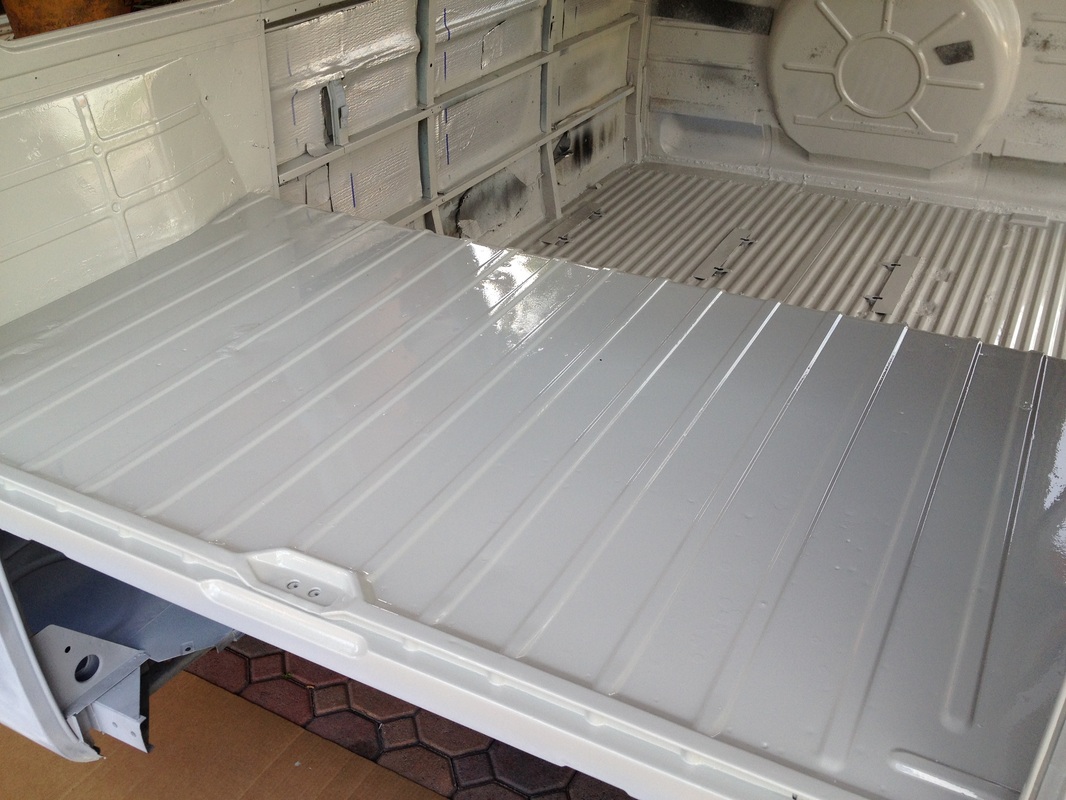
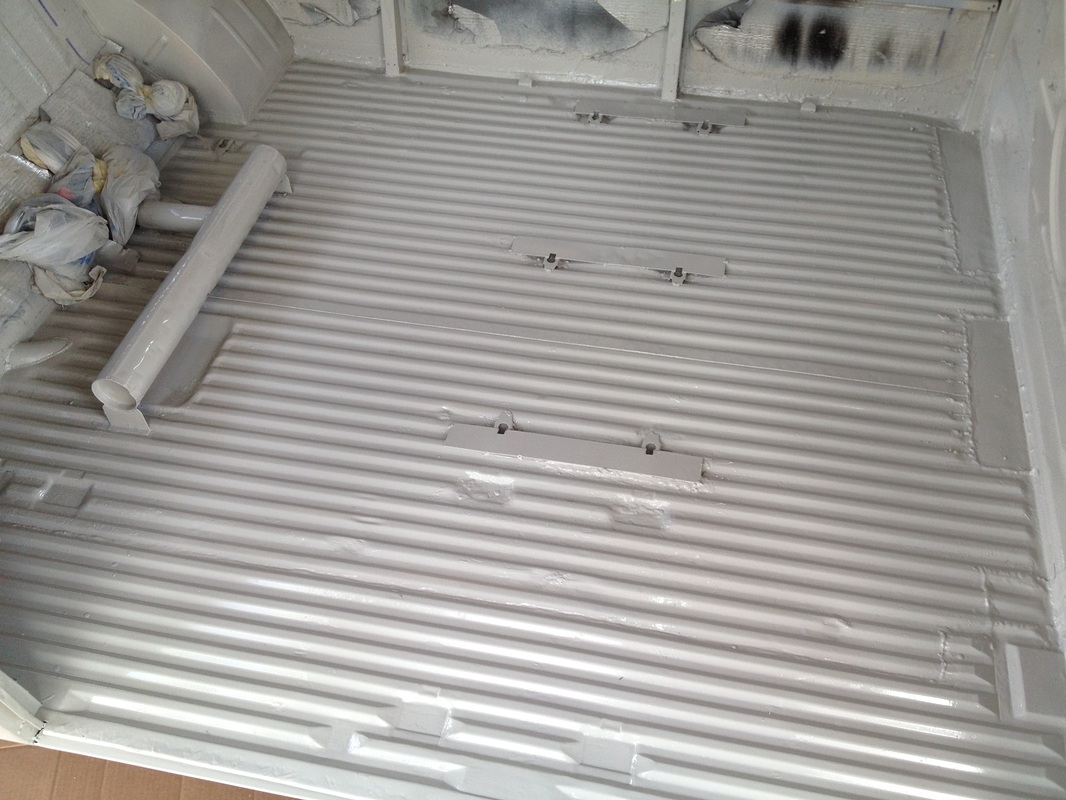
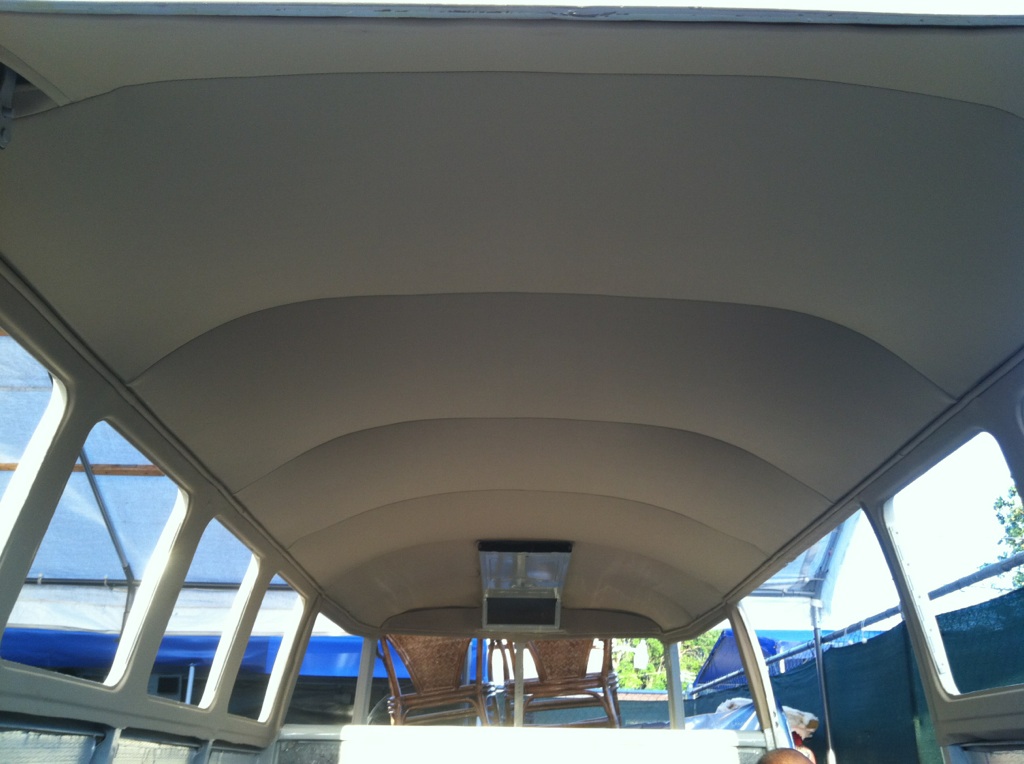
The following day after the POR-15 dried, I sealed up all the possible holes water could find it's way in. Then began the anticipated sound deadening process!! After researching the web for possible sound products. I came across this roofing material called "PEEL N SEAL" from Lowes. I bought 2 rolls. These rolls come 63"x33.5'. I was able to double up on all the panels on the bus except the roof. The original headliner is still in and in good shape so I decided not to do the roof. This "PEEL N SEAL" stuff makes a huge difference and for the price, you can't beat it! I paid a little less than $80 for each roll. There is no vibration and the panels sound SOLID!
The following day after the POR-15 dried, I sealed up all the possible holes water could find it's way in. Then began the anticipated sound deadening process!! After researching the web for possible sound products. I came across this roofing material called "PEEL N SEAL" from Lowes. I bought 2 rolls. These rolls come 63"x33.5'. I was able to double up on all the panels on the bus except the roof. The original headliner is still in and in good shape so I decided not to do the roof. This "PEEL N SEAL" stuff makes a huge difference and for the price, you can't beat it! I paid a little less than $80 for each roll. There is no vibration and the panels sound SOLID!


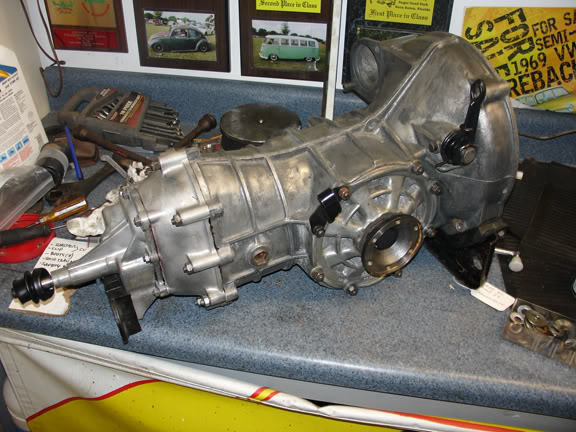
Rebuilt Transmission Install...
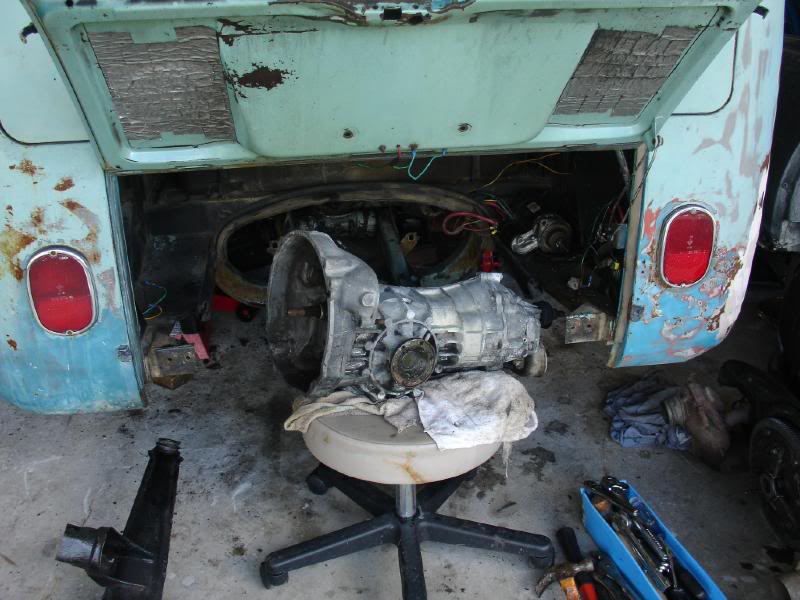
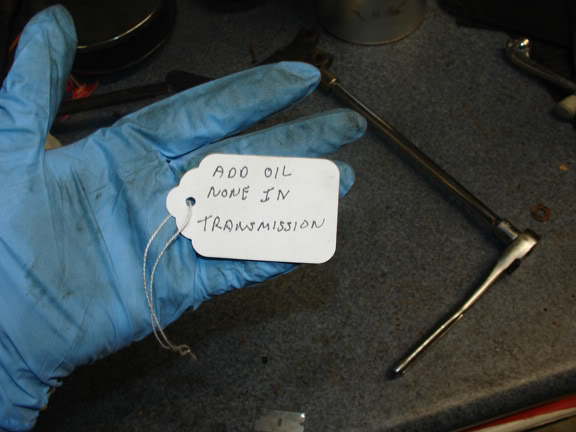
After running the "good-used" IRS tranny for some time, it started to make grinding noises and a loud humming sound on top end. Eventually I lost 4th gear! Was time to get a rebuilt one! Had a gentleman in Northern Florida rebuild my core. Got my transmission back looking all pretty and I put some 80/90 gear oil as instructed. Bolted up the tranny/engine mount cradle to tranny and installed in bus. This tranny was originally a 3.88 but now runs a 4.12 R&P.
After running the "good-used" IRS tranny for some time, it started to make grinding noises and a loud humming sound on top end. Eventually I lost 4th gear! Was time to get a rebuilt one! Had a gentleman in Northern Florida rebuild my core. Got my transmission back looking all pretty and I put some 80/90 gear oil as instructed. Bolted up the tranny/engine mount cradle to tranny and installed in bus. This tranny was originally a 3.88 but now runs a 4.12 R&P.

Engine Make-Over...
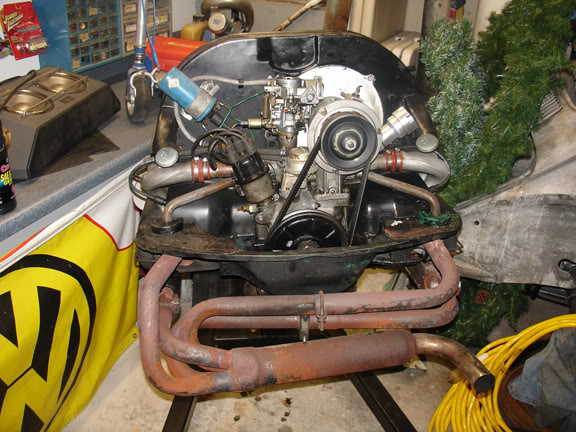
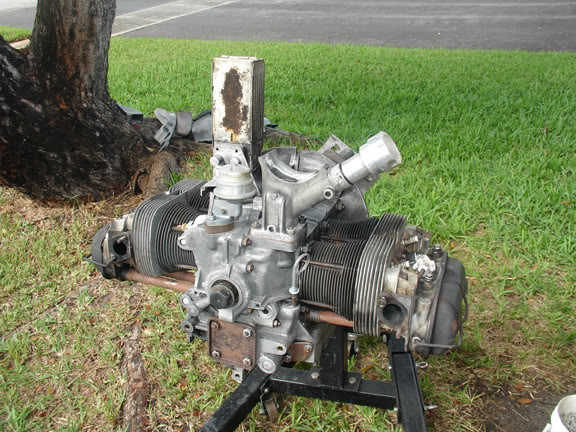
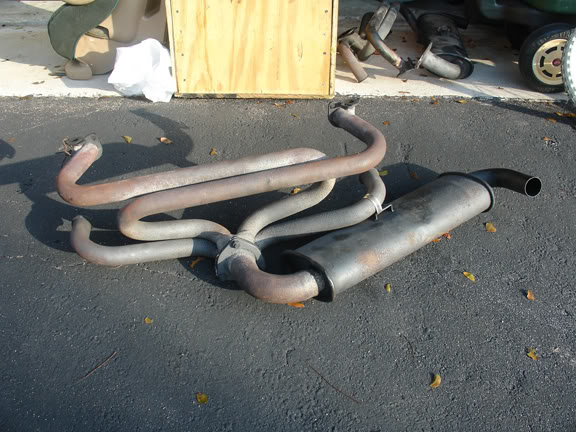
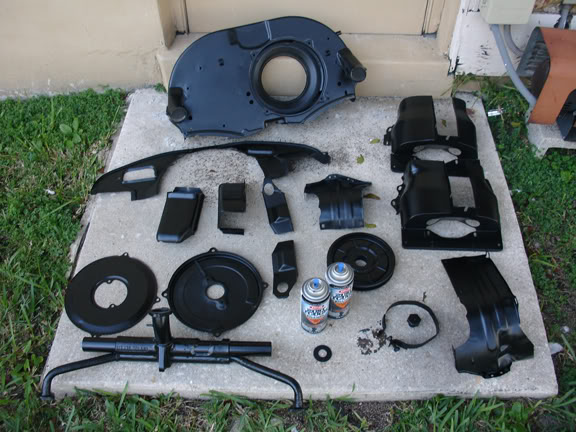
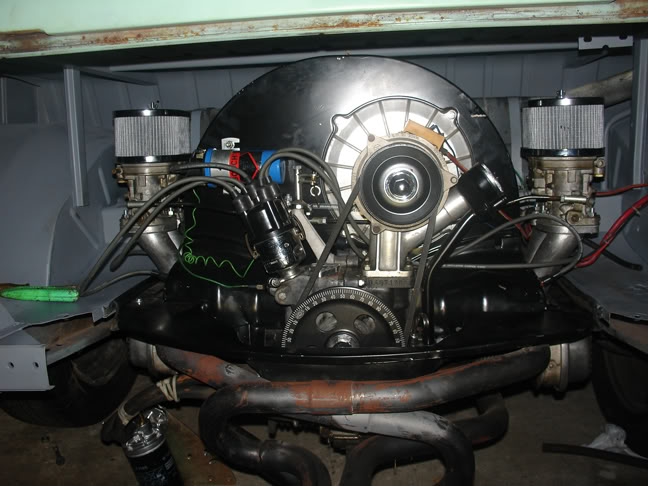
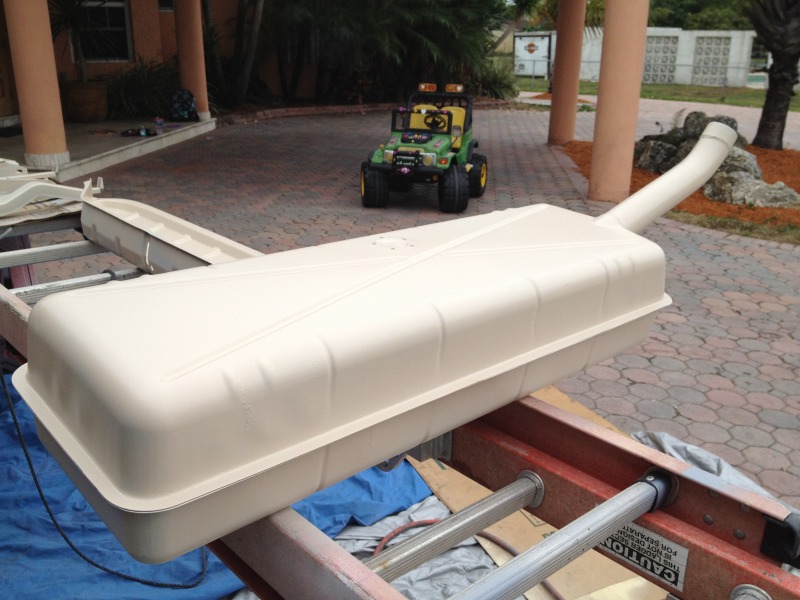
Since I had the engine out to install the rebuilt transmission, I decided to give the 1600cc a make-over! Degreased, scraped and blasted all the engine tins. Sprayed them with black Krylon Semi-Flat. Wish I would have taken a before pic to compare all the crud the tins had! Running a Thunderbird exhaust, unfortunately I had to trim my rear bumper to clear. I can alway weld a patch to fix bumper in the future if need be.
Since I had the engine out to install the rebuilt transmission, I decided to give the 1600cc a make-over! Degreased, scraped and blasted all the engine tins. Sprayed them with black Krylon Semi-Flat. Wish I would have taken a before pic to compare all the crud the tins had! Running a Thunderbird exhaust, unfortunately I had to trim my rear bumper to clear. I can alway weld a patch to fix bumper in the future if need be.


OG Interior Panels...
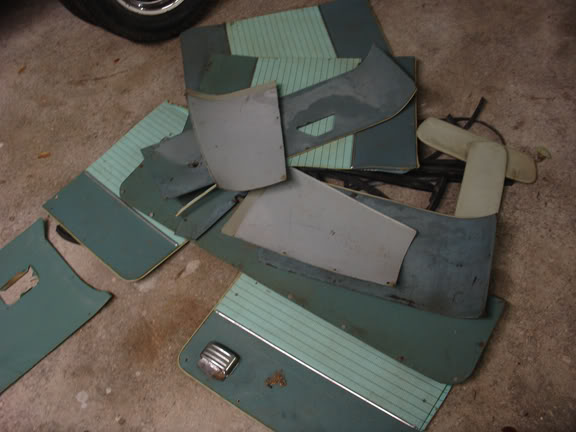
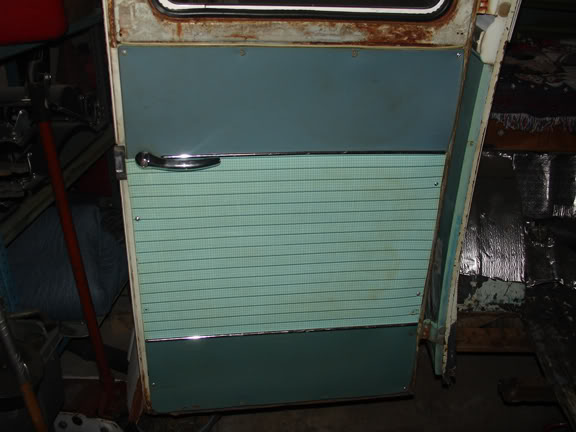
In February at WinterJam in Daytona I scored a complete set (minus frt door panels) of Como Green interior panels for my bus! Set came from a walk-thru but it worked out for me since I already had the bulkhead panels! It came with trim, armrests and overall in very good condition. I cleaned them with Simple Green (how ironic) and treated with a leather conditioner. The trims were removed and re-polished before re-installing on panels.
In February at WinterJam in Daytona I scored a complete set (minus frt door panels) of Como Green interior panels for my bus! Set came from a walk-thru but it worked out for me since I already had the bulkhead panels! It came with trim, armrests and overall in very good condition. I cleaned them with Simple Green (how ironic) and treated with a leather conditioner. The trims were removed and re-polished before re-installing on panels.
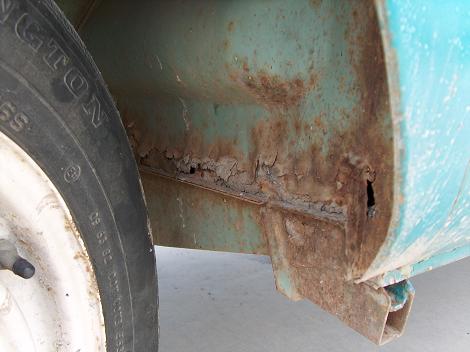
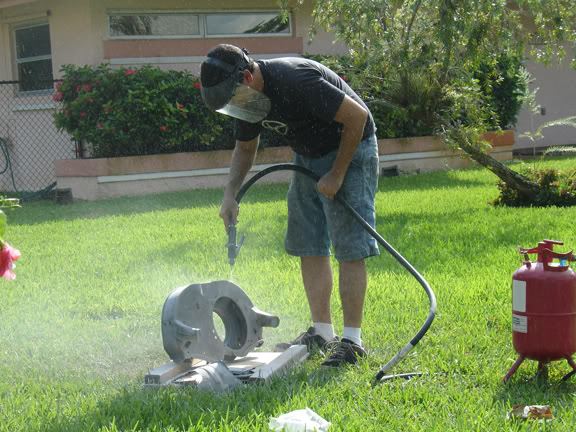
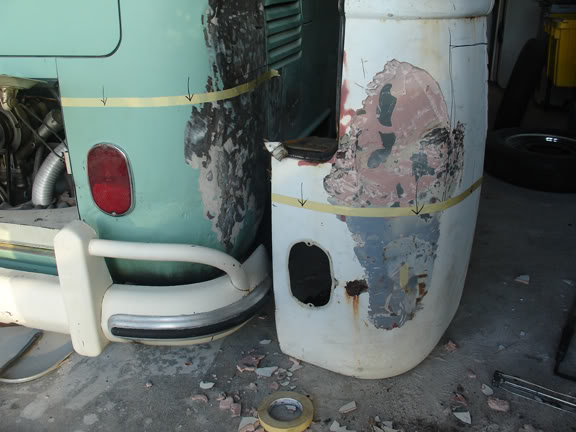
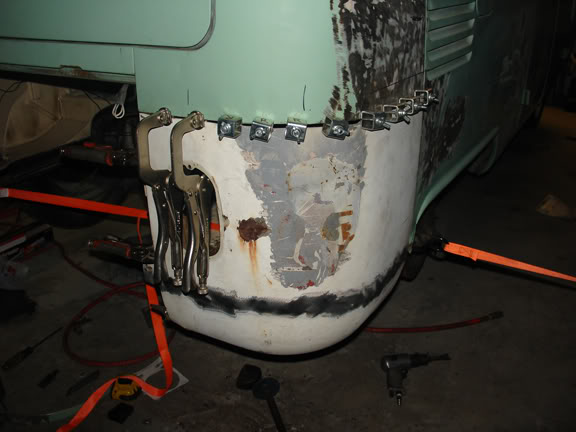
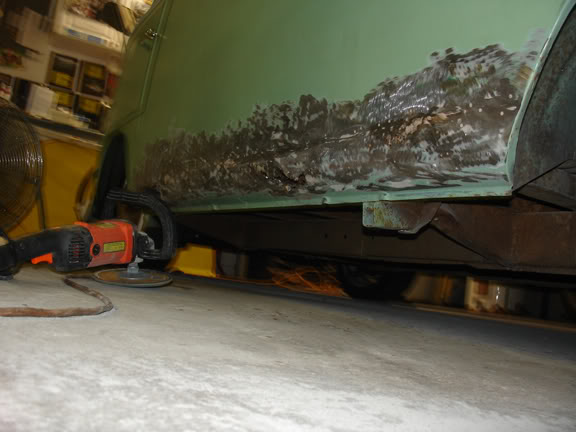
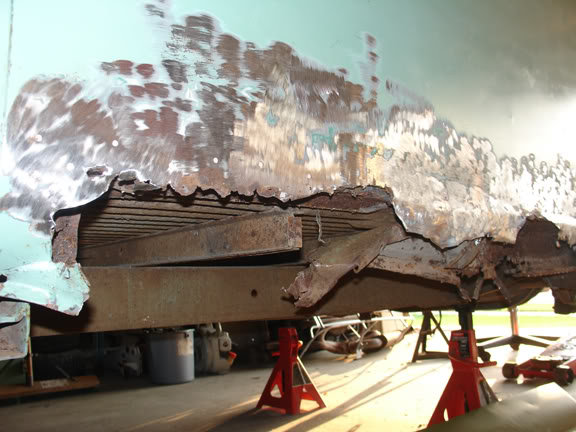
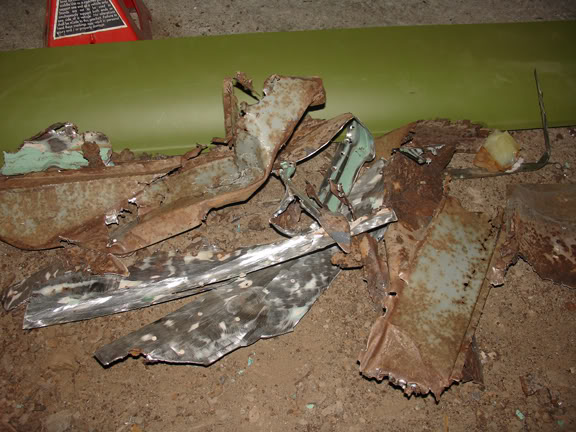
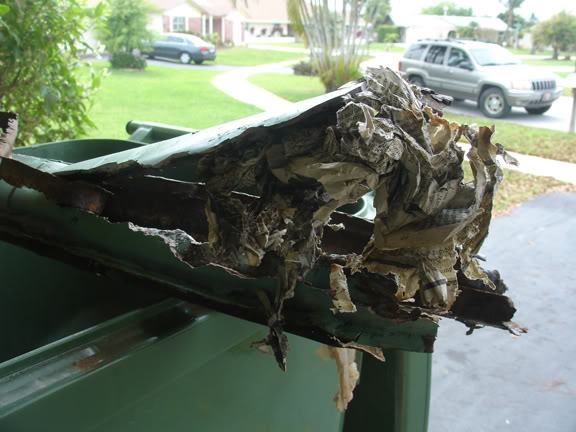
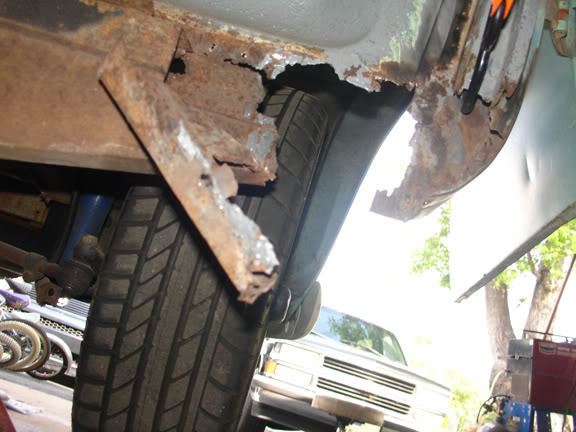
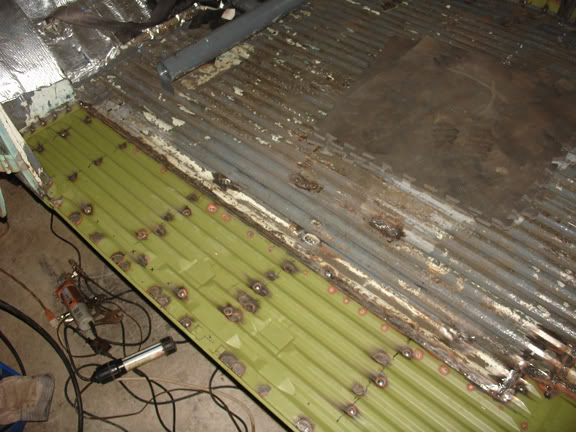
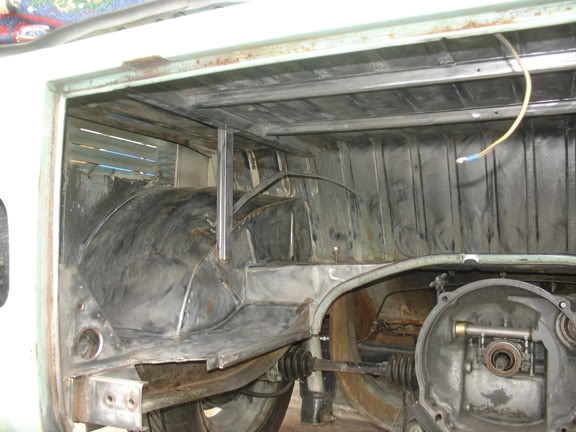
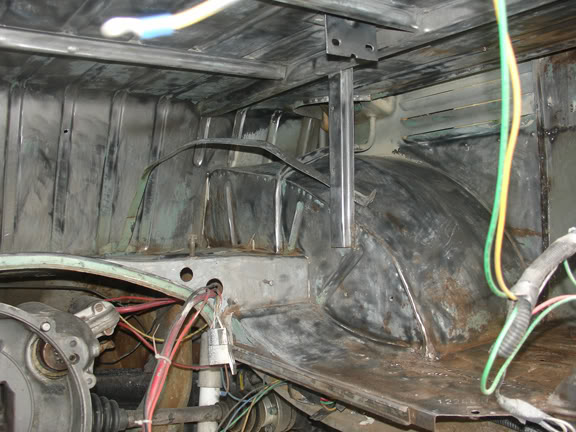
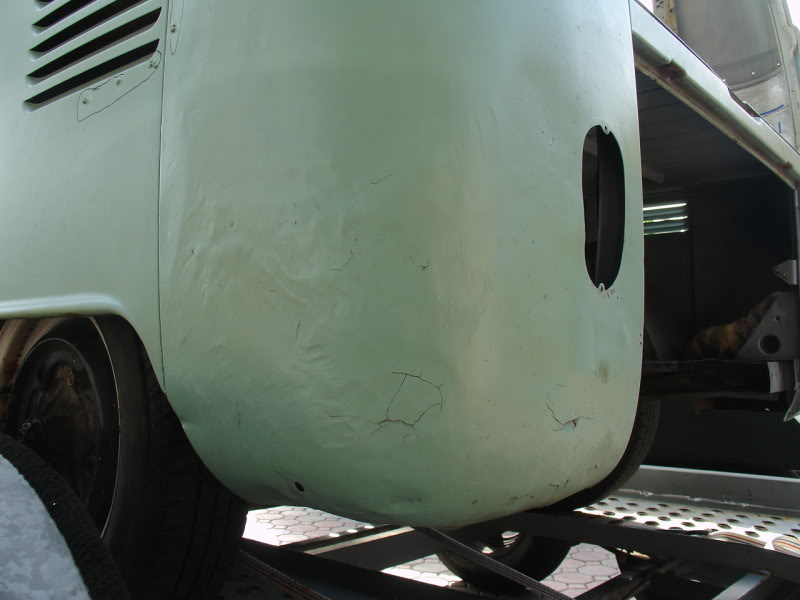
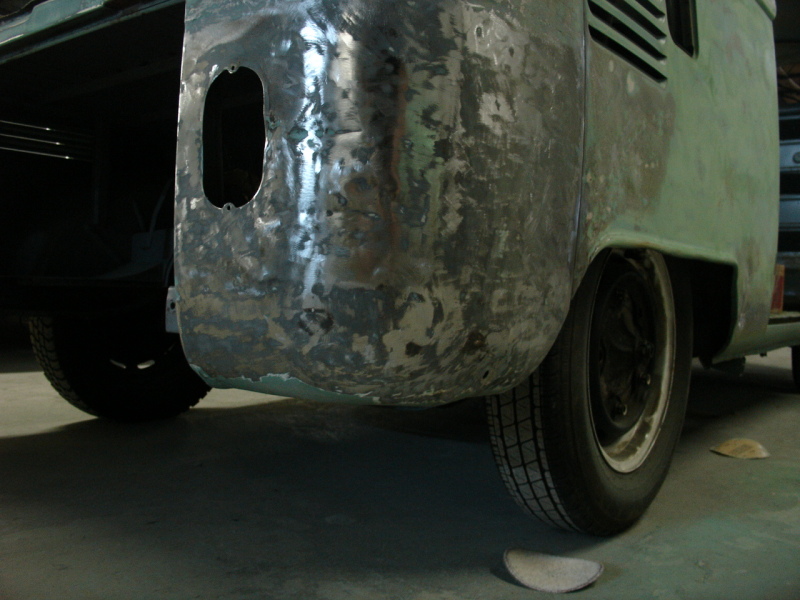
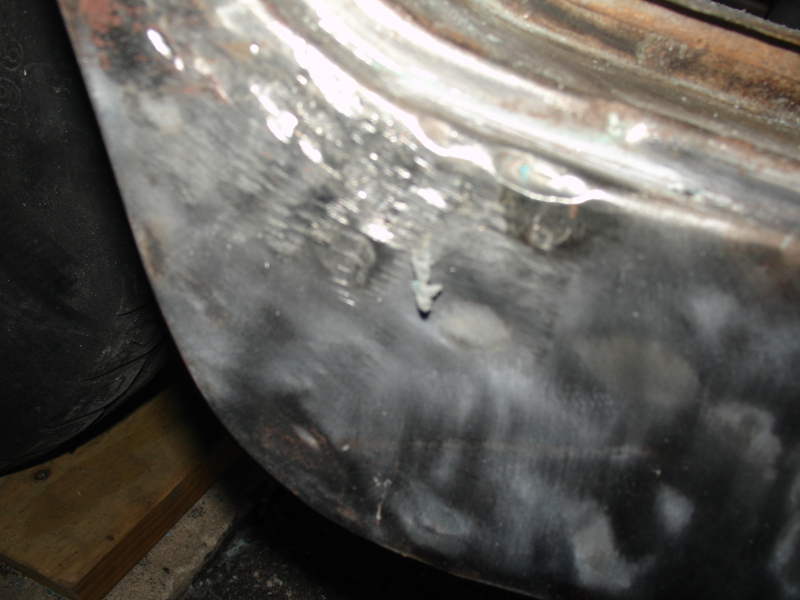
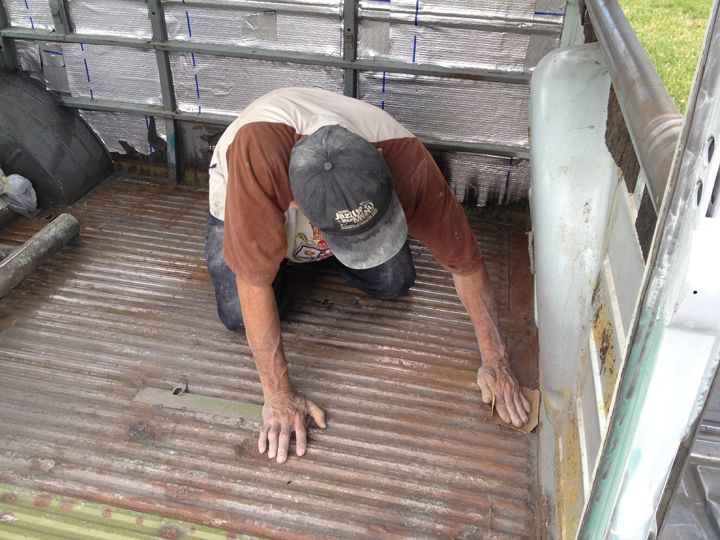
Ahhh....RUST, RUST and more RUST!!
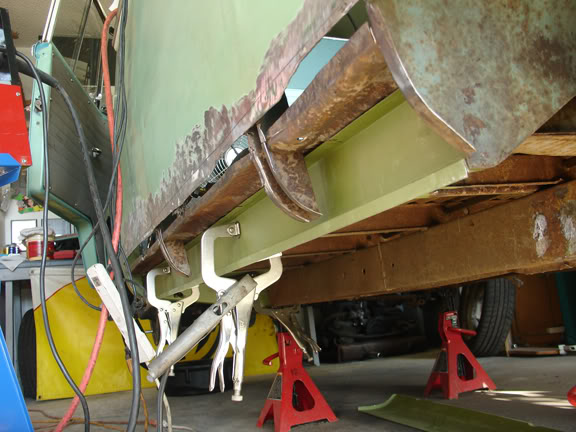
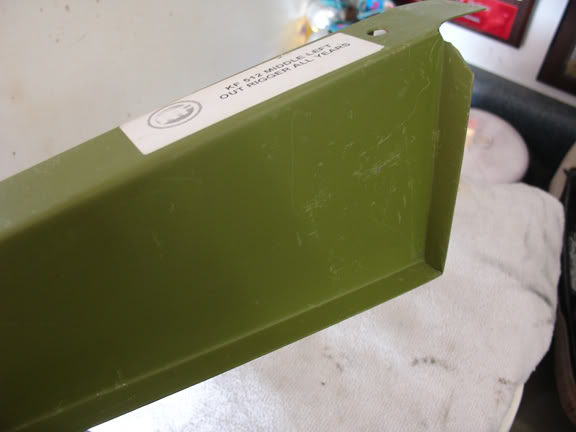
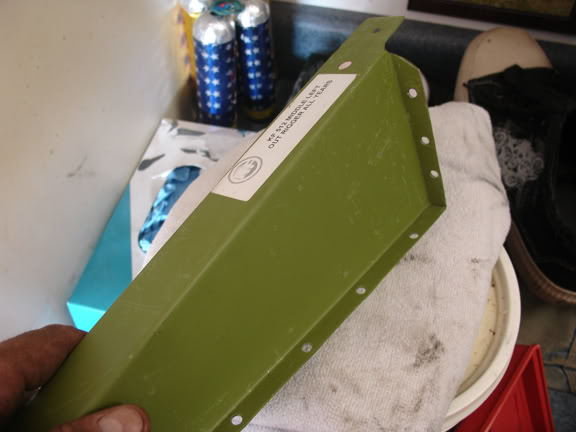
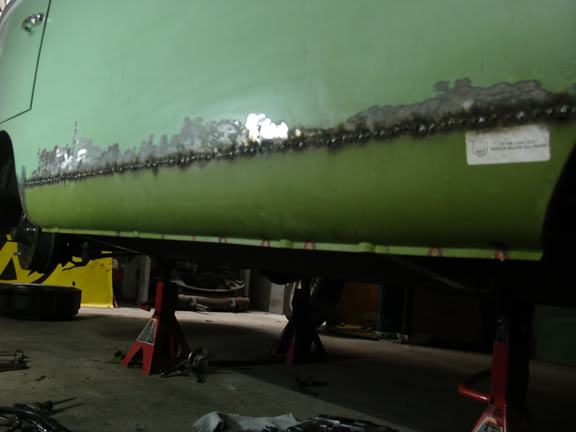
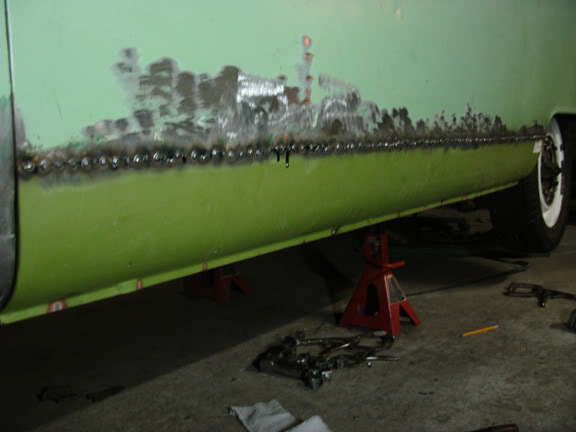
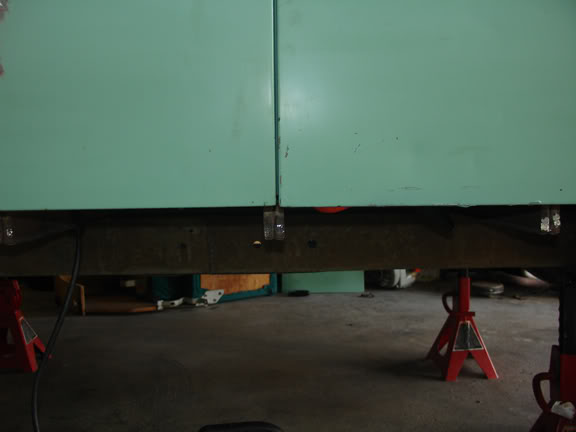
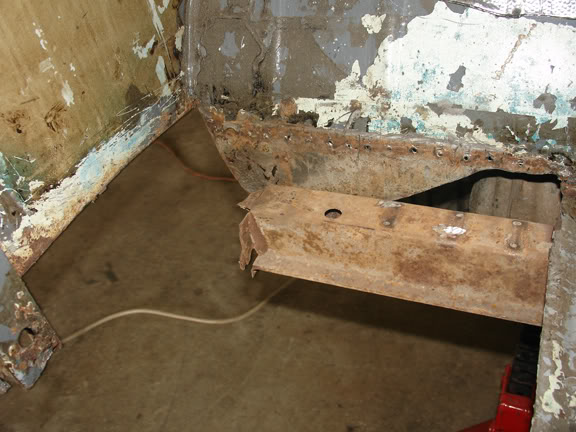
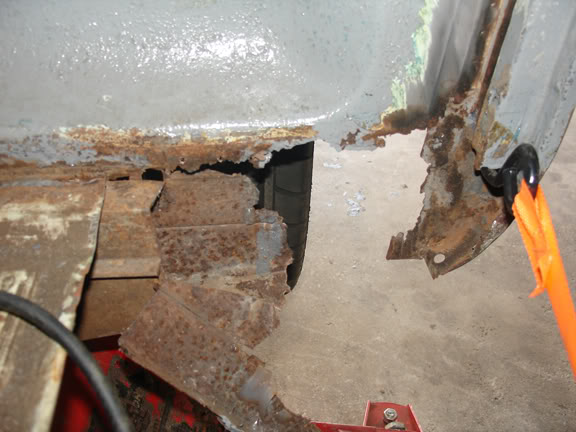
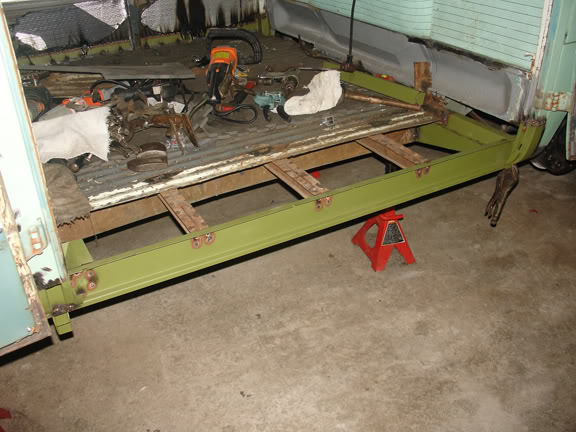
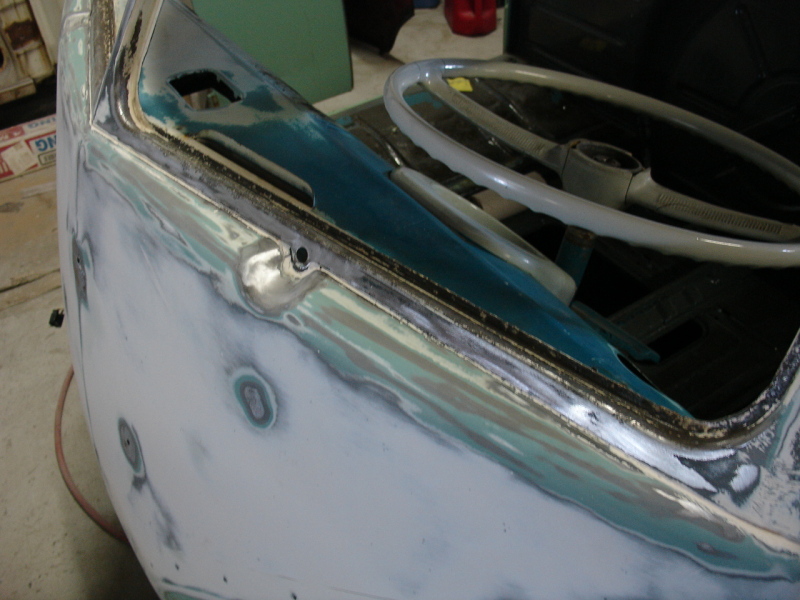
After driving the bus around for quite some time, it was time to tackle the part I was putting off... RUST! Thanks to Gerson at KlassicFab for his funky green metal! Without his contribution to the VW community, this process will never have been done by an amateur like me. Surprisingly, this bus had minimal rust to repair considering it's an east-coast bus! Nose skin, bottom valance, doglegs, front floors, doors, engine tray, and frame rails are all in great shape! What needed to be replaced are the inner and outer cargo door rockers, short side rocker, outriggers, jack mounts, tophats, 16" of cargo floor with some patches, long side rocker and inner rocker too, both B-pillars, cargo door C-pillar, passenger side rear corner and battery tray. All new KlassicFab metal was used except the donor OG battery tray and rear side corner. Bus doesn't look bad...RIGHT?
After driving the bus around for quite some time, it was time to tackle the part I was putting off... RUST! Thanks to Gerson at KlassicFab for his funky green metal! Without his contribution to the VW community, this process will never have been done by an amateur like me. Surprisingly, this bus had minimal rust to repair considering it's an east-coast bus! Nose skin, bottom valance, doglegs, front floors, doors, engine tray, and frame rails are all in great shape! What needed to be replaced are the inner and outer cargo door rockers, short side rocker, outriggers, jack mounts, tophats, 16" of cargo floor with some patches, long side rocker and inner rocker too, both B-pillars, cargo door C-pillar, passenger side rear corner and battery tray. All new KlassicFab metal was used except the donor OG battery tray and rear side corner. Bus doesn't look bad...RIGHT?
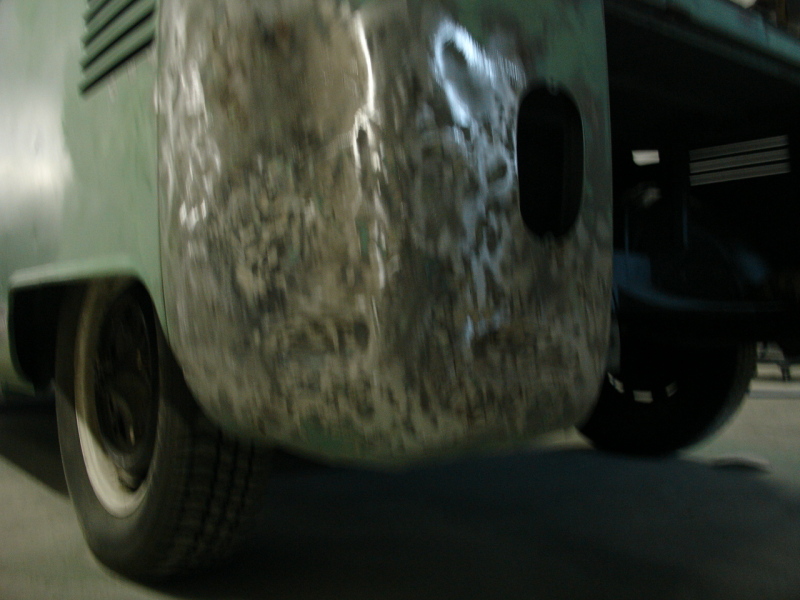
How she sits presently. Looks good right? Well, we'll see once the rust repair starts! Fingers crossed!!
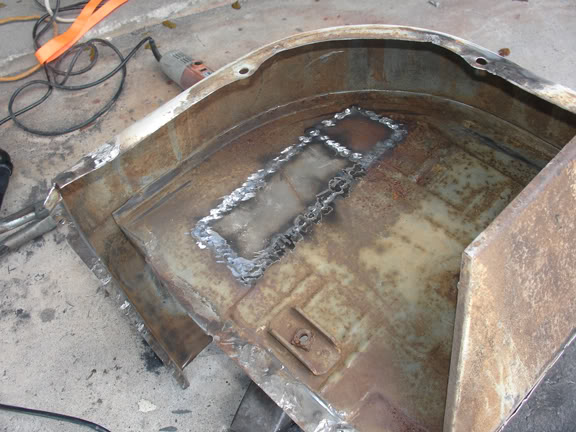
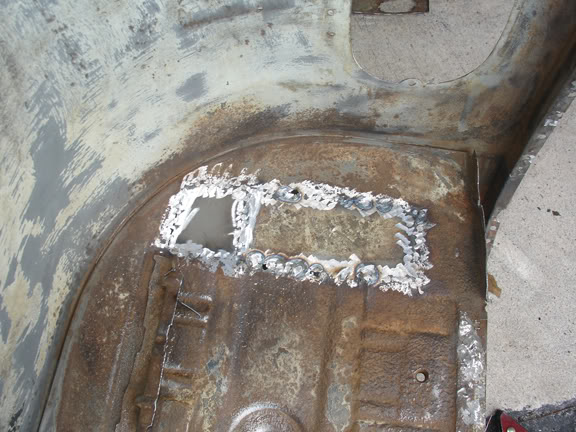
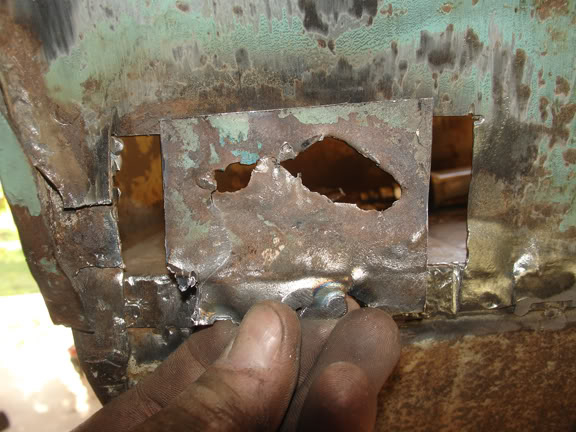
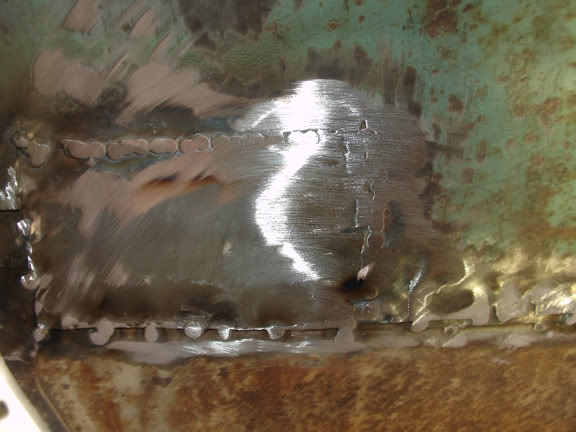
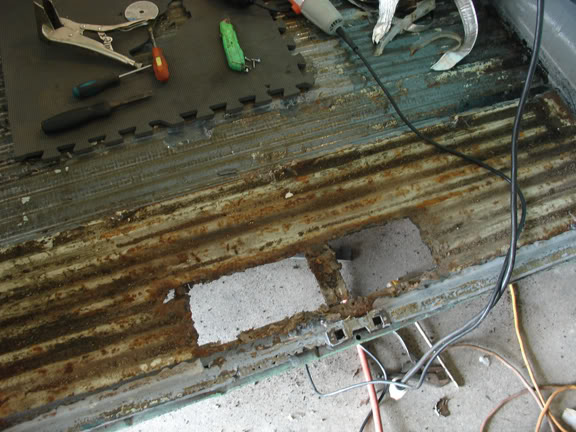
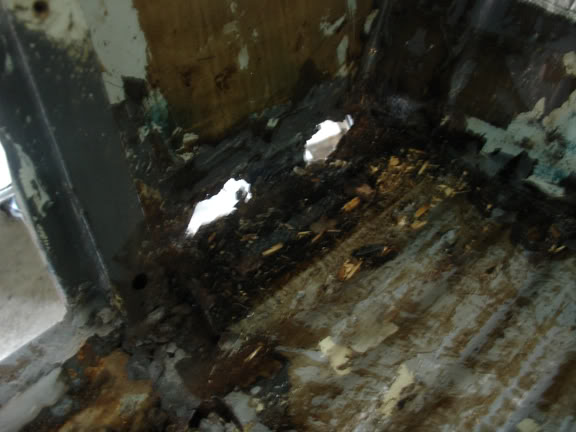
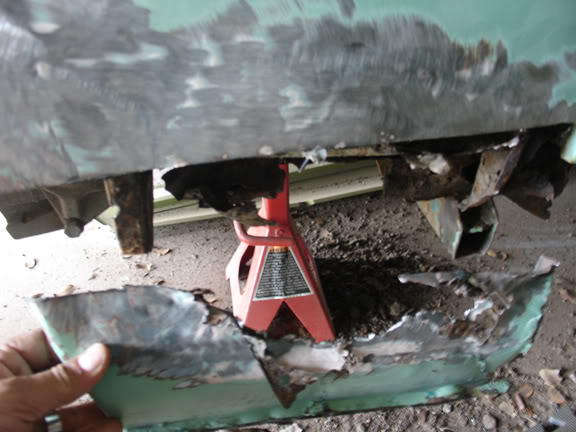
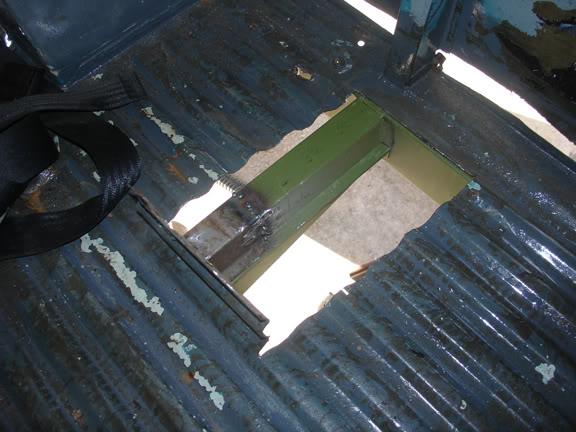
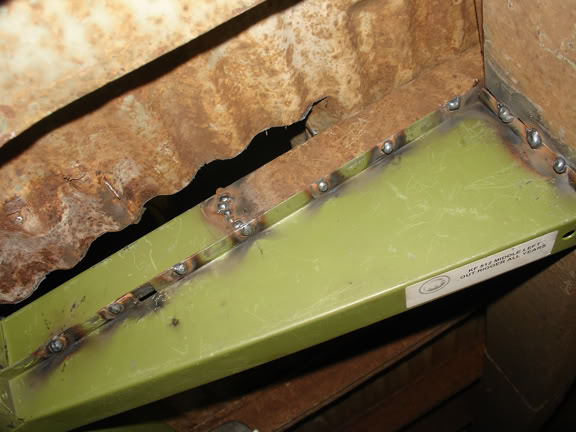
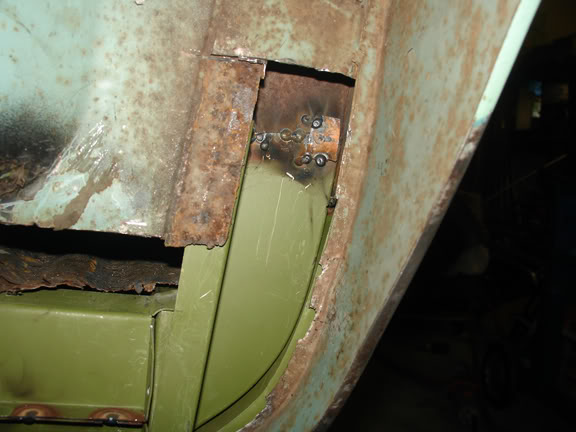
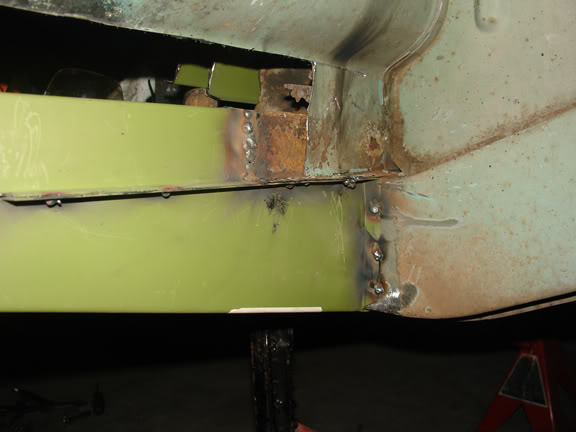
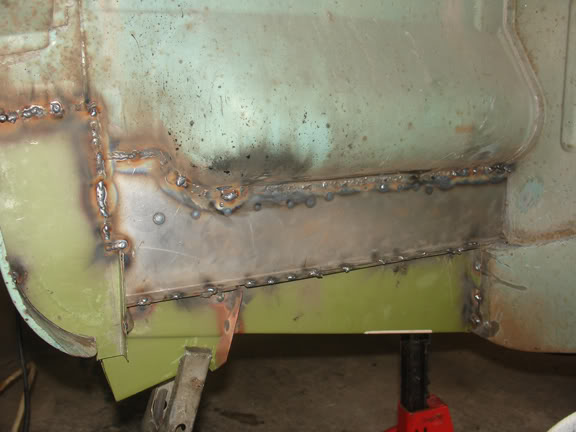
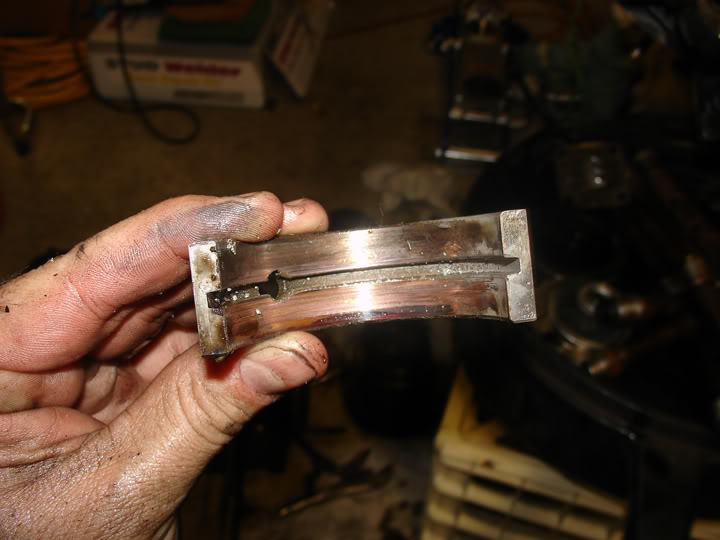
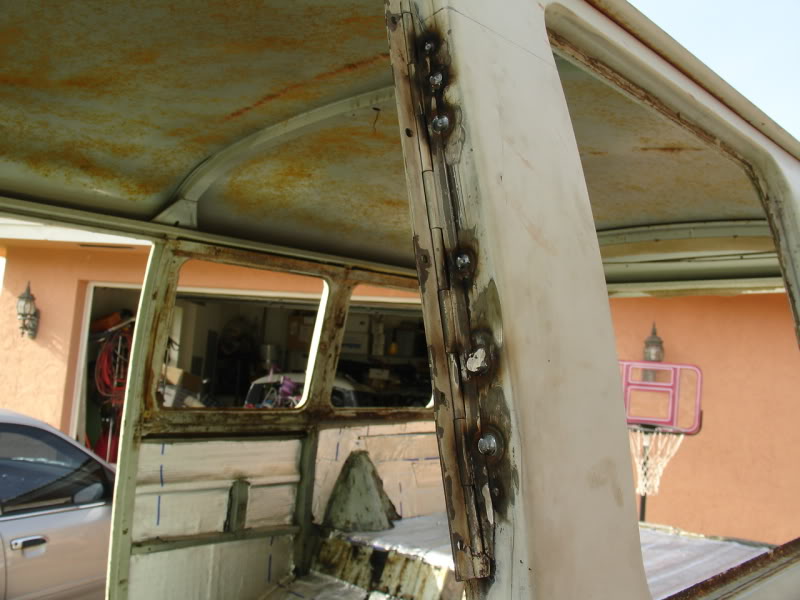
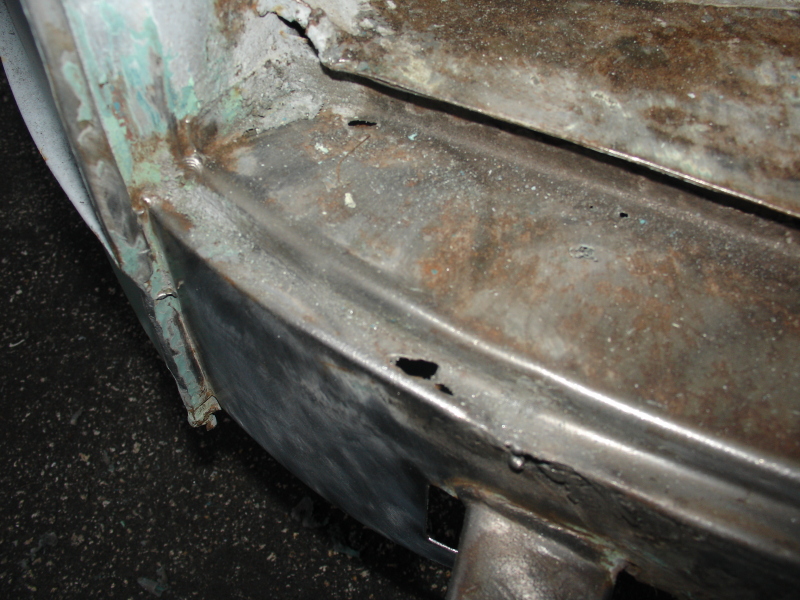
Rear Corner...
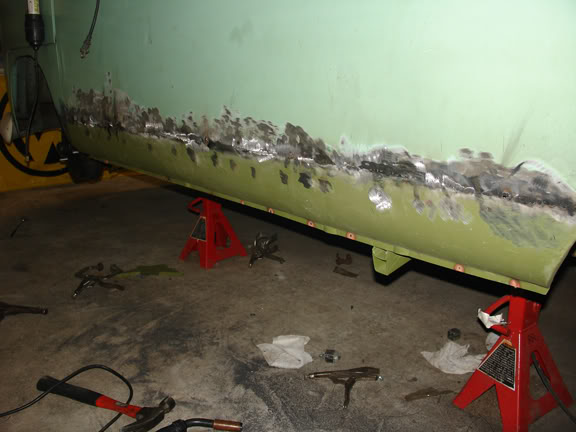
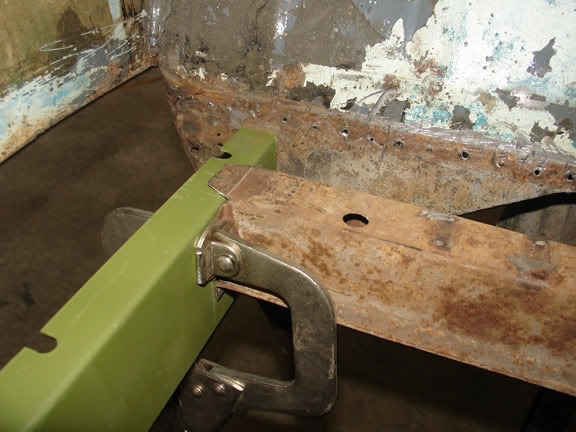
Let me start off by saying I am not a pro at welding! Never welded anything in my life before by myself! I've always had someone else do it for me and I just assisted. Not anymore! Worst that can happen is I do it wrong and I have to redo it...right? Well, here we go... Sourced a donor rear corner as mine had all the metal wrinkled and about 1.5" of mud! Funny thing is, the donor piece had about an inch of mud to cover up a dent but no rust! Cut out rear corner and prepped the seams for lineup and welding. The old battery tray was a thick sheet of steel!
Let me start off by saying I am not a pro at welding! Never welded anything in my life before by myself! I've always had someone else do it for me and I just assisted. Not anymore! Worst that can happen is I do it wrong and I have to redo it...right? Well, here we go... Sourced a donor rear corner as mine had all the metal wrinkled and about 1.5" of mud! Funny thing is, the donor piece had about an inch of mud to cover up a dent but no rust! Cut out rear corner and prepped the seams for lineup and welding. The old battery tray was a thick sheet of steel!


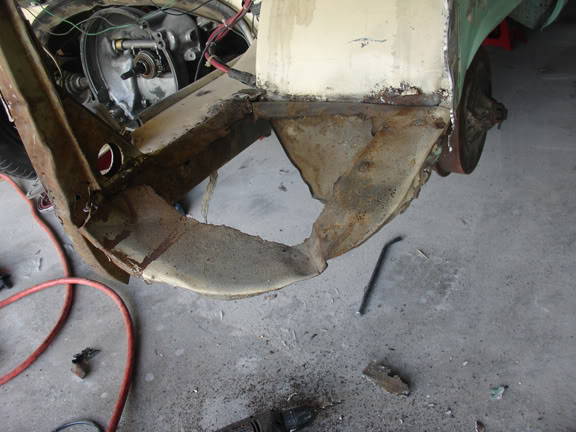


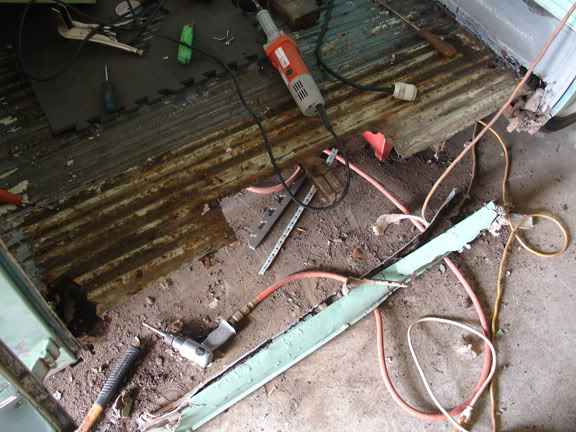
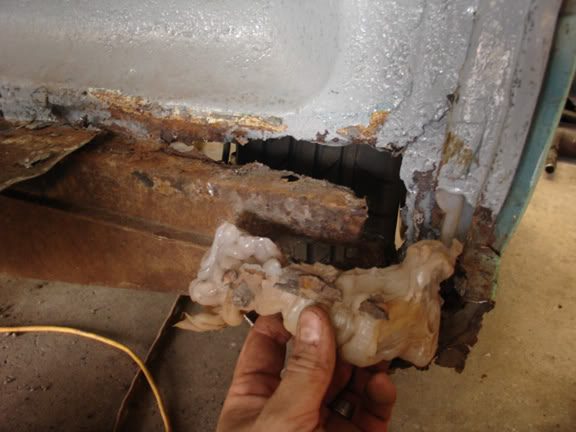
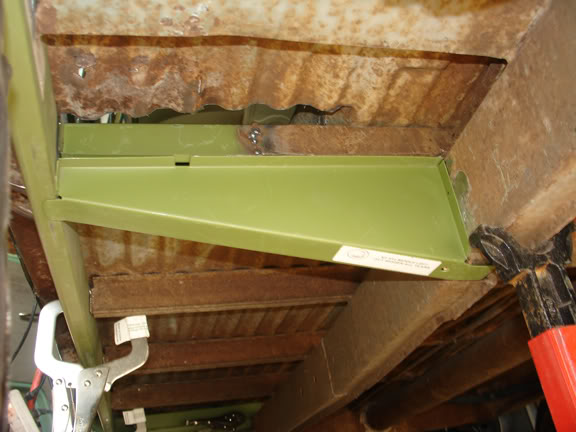
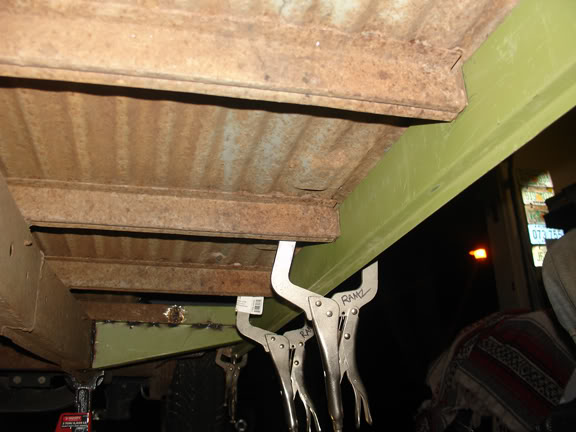
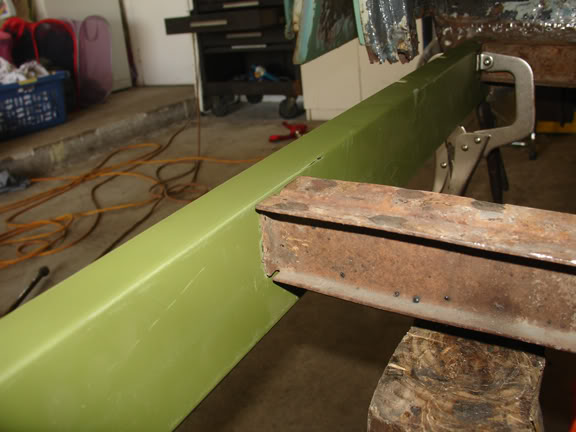
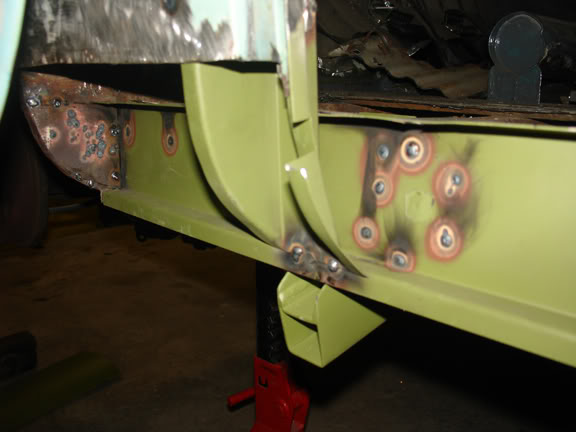
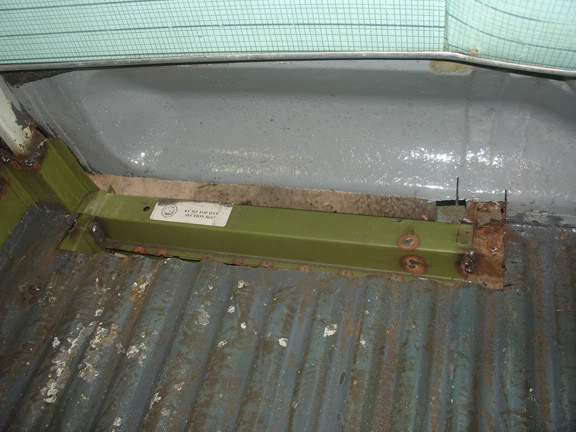
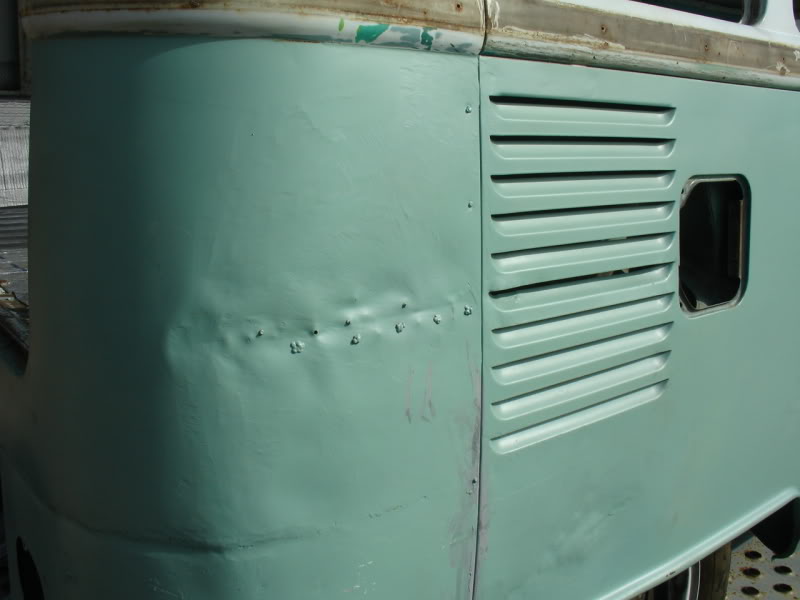
Long Side Rocker
Decided to start with the long side rocker. Longside panel/rocker didn't look so bad until I started cutting away. I was hoping for just the outer rocker repair but quickly realized I would need the inner, both outriggers, tophat sections, jackpoints and b pillar! I realized my initial order to Gerson wasn't enough!
Decided to start with the long side rocker. Longside panel/rocker didn't look so bad until I started cutting away. I was hoping for just the outer rocker repair but quickly realized I would need the inner, both outriggers, tophat sections, jackpoints and b pillar! I realized my initial order to Gerson wasn't enough!
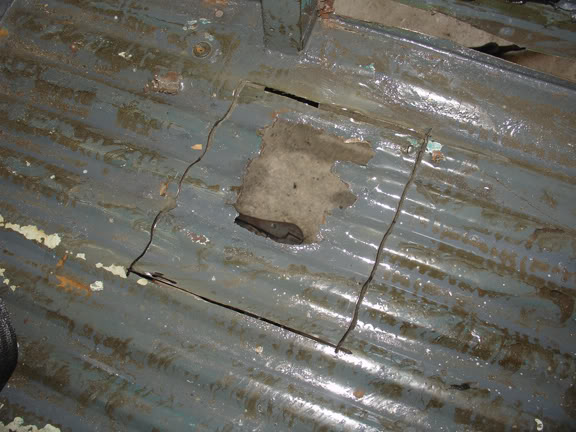
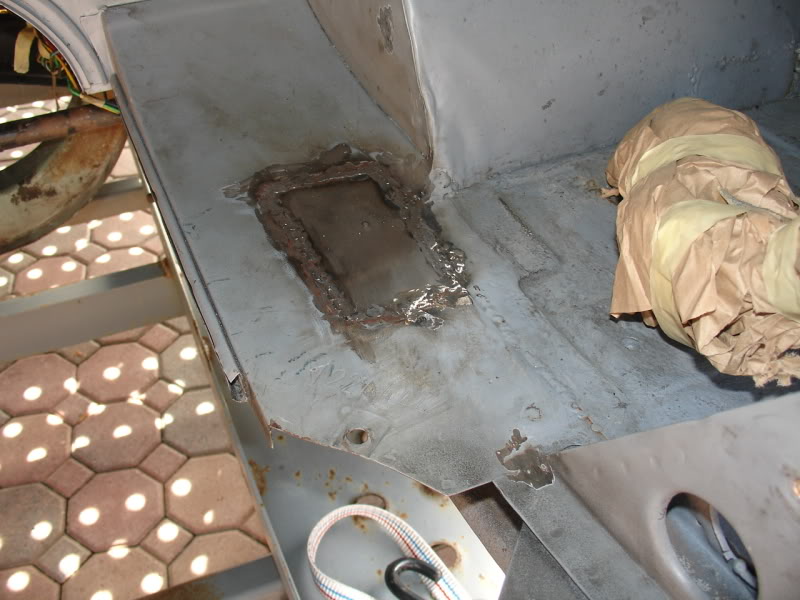
Cargo Door Rocker
Since I knew I was going to order more metal, I jumped to the other side and began to cut out the cargo door rocker as well to see exactly what I needed. Glad I did! Found some more stuff that needed to be replaced correctly.
Since I knew I was going to order more metal, I jumped to the other side and began to cut out the cargo door rocker as well to see exactly what I needed. Glad I did! Found some more stuff that needed to be replaced correctly.


Metal is in!
Had to update my initial order with Gerson. Now I have everything I need!
Had to update my initial order with Gerson. Now I have everything I need!

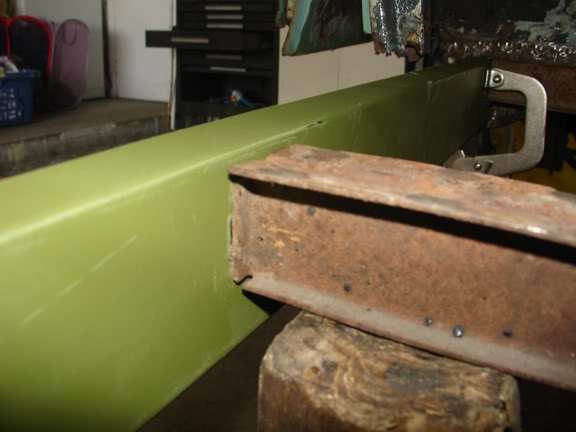
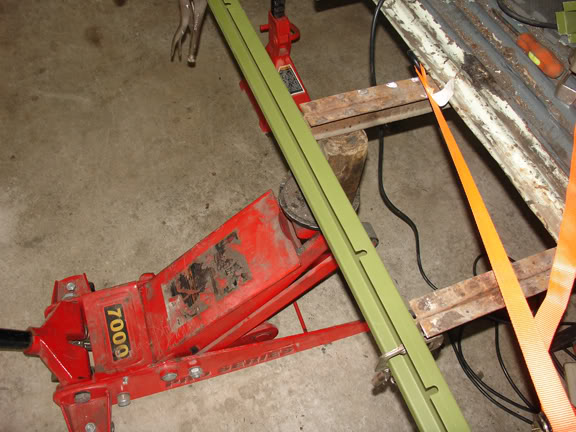
Order from Klassic Fab with their famous "funky green metal"
Driver Side...
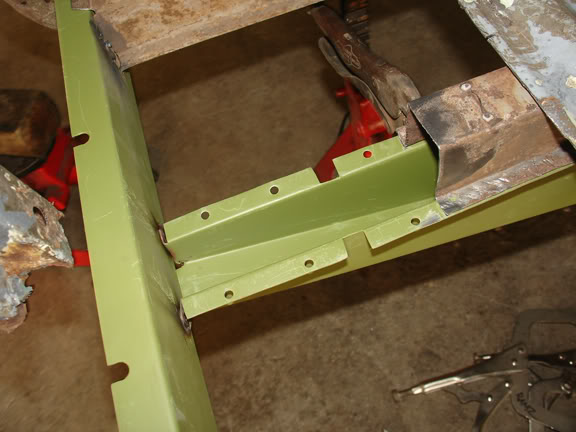
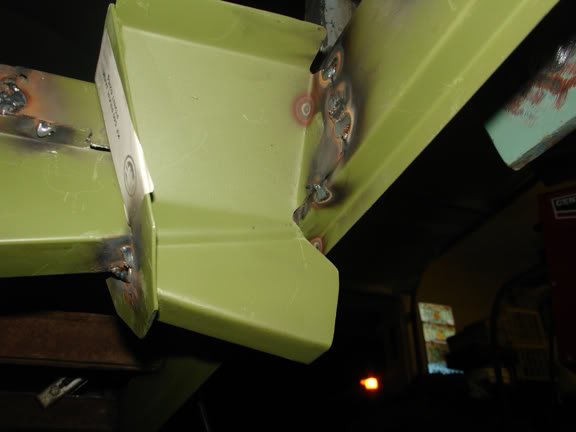
Decided to start on the long side rocker and everything that goes with it. Ok, it's 1 am here and I just got in from the garage! I wasn't going to stop til I finished the long side (driver side). I had to cut and install top hat pieces, both outriggers, b-pillar, inner and outer rocker. Started at noon, so that's 12 hours for this side! I don't know if that is good time or not but for a one man show and a metal newbie at that, that's pretty good for me!
I don't know how everyone else installs the rear top hat, but I felt I had to mock everything up first in order to know the length I needed to reach the inner rocker. I had to cut an access hole in the cargo floor to make sure it was lined up and welded up correctly.


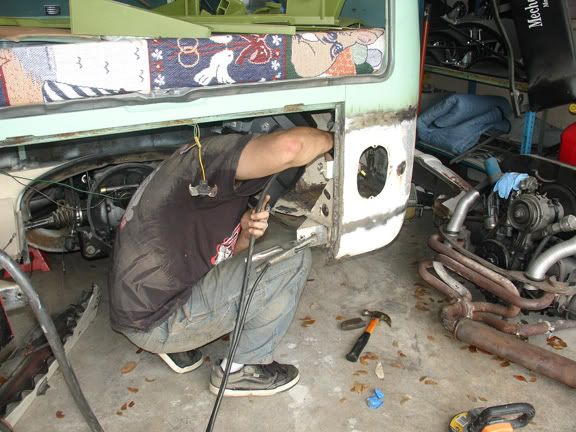
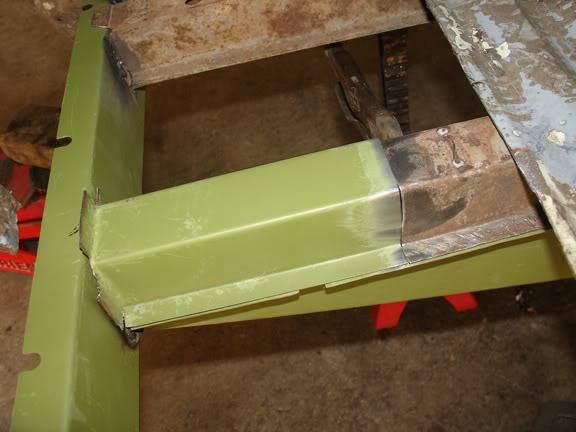
Passenger Side...
I finished cutting out the bad metal and began prepping the metal to line up the inner rocker. This allows me to see what length of top hat I need. Presented the inner rocker and noticed that the support rails where below where they should be. I checked and double checked by putting together as much as I could with clamps to see where the issue was. I guess the cargo floor had settled some due to the rust so I decided to "bend" it back into place! I used a floor jack with a block of wood and stood/jumped on the cargo floor some to bend it up. I think it worked out just fine. After that, I adjusted the door gap to make sure the doors lined up. Once I was pleased with the gaps and doors lined up, I began to weld in the top hats, outriggers, B-pillar, C-pillar, inner rocker and jack points. After 13 hours, I was pleased with the results!
I finished cutting out the bad metal and began prepping the metal to line up the inner rocker. This allows me to see what length of top hat I need. Presented the inner rocker and noticed that the support rails where below where they should be. I checked and double checked by putting together as much as I could with clamps to see where the issue was. I guess the cargo floor had settled some due to the rust so I decided to "bend" it back into place! I used a floor jack with a block of wood and stood/jumped on the cargo floor some to bend it up. I think it worked out just fine. After that, I adjusted the door gap to make sure the doors lined up. Once I was pleased with the gaps and doors lined up, I began to weld in the top hats, outriggers, B-pillar, C-pillar, inner rocker and jack points. After 13 hours, I was pleased with the results!


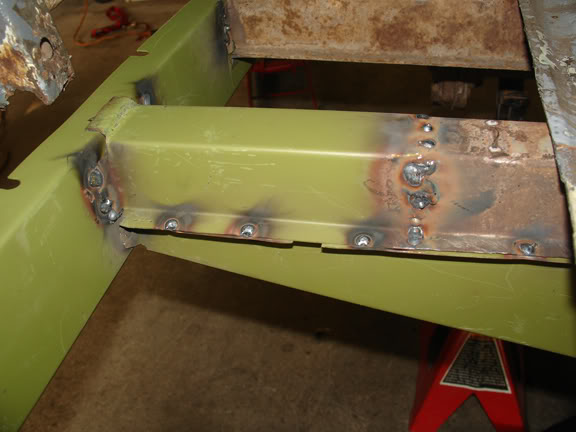


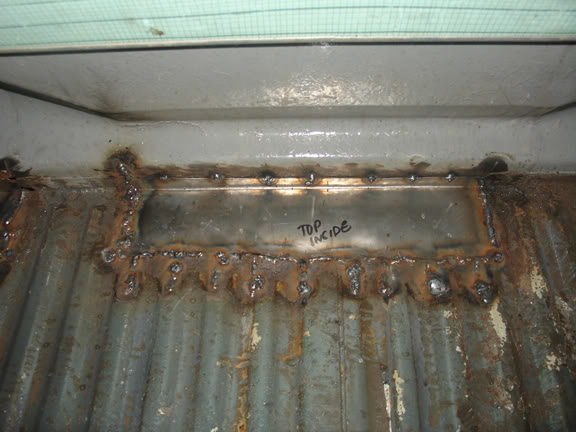
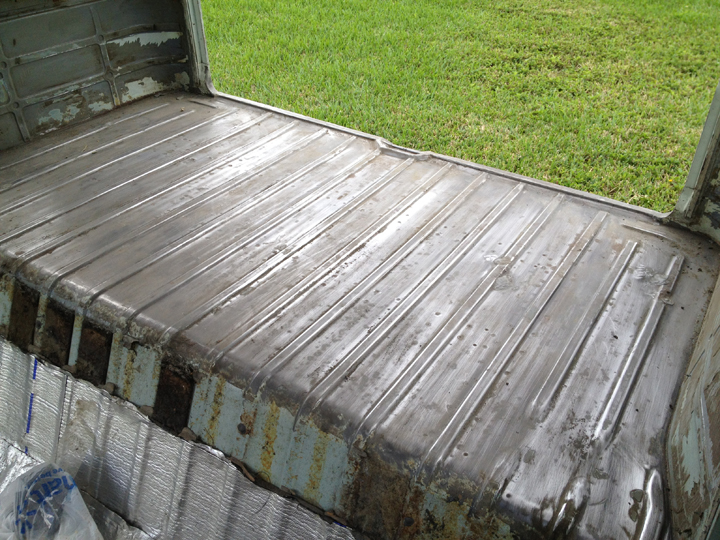
More Passenger Side...
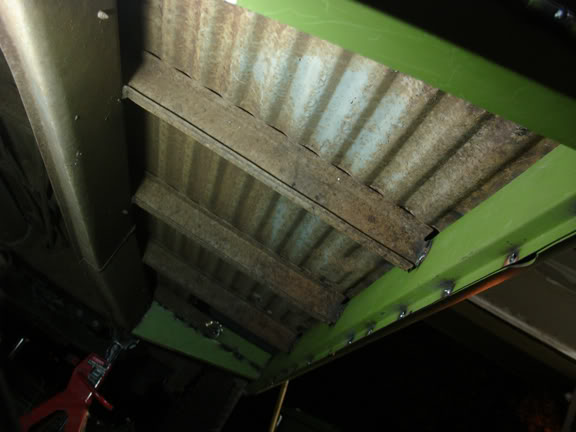
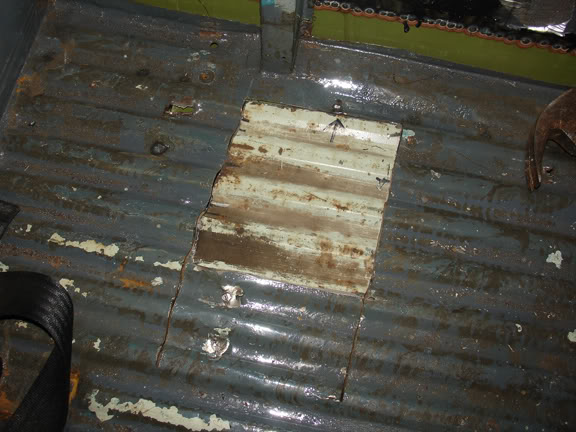
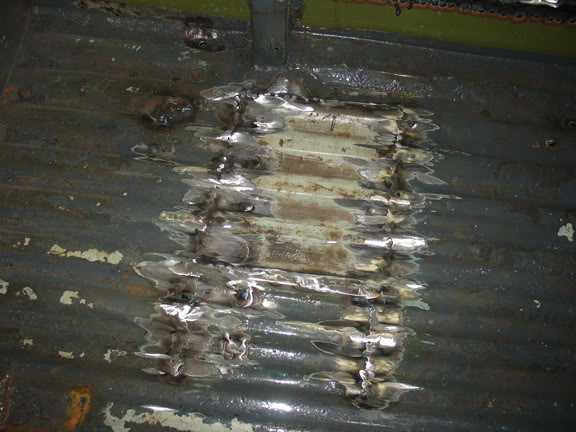
The following day got home from work and decided to finish this pig! So I began to test fit the cargo rocker and short rocker. Once I got it where I thought it was ok, I dropped the floor section in as well to make sure it all lined up. Removed the floor section and cargo rocker and began on the short rocker. Noticed that the short rocker was sticking out some in the wheel well, so I welded up eveything and then cut and massaged into shape. Mocked up the cargo floor and marked the holes for the the plug welds. Held down the floor with self-taps. I welded the outer lip of the floor to the outer rocker. Not sure if I had to do that, but felt it needed it Also welded up the holes in wheel well. Need to source some metal sheets for the patchwork in the front wheel wells.
The following day got home from work and decided to finish this pig! So I began to test fit the cargo rocker and short rocker. Once I got it where I thought it was ok, I dropped the floor section in as well to make sure it all lined up. Removed the floor section and cargo rocker and began on the short rocker. Noticed that the short rocker was sticking out some in the wheel well, so I welded up eveything and then cut and massaged into shape. Mocked up the cargo floor and marked the holes for the the plug welds. Held down the floor with self-taps. I welded the outer lip of the floor to the outer rocker. Not sure if I had to do that, but felt it needed it Also welded up the holes in wheel well. Need to source some metal sheets for the patchwork in the front wheel wells.

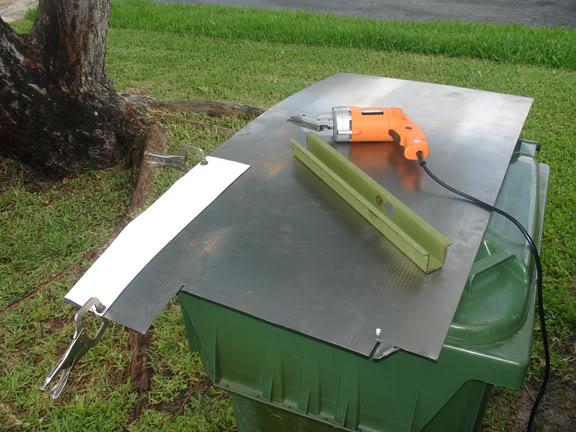
Patchwork...Used all the green metal, but I still had some patches to be made. Bought an electric sheer, sheet of metal and began patching!


Engine Compartment...
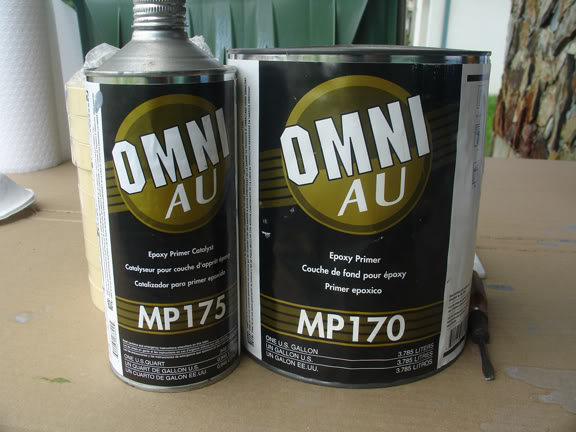
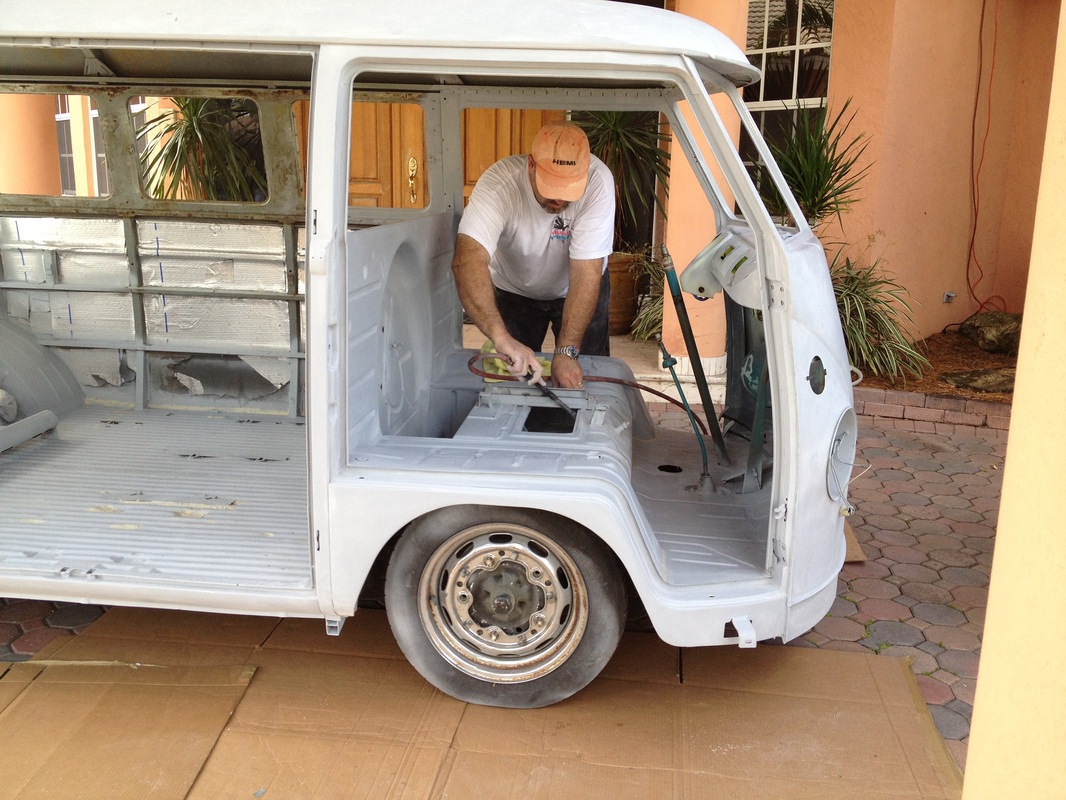
Plans were to begin prepping engine compartment by stripping all the paint off by sandblasting, prime, and paint. Problem is the sandblasting did not go like I had planned! After blasting for 30 minutes, a huge mess of sand in my driveway and only had about a square foot of metal done. Instead, began to chemically strip the paint off. Afterwards, I rinsed off with water. I actually washed it with soap and water and hosed it all out. Blew it dry and let it dry for a few days. Few days later, I sanded it all down, blew it out, wiped it down and sprayed epoxy primer.
Plans were to begin prepping engine compartment by stripping all the paint off by sandblasting, prime, and paint. Problem is the sandblasting did not go like I had planned! After blasting for 30 minutes, a huge mess of sand in my driveway and only had about a square foot of metal done. Instead, began to chemically strip the paint off. Afterwards, I rinsed off with water. I actually washed it with soap and water and hosed it all out. Blew it dry and let it dry for a few days. Few days later, I sanded it all down, blew it out, wiped it down and sprayed epoxy primer.


Make A Driver Again...
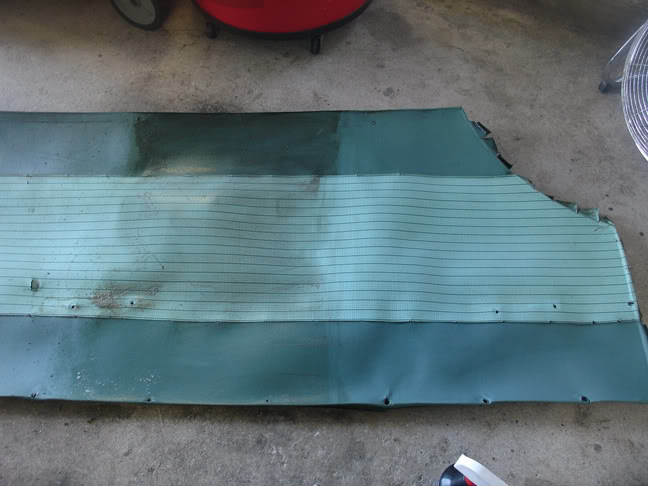
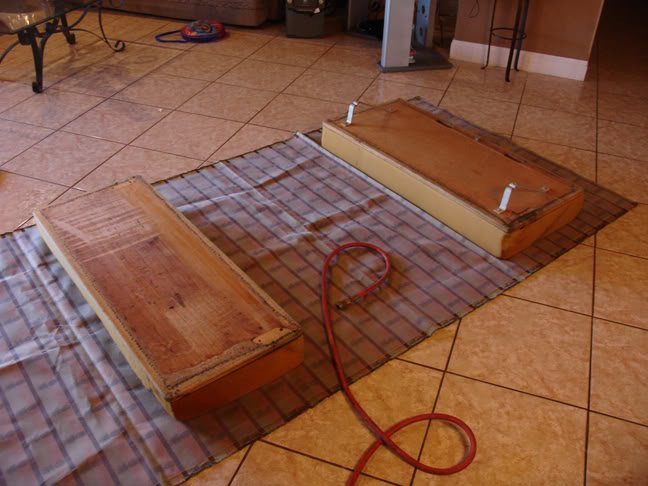
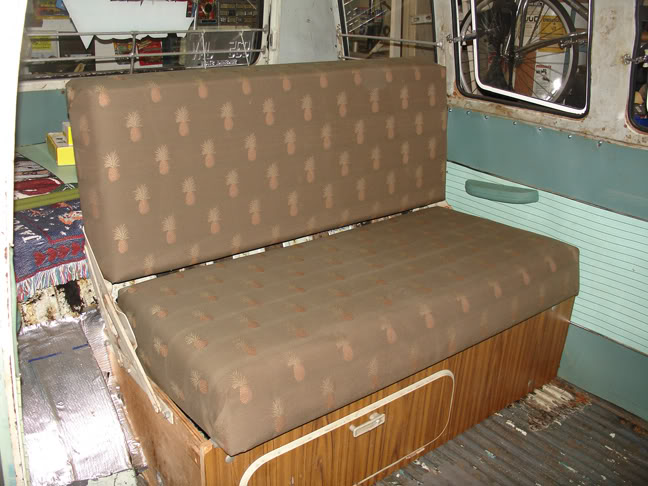
I'm planning a trip to South Carolina for the VW Drag Night in Charleston. Plans are to drive the bus! I had sold a Beetle I had so went ahead and purchased a used 1776cc complete motor from thesamba.com classifieds. Purchased some tires and mounted them on new EMPI fakie sprints. Also bought an A1 Sidewinder ceramic coated exhaust, waiting on that tho! Finally got around to cleaning the long panel and reupholstered the Z-bed with some material my bro gave me.
I'm planning a trip to South Carolina for the VW Drag Night in Charleston. Plans are to drive the bus! I had sold a Beetle I had so went ahead and purchased a used 1776cc complete motor from thesamba.com classifieds. Purchased some tires and mounted them on new EMPI fakie sprints. Also bought an A1 Sidewinder ceramic coated exhaust, waiting on that tho! Finally got around to cleaning the long panel and reupholstered the Z-bed with some material my bro gave me.

KABOOM!!
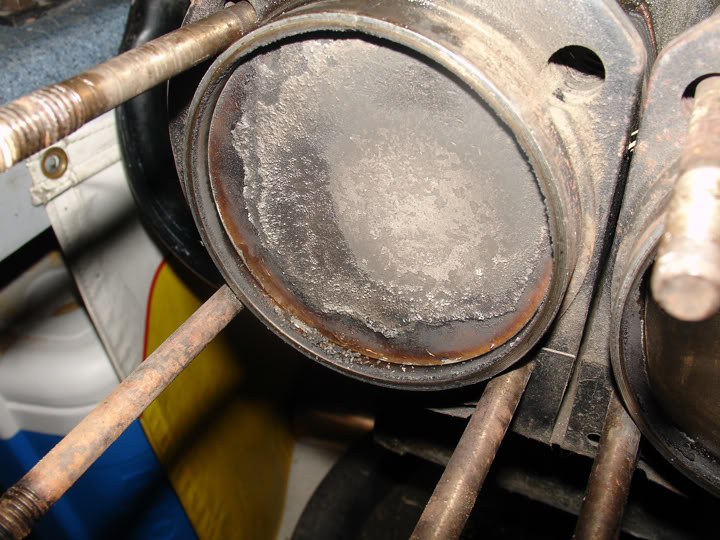
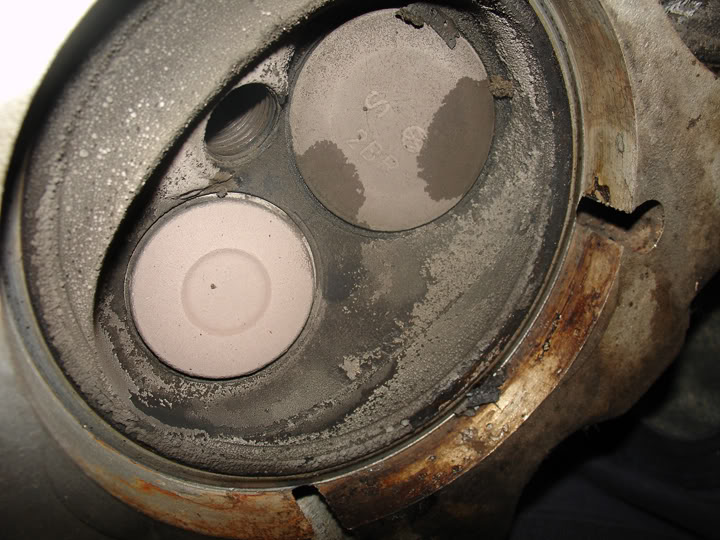
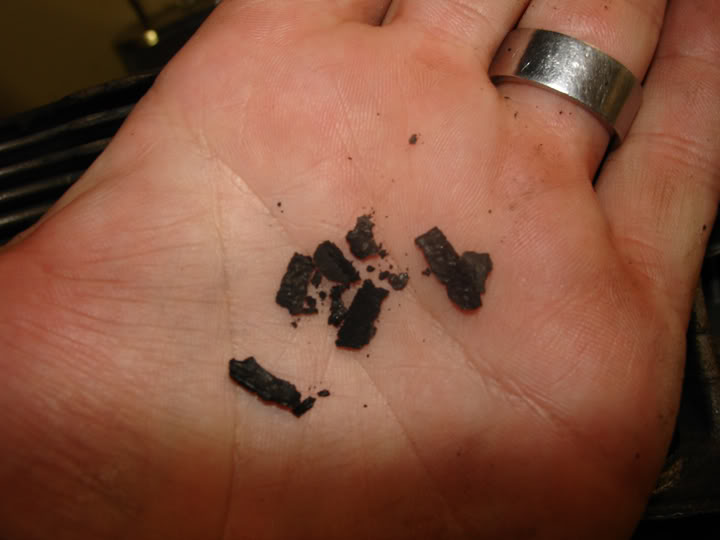
Well, drove all the way to South Carolina from Ft. Lauderdale, FL at an average speed of 62 mph. Did good on gas, about 24 mpg. Enjoyed the drive, weekend events and on the drive back, in Daytona Beach, 250 miles from home the engine locked up! Had the bus towed to a Bill's house about 1.5 hours away in Deland. The following day my other friend Ceasar drove up with a trailer to bring it home. Dropped the engine and took it apart to find that #3 and #4 rods were seized to the crank! The crank was blue in color showing major signs of overheating although my engine temp never went over 230 degrees to the block. At first I thought I had run out of oil, but the oil was all in the case. Found pieces of a carbon-like material in the head chambers and the builder had put the case together with a red RTV sealant that was all over the inside of the case bottom when taken apart! After speaking with some gear heads, I came to the conclusion that I lost oil pressure and the engine gave up its ghost.
Well, drove all the way to South Carolina from Ft. Lauderdale, FL at an average speed of 62 mph. Did good on gas, about 24 mpg. Enjoyed the drive, weekend events and on the drive back, in Daytona Beach, 250 miles from home the engine locked up! Had the bus towed to a Bill's house about 1.5 hours away in Deland. The following day my other friend Ceasar drove up with a trailer to bring it home. Dropped the engine and took it apart to find that #3 and #4 rods were seized to the crank! The crank was blue in color showing major signs of overheating although my engine temp never went over 230 degrees to the block. At first I thought I had run out of oil, but the oil was all in the case. Found pieces of a carbon-like material in the head chambers and the builder had put the case together with a red RTV sealant that was all over the inside of the case bottom when taken apart! After speaking with some gear heads, I came to the conclusion that I lost oil pressure and the engine gave up its ghost.

Engine Rebuild...
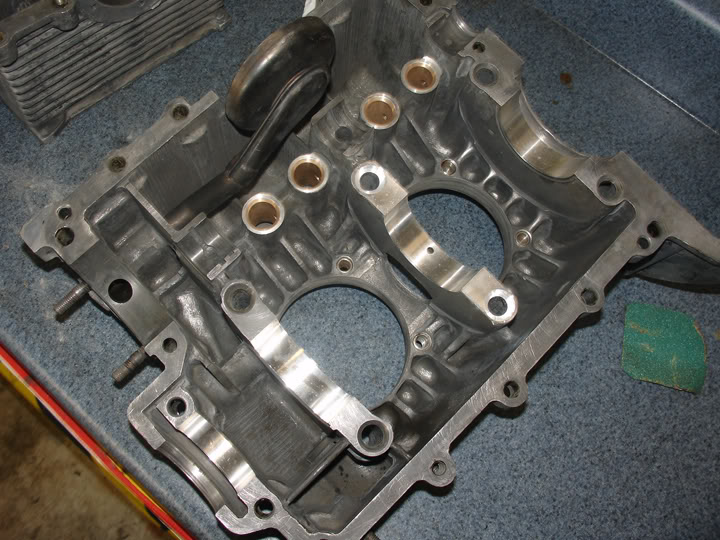
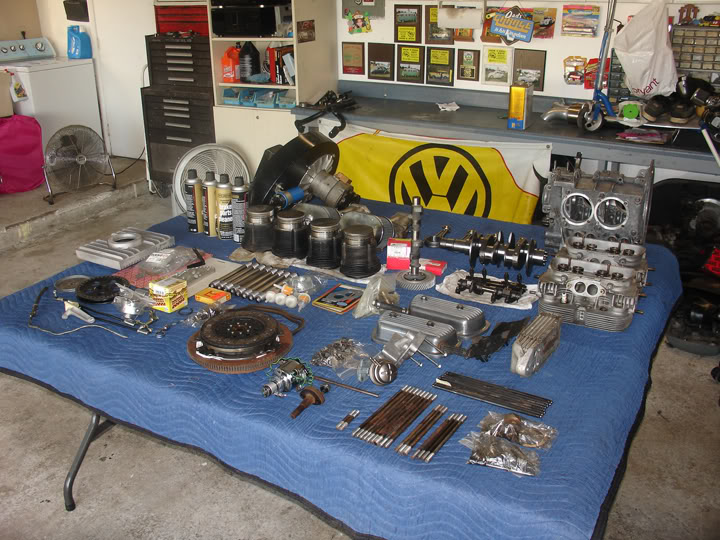
After much thought of which way to go, I decided to rebuild the engine. Sent the case out to Brothers Machine in Cali. Meanwhile, I ordered a new counter-weighted 69mm crank from DPR. New rods from CB Performance and all the misc stuff like lifters and bearings from local shop. Got the case back from machine shop. New lifter bores, case savers, decked and align bored. Thrust was ok.
After much thought of which way to go, I decided to rebuild the engine. Sent the case out to Brothers Machine in Cali. Meanwhile, I ordered a new counter-weighted 69mm crank from DPR. New rods from CB Performance and all the misc stuff like lifters and bearings from local shop. Got the case back from machine shop. New lifter bores, case savers, decked and align bored. Thrust was ok.

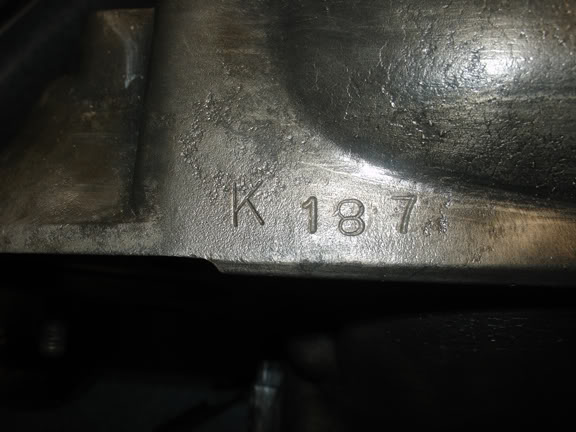
1776cc?
All this time I thought my engine was a 1776 because that's how it was listed on Samba when I bought it. While putting the engine together my buddy Carlos asks me why my pistons/jugs look so big. At that point I noticed 93.93 stamped so I'm like, what the hell is that stamping on there if these are supposed to be 90.5's?? Turns out it's a 1914! Thanks to my brother Alex for helping with the engine assembly.
All this time I thought my engine was a 1776 because that's how it was listed on Samba when I bought it. While putting the engine together my buddy Carlos asks me why my pistons/jugs look so big. At that point I noticed 93.93 stamped so I'm like, what the hell is that stamping on there if these are supposed to be 90.5's?? Turns out it's a 1914! Thanks to my brother Alex for helping with the engine assembly.


Fanshroud...
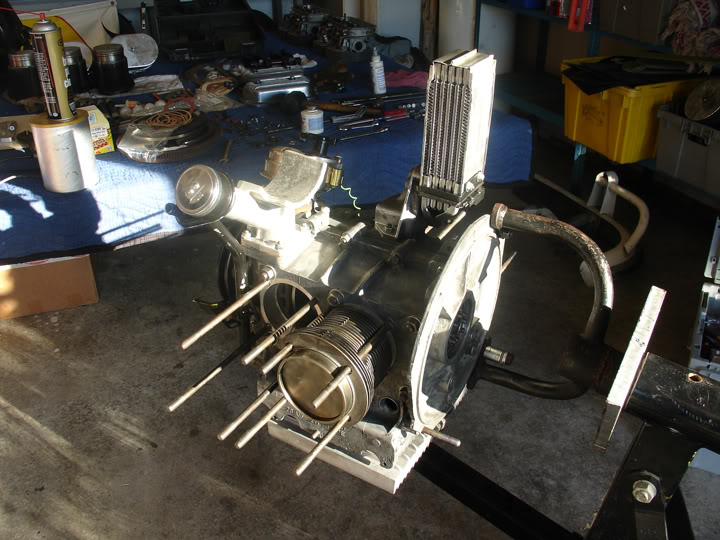
Here's another reason my engine could have overheated! Some vents in the shroud were loose so I began to spot weld them. I later noticed that I was missing vents all together! I pulled out an NOS SCAT shroud I had up in the attic. I spot welded every vein/vent and anywhere I saw it could come apart. Used that instead.
Here's another reason my engine could have overheated! Some vents in the shroud were loose so I began to spot weld them. I later noticed that I was missing vents all together! I pulled out an NOS SCAT shroud I had up in the attic. I spot welded every vein/vent and anywhere I saw it could come apart. Used that instead.

Update...
Been driving the bus for almost a year now and it is running flawless! Getting some serious windshield time and enjoying every minute of it. Been on long distance trips, camping trips and the local drive ins. Gonna be taking bus apart to have it finally painted!!
Been driving the bus for almost a year now and it is running flawless! Getting some serious windshield time and enjoying every minute of it. Been on long distance trips, camping trips and the local drive ins. Gonna be taking bus apart to have it finally painted!!
Dismantle...
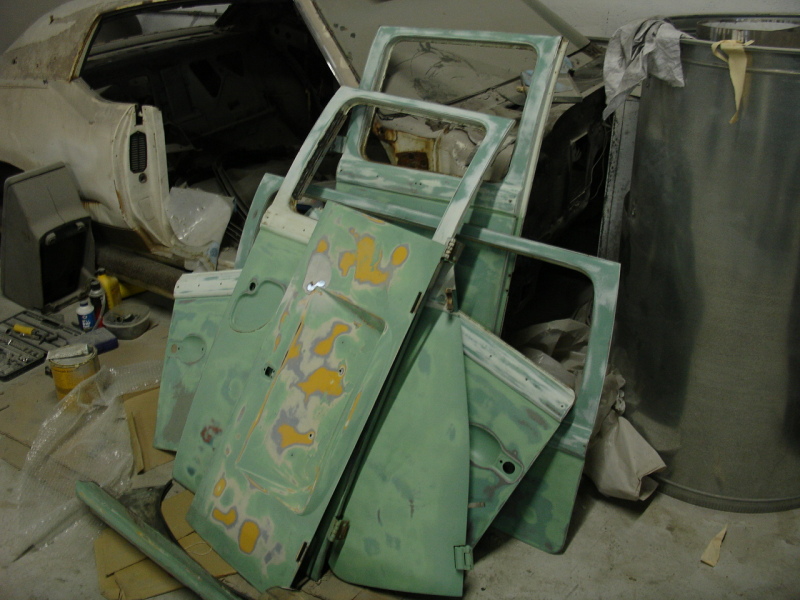
Well the time has come to get this pig painted!! Woohoo!! It's been 5 years since I first got this bus and I think I've fixed every kink to make it road-worthy. Now it's time to make it look sexy! Began to strip it down, bag the items and had Ceasar trailer it for me to the bodyshop/painter.
Well the time has come to get this pig painted!! Woohoo!! It's been 5 years since I first got this bus and I think I've fixed every kink to make it road-worthy. Now it's time to make it look sexy! Began to strip it down, bag the items and had Ceasar trailer it for me to the bodyshop/painter.


Body Shop...
These are some pics I took and others that the shop sent me. Boy is it a slow process to deal with body shops! I wish I could go there and work on it myself but then why am I paying them!! This will be a slow process. Meanwhile, I will be prepping the stuff I removed so when it come time to put bus back together again, I will have the majority of the stuff ready to go!
These are some pics I took and others that the shop sent me. Boy is it a slow process to deal with body shops! I wish I could go there and work on it myself but then why am I paying them!! This will be a slow process. Meanwhile, I will be prepping the stuff I removed so when it come time to put bus back together again, I will have the majority of the stuff ready to go!

Body Shop Update...
So... you know I took my bus in the shop for body and paint in July. Great attitude and very easy to talk to guy at first, but I come to find out his words are as empty as the seats in a Florida Marlins game! Promise after promise, the lies grew larger and larger. My means of communication was texting, because he didn't answer his calls. After 3 weeks of not answering my calls or text, on Thursday, he finally responds with a text telling me he's closing shop on the 15th! That's only a week away! He said he was going to finish my bus by then...(haha) anyway, we agreed to work on it the coming Saturday. Not surprised, he doesn't show up!
I decided I was going to camp outside the shop til he showed up. The property is fenced in but i noticed the lock was not locked, so I pushed the gate open. I recognized a car he drove so I park behind him to block it in. After an hour, an unknown guy walks out of the closed door building, so I question him the whereabouts of the painter. He tells me he's been waiting on him as well. Turns out the guy is the big money guy/owner who had invested over $300K to get this shop up and running and I was dealing with his shop manager. His manager had defaulted 4 months of rent and the owner had to step in cause the landlord was evicting them!
I explained to him I was there to get my bus out and wasn't leaving until I did. Make a very long story short, I was able to get my bus and parts out of the shop along with 2 of my other friends' cars who had theirs in there too. I might have lost some money because I had given him half up front, but I was very happy to get my bus back without having to deal with my stuff held for ransom by the landlord.
I had my friend Ceasar once again come with his trailer and pick the bus to store at his house meanwhile we looked for a new bodyshop. That was my fun-filled Saturday!
New Bodyman..."El Tio"
After searching...again... for bodyshops, another friend Stephen, recommended a bodyman who does old-skool bodywork for a fair price! After meeting with the new body guy, I realized this is the guy! He massages the metal as much as possible, sands everything by hand and uses mud as least as possible...Perfect! Why couldn't I find this guy a few months ago?? We agreed he would finish the bodywork and have the bus prepped and ready for paint. Afterwards, Ceasar and I will spray it. I'll have to wait another 2-3 weeks til Tio makes room for me, so I'll have to wait some more! Errr!! He said he should have it done in 2 weeks...where have I heard that before?!
After searching...again... for bodyshops, another friend Stephen, recommended a bodyman who does old-skool bodywork for a fair price! After meeting with the new body guy, I realized this is the guy! He massages the metal as much as possible, sands everything by hand and uses mud as least as possible...Perfect! Why couldn't I find this guy a few months ago?? We agreed he would finish the bodywork and have the bus prepped and ready for paint. Afterwards, Ceasar and I will spray it. I'll have to wait another 2-3 weeks til Tio makes room for me, so I'll have to wait some more! Errr!! He said he should have it done in 2 weeks...where have I heard that before?!
Back Home...temporarily
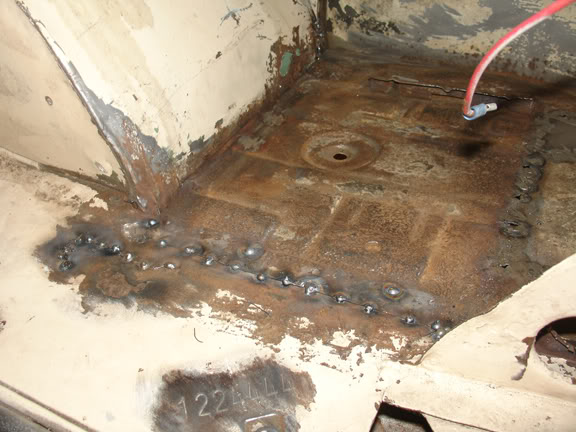
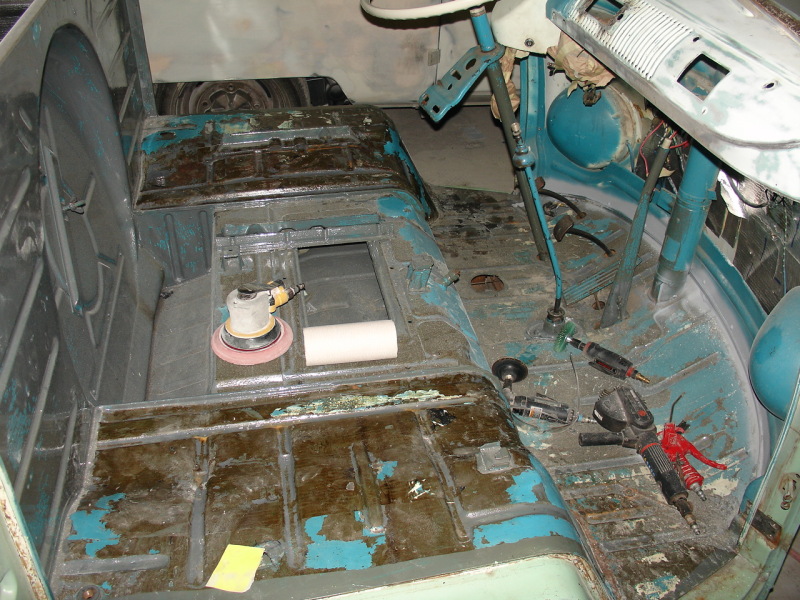
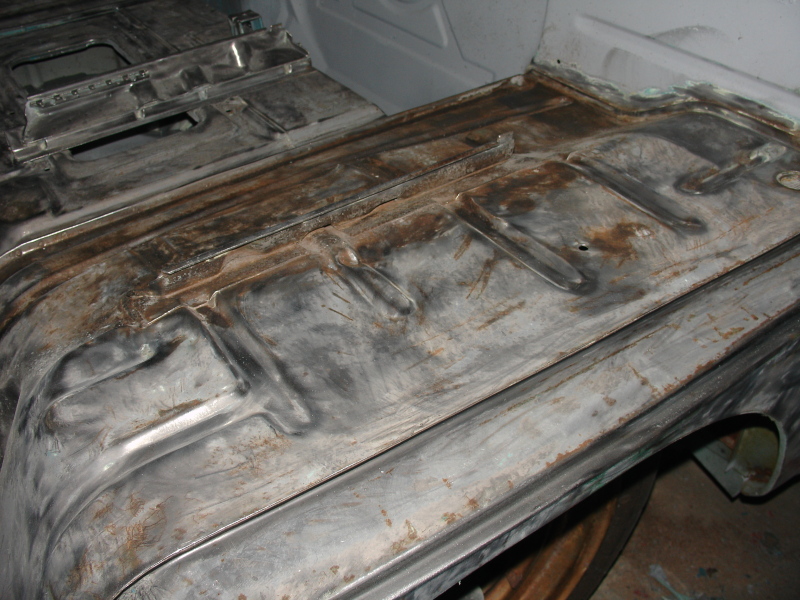
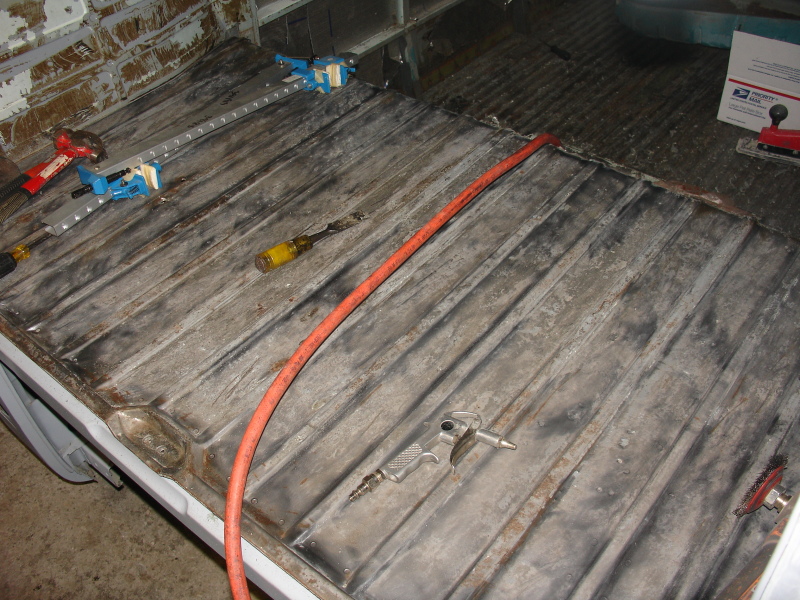
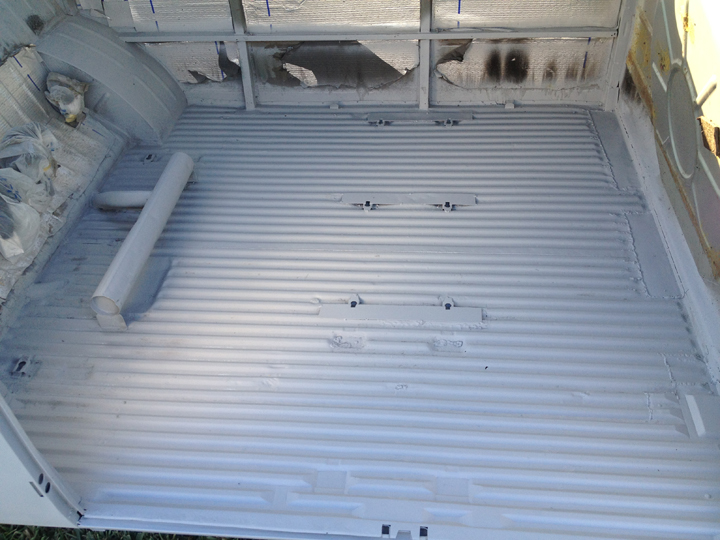
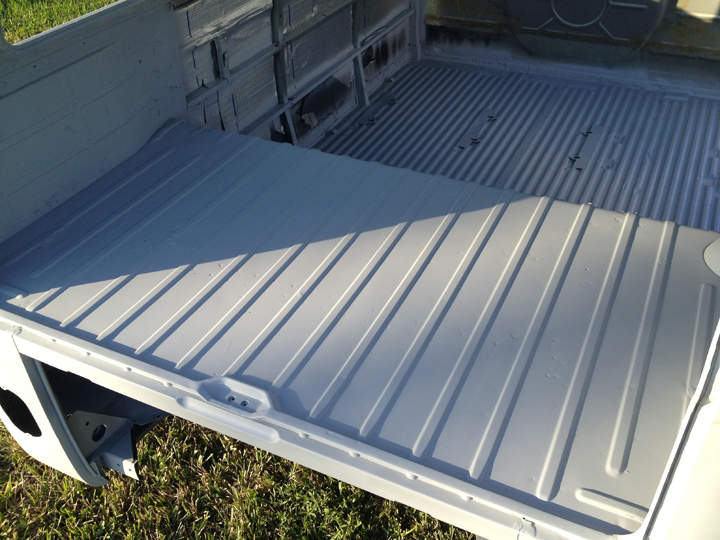
Meanwhile, I decided to bring the bus back home. While I waited for my turn, I did some finishing on the floors and some odds and ends that were never done and should have been done by the other bodyshop. Decided to remove all the sound deadening off the floors and strip the paint off the floors, doglegs and luggage area. I found some holes in the metal and patched them up. While I was in the welding mode, I measured and welded in the brackets for the middle seat and rear seat tie-downs.
Meanwhile, I decided to bring the bus back home. While I waited for my turn, I did some finishing on the floors and some odds and ends that were never done and should have been done by the other bodyshop. Decided to remove all the sound deadening off the floors and strip the paint off the floors, doglegs and luggage area. I found some holes in the metal and patched them up. While I was in the welding mode, I measured and welded in the brackets for the middle seat and rear seat tie-downs.


Back on the bodywork!
Finally got a call from Tio that my bus was next. Loaded it up and took it to him so he can begin the bodywork phase. Unfortunately, the bus sat for weeks because I had told him to prioritize my friend's Stephen's bus since he was weeks away from debuting his 23 window at Bulli Brigade. He also had been finishing up on some loose ends on Tom's buses. After the show weekend and debut of Stephen's bus was over, it was time to start on my pig, I finally got Tio to work on my bus. UPDATE! He's been plugging away for a few days now and he did get it done in 2 weeks like he said! Not much pictures to show since sanding is the same no matter what pic you take, so I'll stick to the "action shots"!
Finally got a call from Tio that my bus was next. Loaded it up and took it to him so he can begin the bodywork phase. Unfortunately, the bus sat for weeks because I had told him to prioritize my friend's Stephen's bus since he was weeks away from debuting his 23 window at Bulli Brigade. He also had been finishing up on some loose ends on Tom's buses. After the show weekend and debut of Stephen's bus was over, it was time to start on my pig, I finally got Tio to work on my bus. UPDATE! He's been plugging away for a few days now and he did get it done in 2 weeks like he said! Not much pictures to show since sanding is the same no matter what pic you take, so I'll stick to the "action shots"!

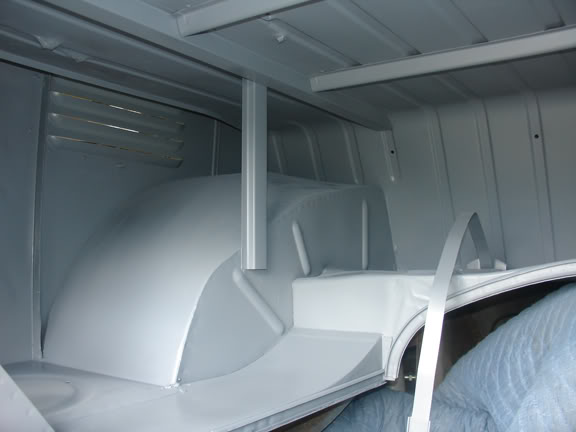
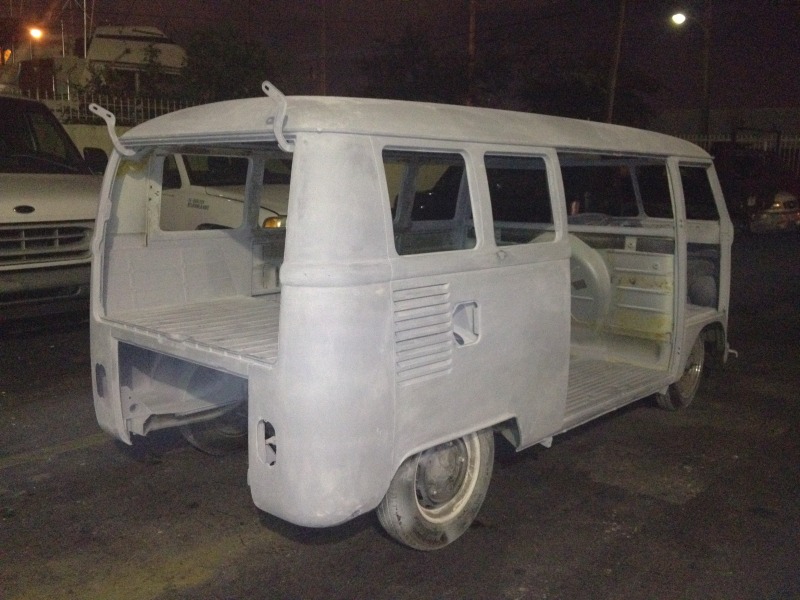
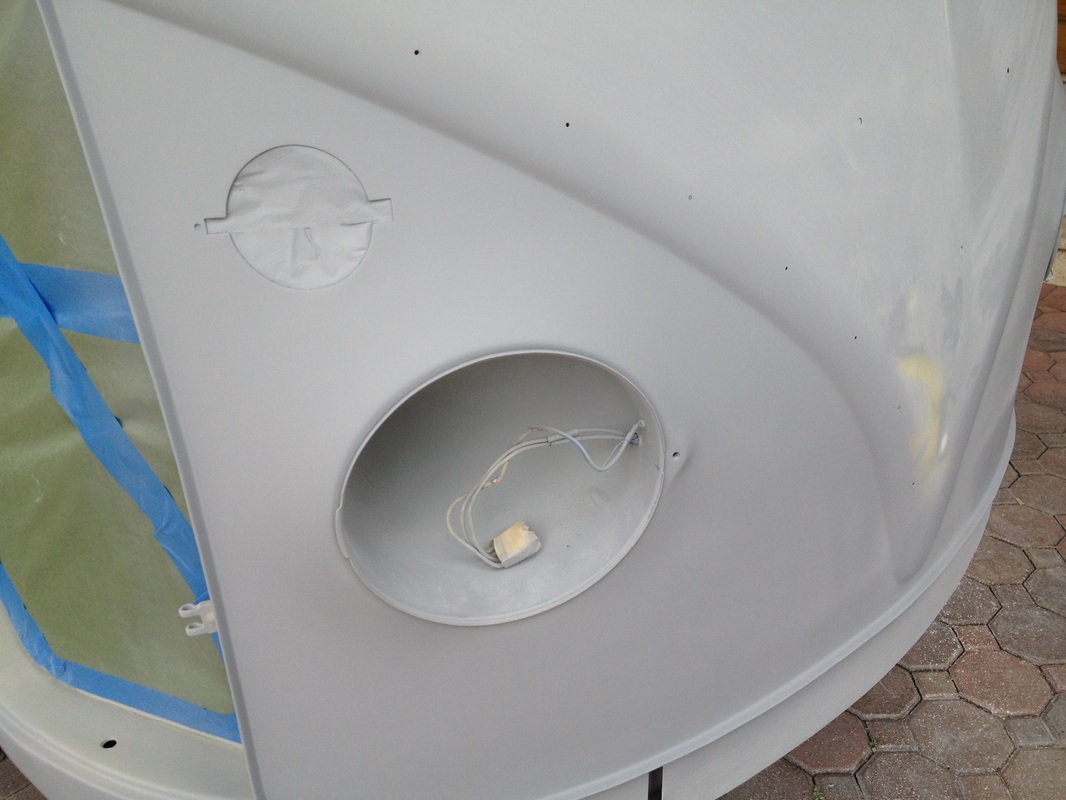
Ready for 2K Primer
Had Victor take my bus to Ceasar's yard to spray the 2k primer. Spent the morning doing some last minute prepping and sanding to later apply the primer. Turned into an all day event but the results are amazing! Feels like a totally different bus already! Afterwards, we picked up, loaded the bus back on the trailer, and took it back to the shop for final blocking.
Had Victor take my bus to Ceasar's yard to spray the 2k primer. Spent the morning doing some last minute prepping and sanding to later apply the primer. Turned into an all day event but the results are amazing! Feels like a totally different bus already! Afterwards, we picked up, loaded the bus back on the trailer, and took it back to the shop for final blocking.


Holidays
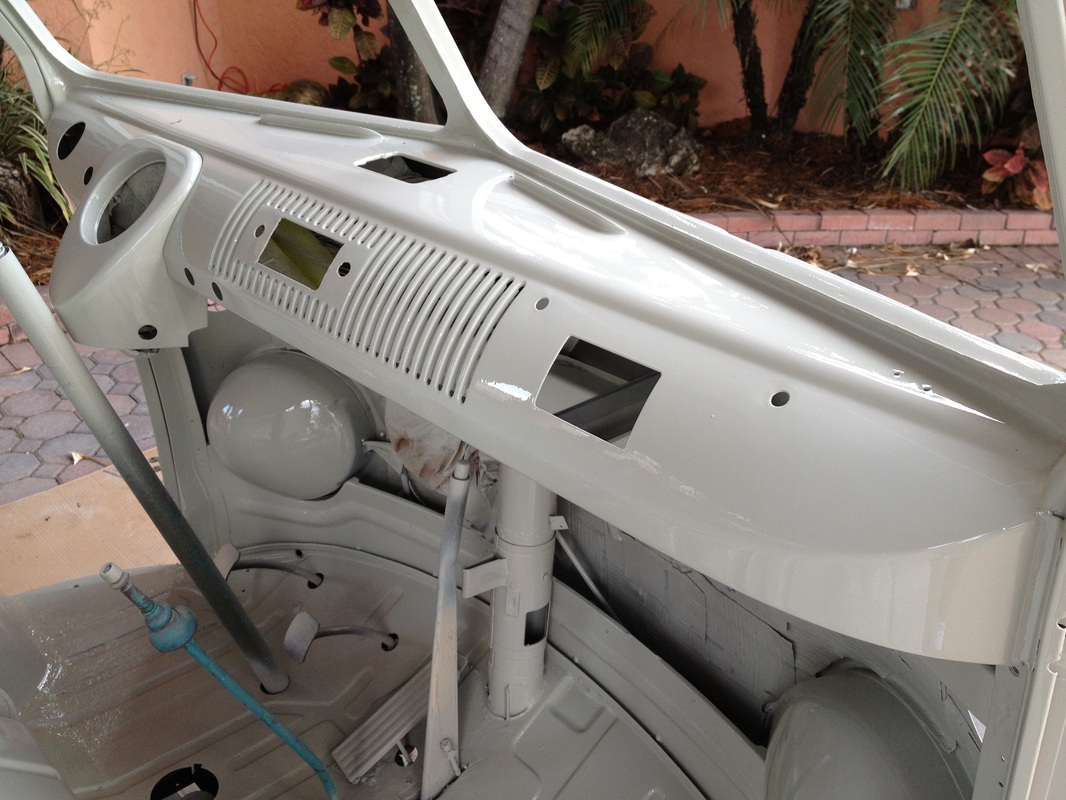
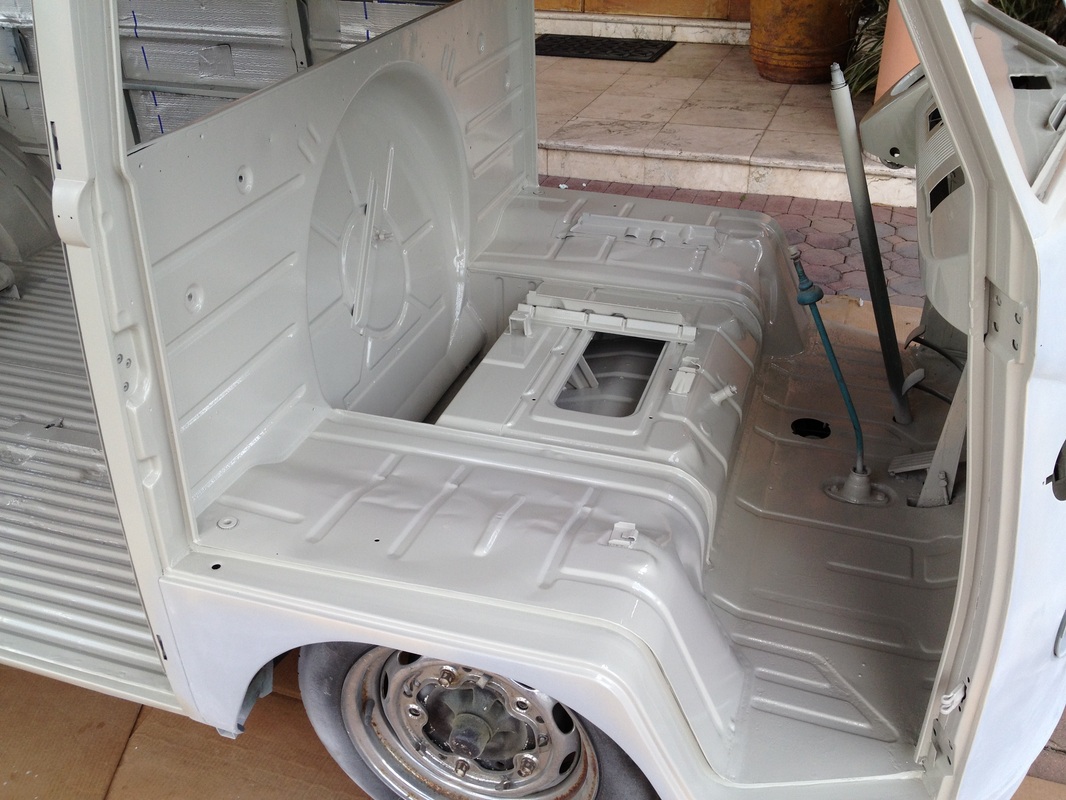
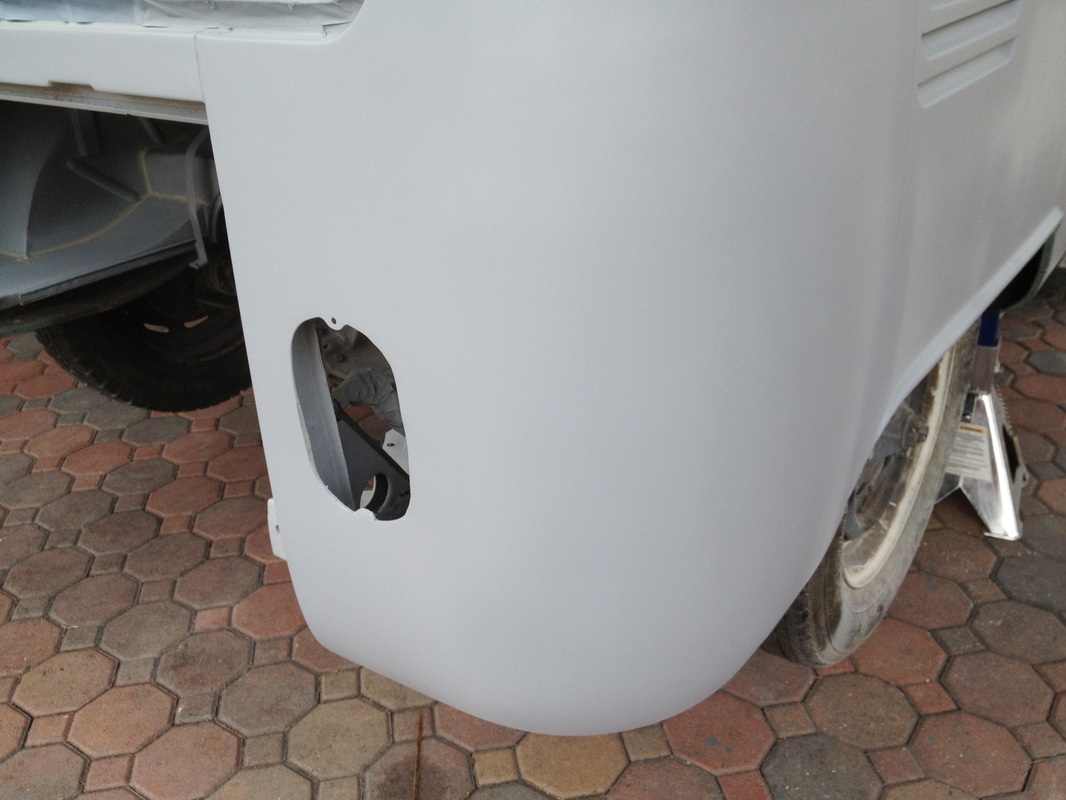
Not much progress due to the holidays but Tio finally got some minor bodywork done we noticed while spraying the primer. He blocked and sanded the bus smooth! Gonna wet sand one more time before paint on exterior. Not worried about it right now since it will get some overspray from the interior. Plans are to do the interior first, tape up and spray the top color, then tape up again and do the bottom color and engine compartment. Still need to sand the dash smooth, especially around the grills. I want that area to be flawless! Seam sealed the front floors, cargo area, and engine compartment.
Not much progress due to the holidays but Tio finally got some minor bodywork done we noticed while spraying the primer. He blocked and sanded the bus smooth! Gonna wet sand one more time before paint on exterior. Not worried about it right now since it will get some overspray from the interior. Plans are to do the interior first, tape up and spray the top color, then tape up again and do the bottom color and engine compartment. Still need to sand the dash smooth, especially around the grills. I want that area to be flawless! Seam sealed the front floors, cargo area, and engine compartment.
Out of shop
Bodywork is done!! Had my friend Ceasar once again load up the bus on a trailer and take to his house where it will be sprayed by him. We haven't decided where to spray it yet but I'm even willing to paint it out in his yard just to get it done! I can't wait for this be done!! A few days later, I went over and finished sanding the dash grills smooth. I also gave him the money to buy paint and supplies since he's good friends with the paint supply shop owner.
Bodywork is done!! Had my friend Ceasar once again load up the bus on a trailer and take to his house where it will be sprayed by him. We haven't decided where to spray it yet but I'm even willing to paint it out in his yard just to get it done! I can't wait for this be done!! A few days later, I went over and finished sanding the dash grills smooth. I also gave him the money to buy paint and supplies since he's good friends with the paint supply shop owner.

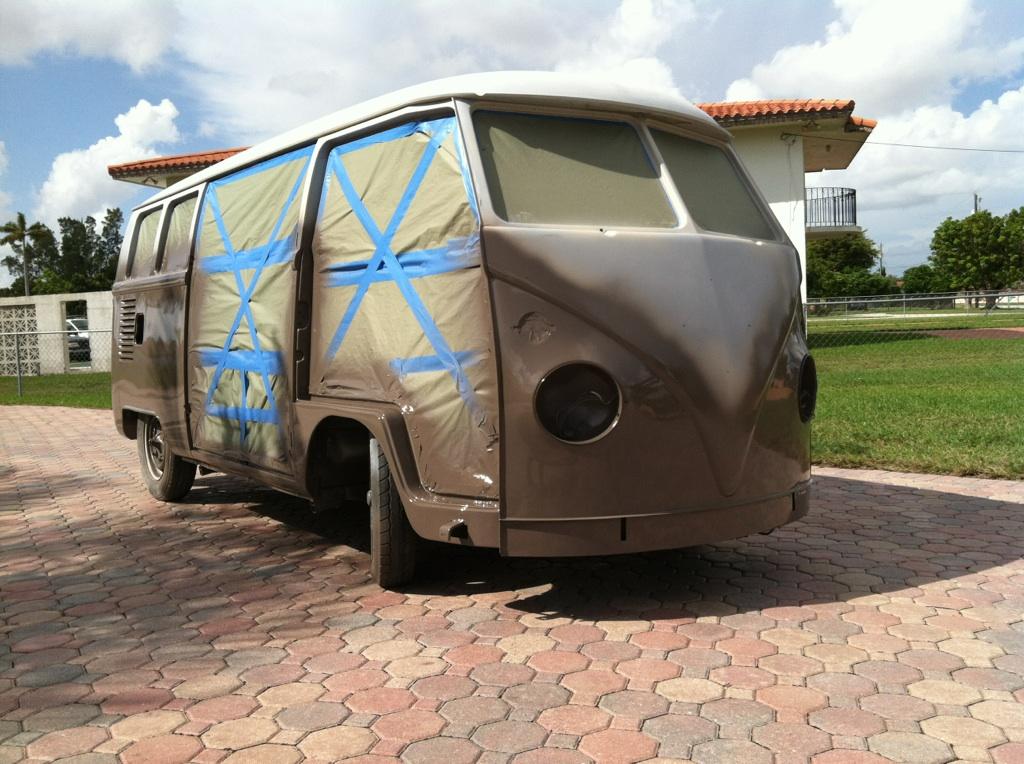
Paint Session 1
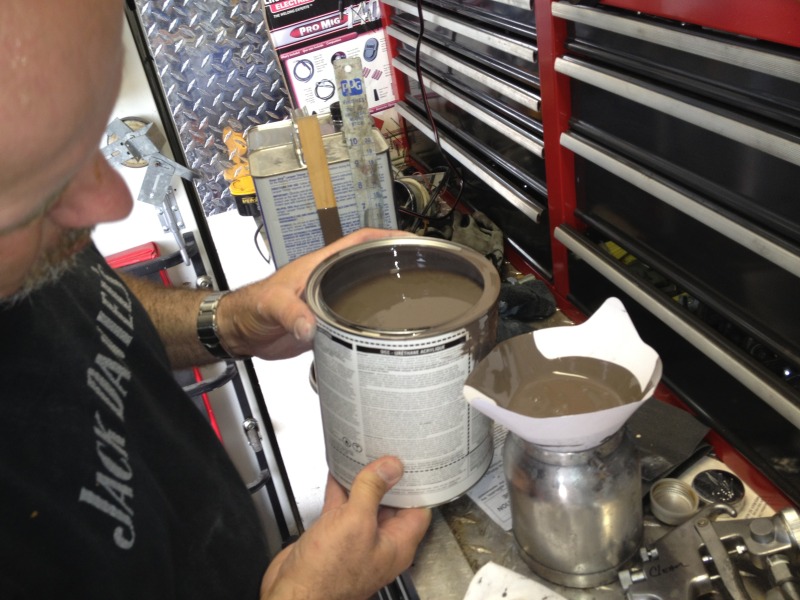
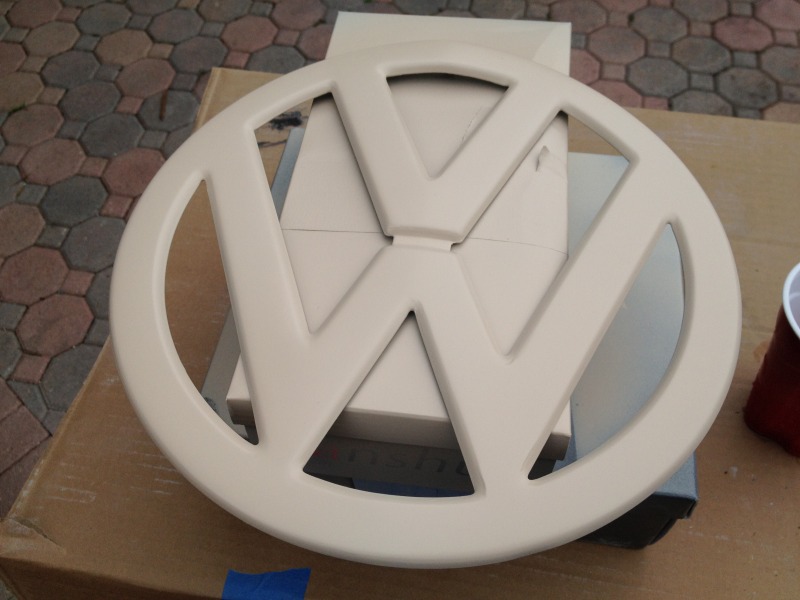
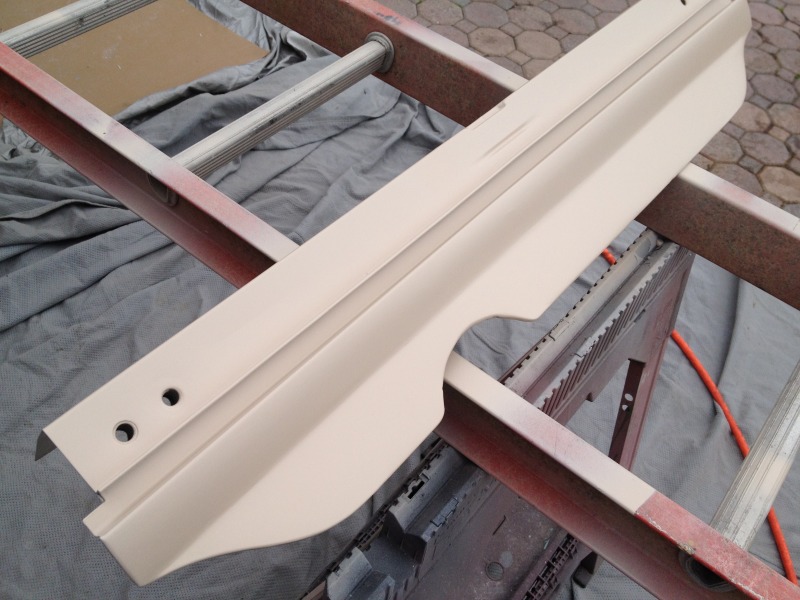
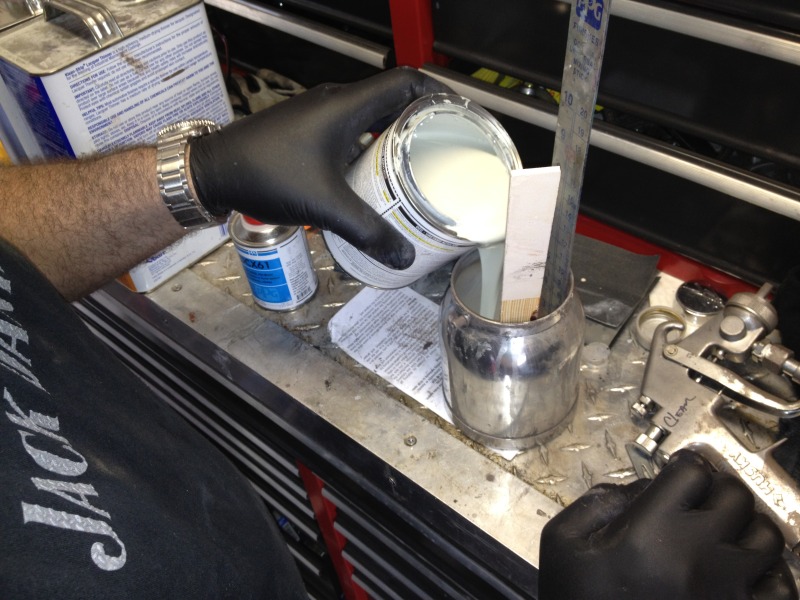
Ceasar calls me early morning of Super Bowl Sunday to spray the misc items like bumpers, gas tank, apron, door frame items, etc. I could have sprayed other misc stuff like hinges, gas door, vents, etc but I left them at home! Errr!! Anyway, we got a good head start with the painting. We decided to apply sealer which we tinted, then later applied the PPG Concept single stage Nutria Brown L573 and Beige Grey L472. Both are original Volkswagen colors from a '64 Type 3. Keeping the colors in the VW family and coincidentally the same year!
Ceasar calls me early morning of Super Bowl Sunday to spray the misc items like bumpers, gas tank, apron, door frame items, etc. I could have sprayed other misc stuff like hinges, gas door, vents, etc but I left them at home! Errr!! Anyway, we got a good head start with the painting. We decided to apply sealer which we tinted, then later applied the PPG Concept single stage Nutria Brown L573 and Beige Grey L472. Both are original Volkswagen colors from a '64 Type 3. Keeping the colors in the VW family and coincidentally the same year!

Paint Session 2
After a 2 week hiatus, we made plans for Sunday of Presidents' Day weekend to spray the interior and backsides of the removables. We set up our "workstation" and began the prep process to seal and paint. While Ceasar prepped the bus interior, I went ahead and prepped the removables. Our friend Victor swung by and helped with the prep as well. Thanks to Ceasar for all his hard work! He's really making a transformation on this bus I thought I'd never witness!
After a 2 week hiatus, we made plans for Sunday of Presidents' Day weekend to spray the interior and backsides of the removables. We set up our "workstation" and began the prep process to seal and paint. While Ceasar prepped the bus interior, I went ahead and prepped the removables. Our friend Victor swung by and helped with the prep as well. Thanks to Ceasar for all his hard work! He's really making a transformation on this bus I thought I'd never witness!


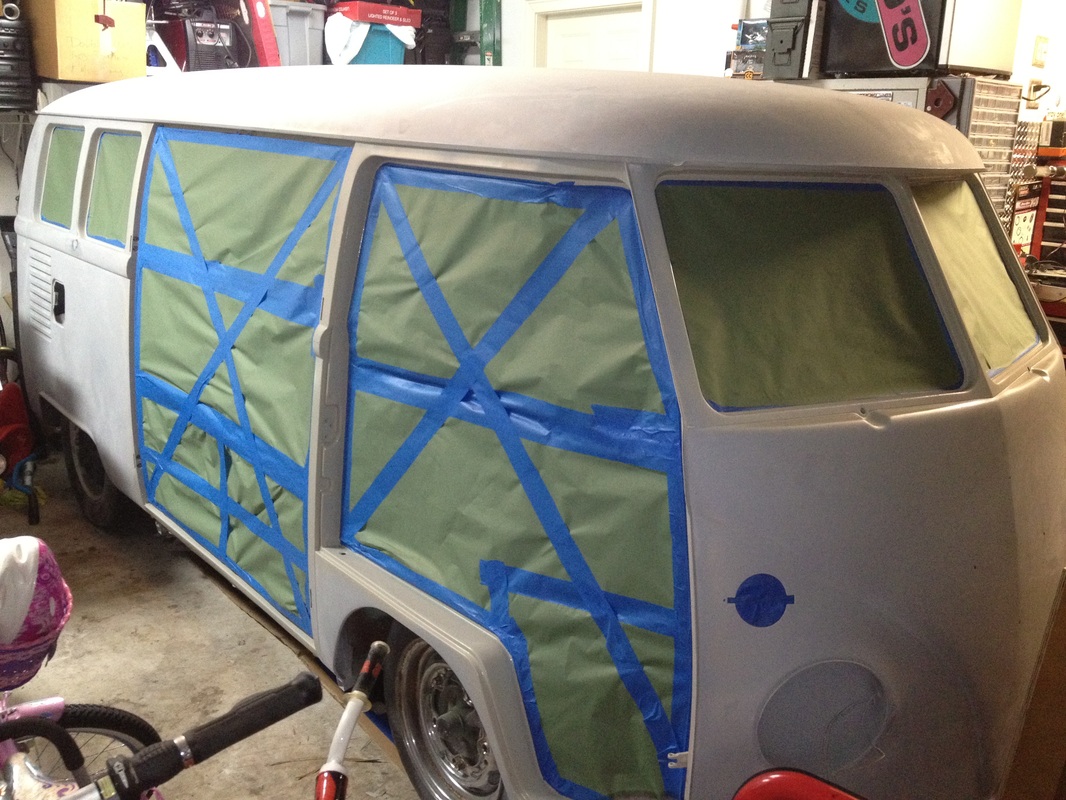
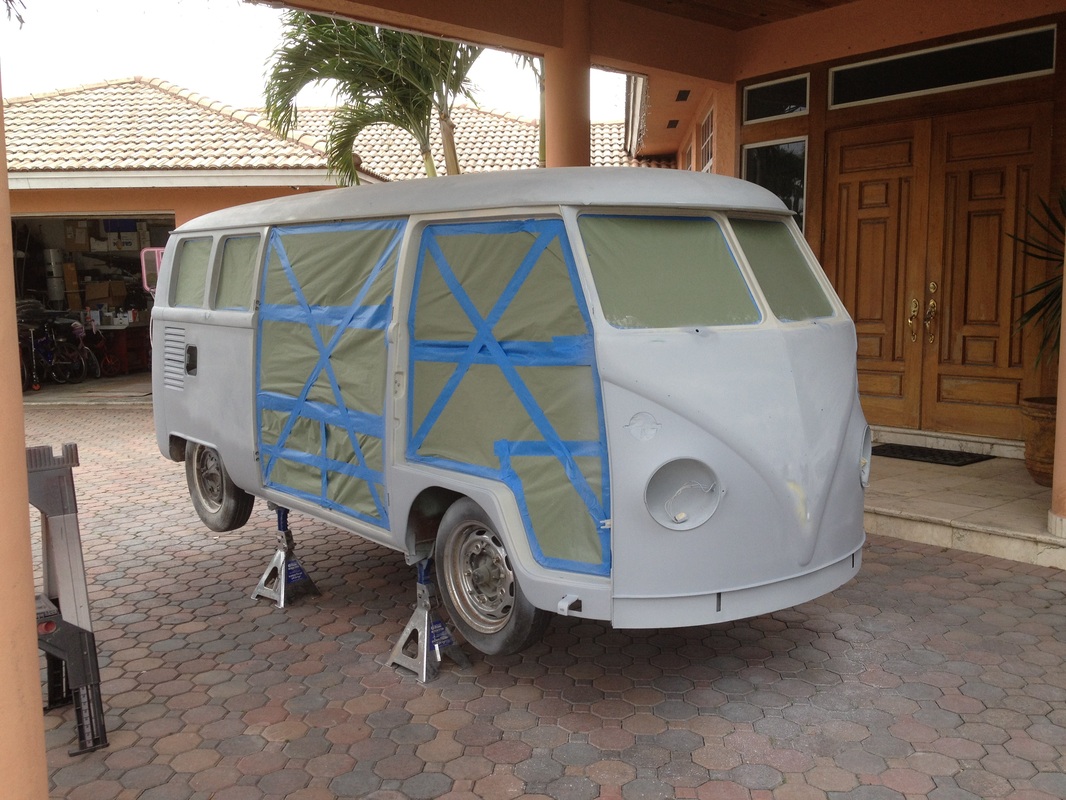
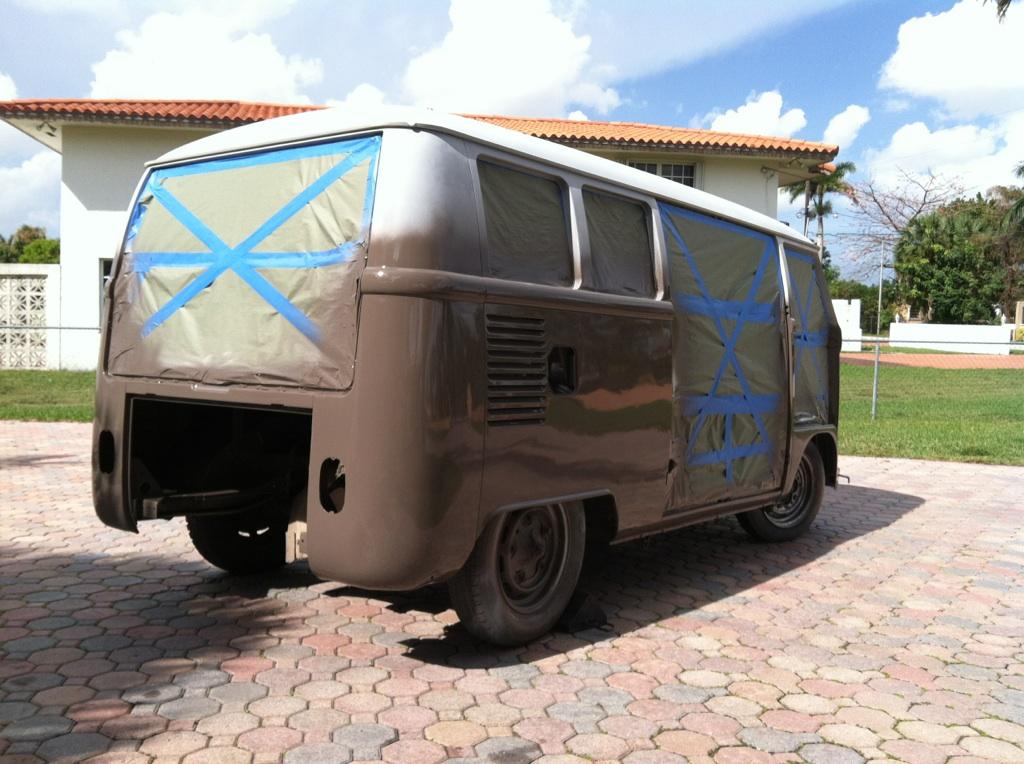
Paint Session 3
No paint this weekend but did spend some hours taping up the bus and removables. Plans are to spray engine compartment and bottom half next. Then spray top side and roof at a later time. Baby steps but I can almost see the end!!
No paint this weekend but did spend some hours taping up the bus and removables. Plans are to spray engine compartment and bottom half next. Then spray top side and roof at a later time. Baby steps but I can almost see the end!!


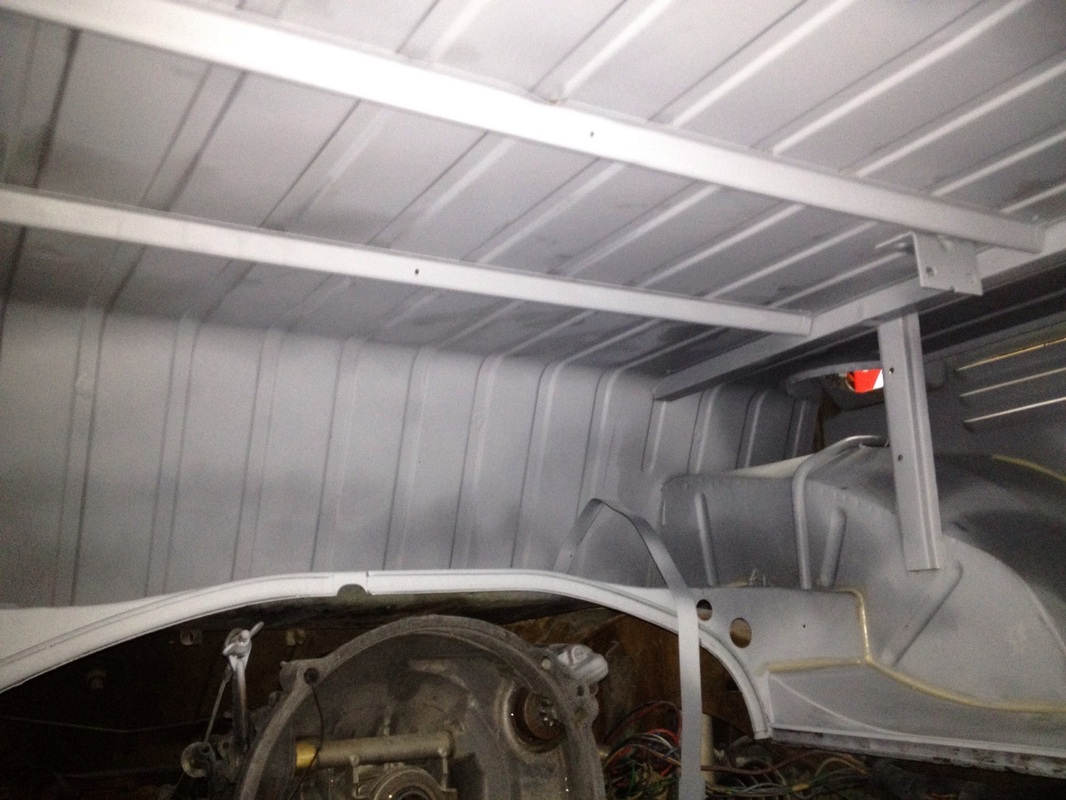
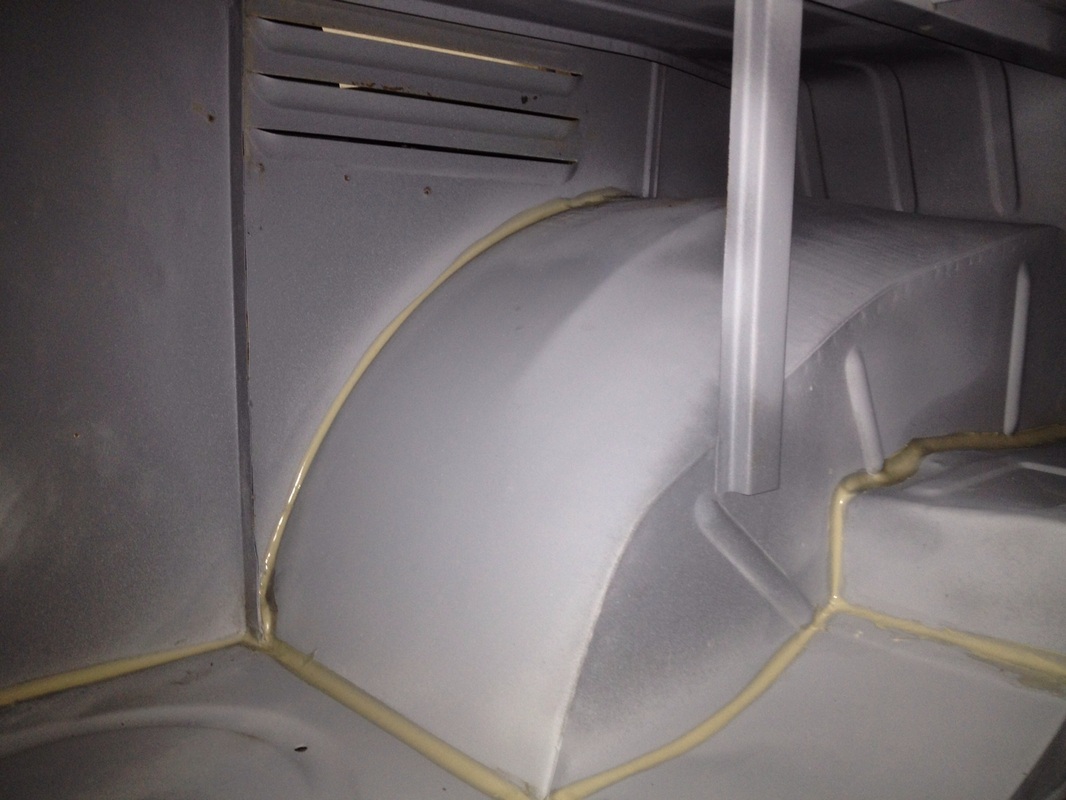
Engine Compartment Prep
Finally got the engine compartment ready for paint. This area was stripped before and had been previously sprayed with epoxy primer. Ran the bus like that for a while, so it had some oil mist residue and dirt that needed to be addressed before paint. Degreased and scrubbed the whole engine compartment, dried it all up and later seam-sealed all the edges.
Finally got the engine compartment ready for paint. This area was stripped before and had been previously sprayed with epoxy primer. Ran the bus like that for a while, so it had some oil mist residue and dirt that needed to be addressed before paint. Degreased and scrubbed the whole engine compartment, dried it all up and later seam-sealed all the edges.

More Bodywork Detail!
We were about to spray the bottom color when we realized the finish on the bodywork wasn't up to snuff! It was never intended to be a "perfect" restoration, but the imperfections were just too much! So we ended up going over the bottom half again! I'm glad we did cause the end result will be much sweeter. We'll have to go over the top half before painting too!
We were about to spray the bottom color when we realized the finish on the bodywork wasn't up to snuff! It was never intended to be a "perfect" restoration, but the imperfections were just too much! So we ended up going over the bottom half again! I'm glad we did cause the end result will be much sweeter. We'll have to go over the top half before painting too!

Bottom Half Painted!
So...today to my surprise, I get several text messages of pics of my bus' bottom half painted from Ceasar! I call him and ask if he was in a painting mood. He replies to me, that since "I'm saying the progress of my bus depends on my friend's schedule, I took the day off from work and painted it." So my response was..."you're obviously reading the build thread!" Anyway, these are the pics he sent me and once again...thanks for everything Ceasar!!!
So...today to my surprise, I get several text messages of pics of my bus' bottom half painted from Ceasar! I call him and ask if he was in a painting mood. He replies to me, that since "I'm saying the progress of my bus depends on my friend's schedule, I took the day off from work and painted it." So my response was..."you're obviously reading the build thread!" Anyway, these are the pics he sent me and once again...thanks for everything Ceasar!!!

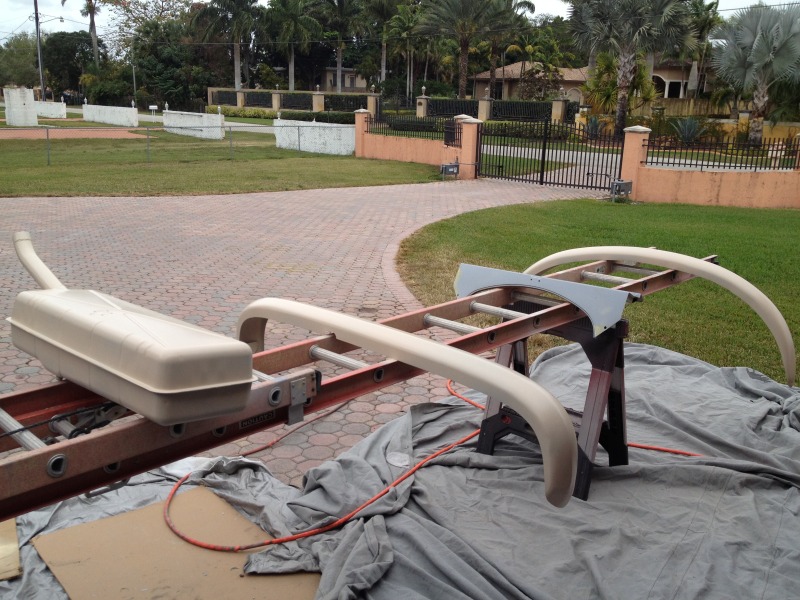
Frames
Bought some new popout frames because the "new" ones I had powercoated years ago were all rusted beneath the powdercoating! This time around I decided to have them painted instead. Also stripped the front door frames and prepped everything for paint.
Bought some new popout frames because the "new" ones I had powercoated years ago were all rusted beneath the powdercoating! This time around I decided to have them painted instead. Also stripped the front door frames and prepped everything for paint.
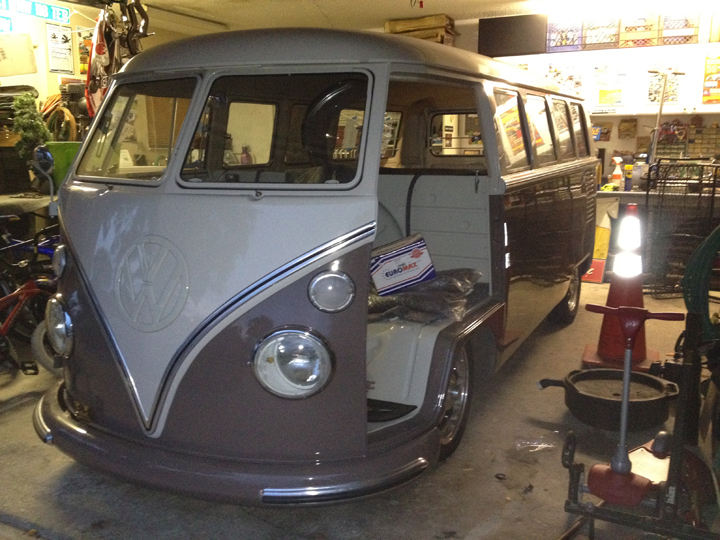
Paint is DONE!!
I'm on vacation in North Carolina and my buddy Ceasar again takes the day off to finish the rest of the paint! I get the following pics via text. I can't wait to see it in person but the pics look killer!!
I'm on vacation in North Carolina and my buddy Ceasar again takes the day off to finish the rest of the paint! I get the following pics via text. I can't wait to see it in person but the pics look killer!!

Headliner
Once all the paint was finalized, Ceasar convinced me to take the bus straight to upholstery shop to get the headliner done first. Since it was near his house and I needed the headiner in anyway to get the windoes and seals in...I agreed. Ceasar took the bus over the next day to get the headliner installed by the interior guy Benny! Looks great and economical! The guy actually gave the hinge area a finished look which I wasn't expecting. I will put some hinge covers on anyway.
Once all the paint was finalized, Ceasar convinced me to take the bus straight to upholstery shop to get the headliner done first. Since it was near his house and I needed the headiner in anyway to get the windoes and seals in...I agreed. Ceasar took the bus over the next day to get the headliner installed by the interior guy Benny! Looks great and economical! The guy actually gave the hinge area a finished look which I wasn't expecting. I will put some hinge covers on anyway.

Bus is Home!
Trailered the bus to the house for the first time in a while. Feels great to know she's sitting in the garage now! Left all the removable at Ceasar's to be picked up at a later date.
Trailered the bus to the house for the first time in a while. Feels great to know she's sitting in the garage now! Left all the removable at Ceasar's to be picked up at a later date.
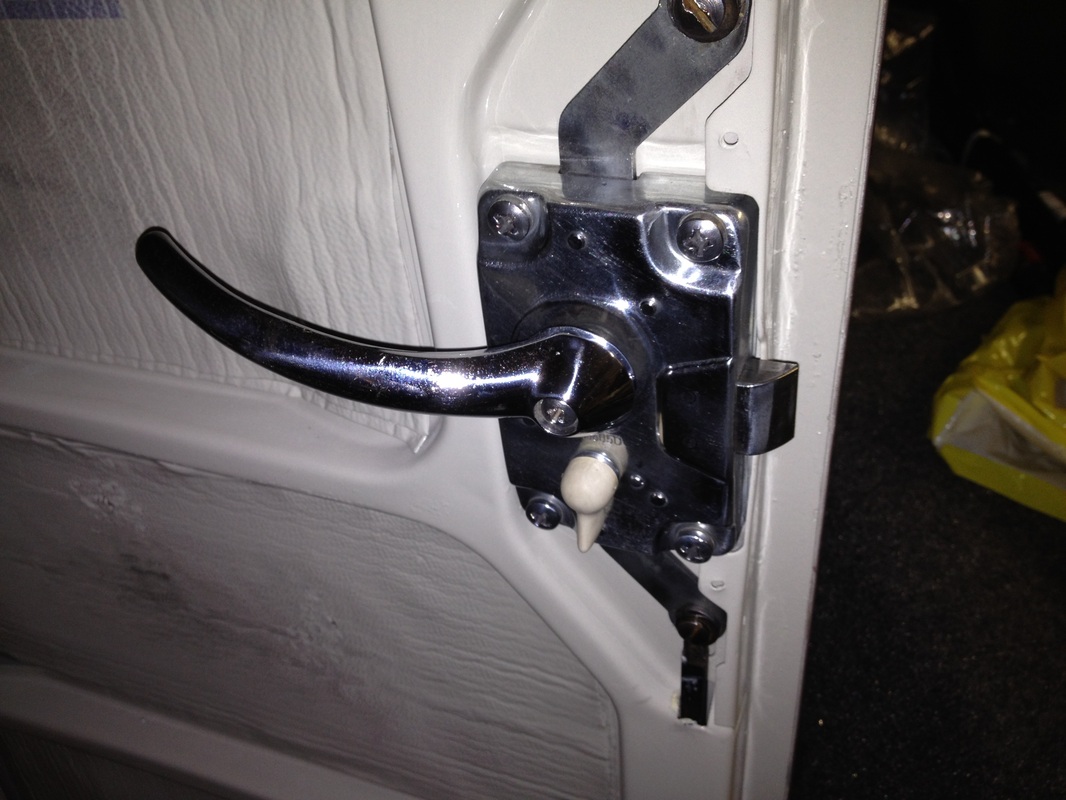
Saturday Build Day
After my daughters' soccer games, I began the process of putting it all back together. Started off with the cargo doors. Aligned them and set the gaps as good as I could. Then installed the cargo door seals...that was a bear! Ended up shaving the backsides so they wouldn't make the doors bulge out and hyper-extend the hinges! Installed the cargo door mechs and polished the door mech as well. Finished installing the outside scraper seals to 4 of the 6 popouts. Installed them on the bus with some new long spoons! Put the safaris back in too.
After my daughters' soccer games, I began the process of putting it all back together. Started off with the cargo doors. Aligned them and set the gaps as good as I could. Then installed the cargo door seals...that was a bear! Ended up shaving the backsides so they wouldn't make the doors bulge out and hyper-extend the hinges! Installed the cargo door mechs and polished the door mech as well. Finished installing the outside scraper seals to 4 of the 6 popouts. Installed them on the bus with some new long spoons! Put the safaris back in too.
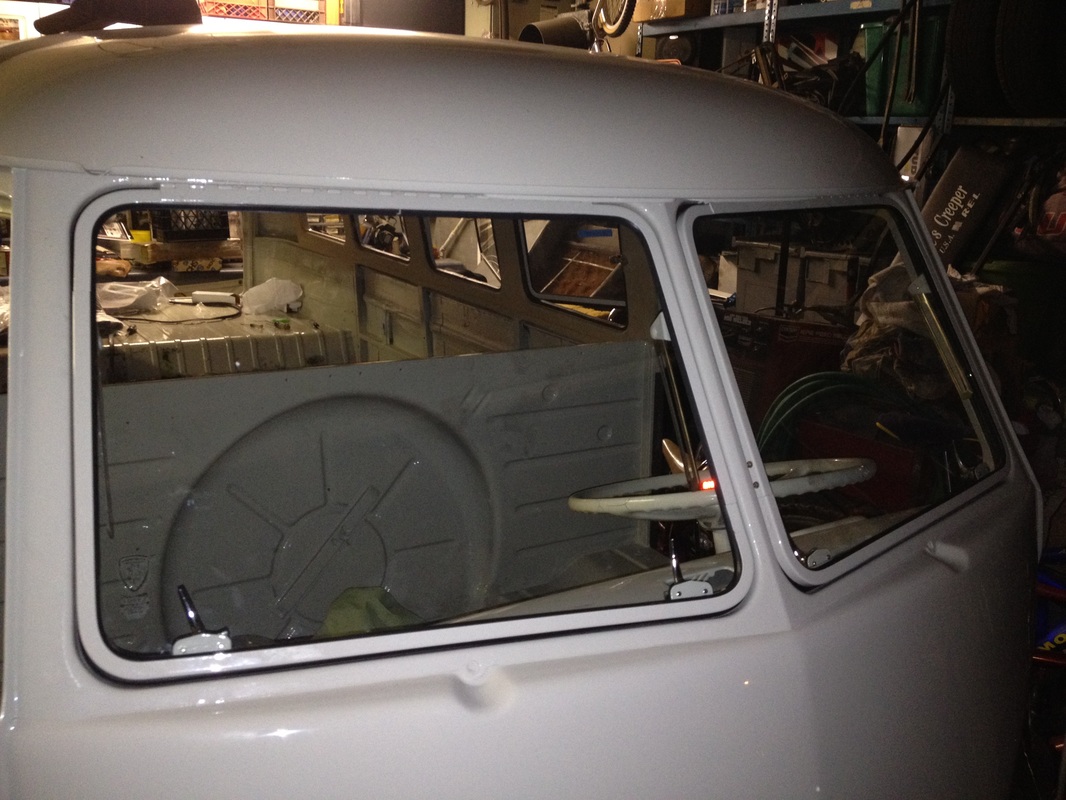
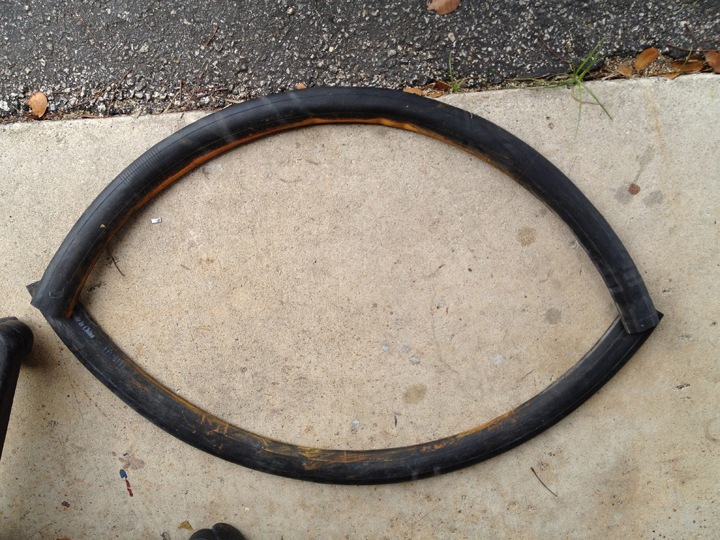
Vent Windows
Today I needed to press in the glass for the vent windows. I made a jig out of wood. I used an old bicycle tube as the seal and doubled it up to make it thicker. After I had everything done and mounted them on the door frames, while taking the pics I realized the drip pieces were on the wrong side! Took them all apart again, re-pressed and reinstalled them on the door frames. Door frames are now ready to be installed onto the doors!
Today I needed to press in the glass for the vent windows. I made a jig out of wood. I used an old bicycle tube as the seal and doubled it up to make it thicker. After I had everything done and mounted them on the door frames, while taking the pics I realized the drip pieces were on the wrong side! Took them all apart again, re-pressed and reinstalled them on the door frames. Door frames are now ready to be installed onto the doors!


Saturday Build Day 2
Spent most of the day polishing some of the deluxe trim. Didn't finish it all as I got tired of polishing so I moved on to other areas. Took apart and restored the speedo with new "gels." I actually used the colored plastic tabs that are used on file folders as the gels. Finished connecting the electrics on the dash that I had started during the week. Installed the rear tail lights. Polished and installed the deluxe bumper trims and inserts. Made a bumper bracket for the MVD club badge. Put the lights and turn signal lenses in. All I need is the deluxe trim to button up the front!
Off to the Ft. Lauderdale "Show N Shine" show tomorrow to hopefully pick up some stuff from the swaps and vendors, and to just relax!
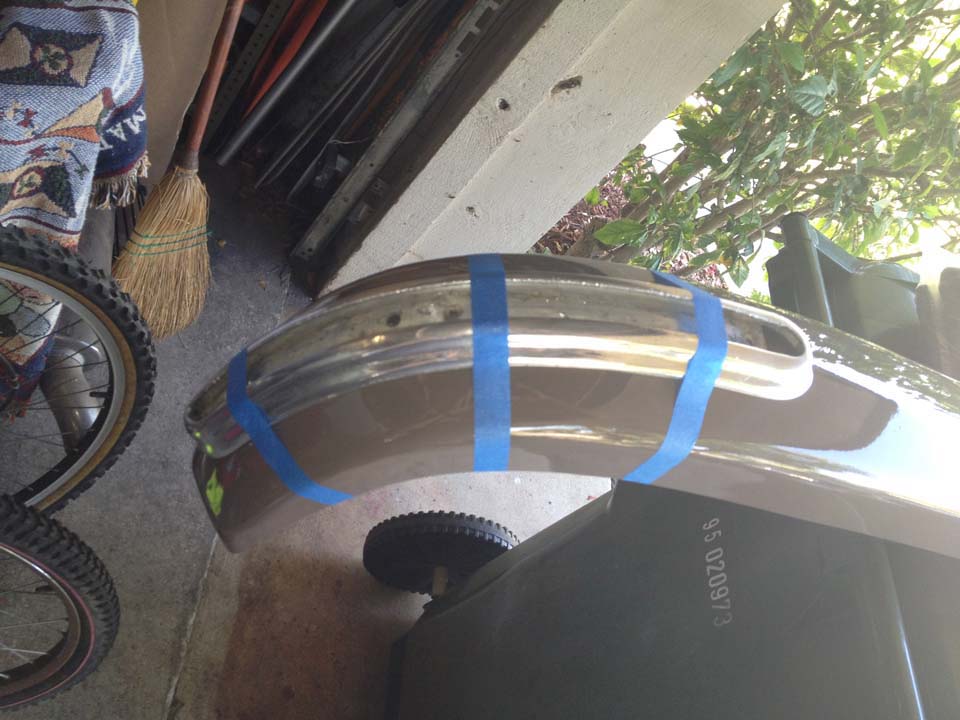
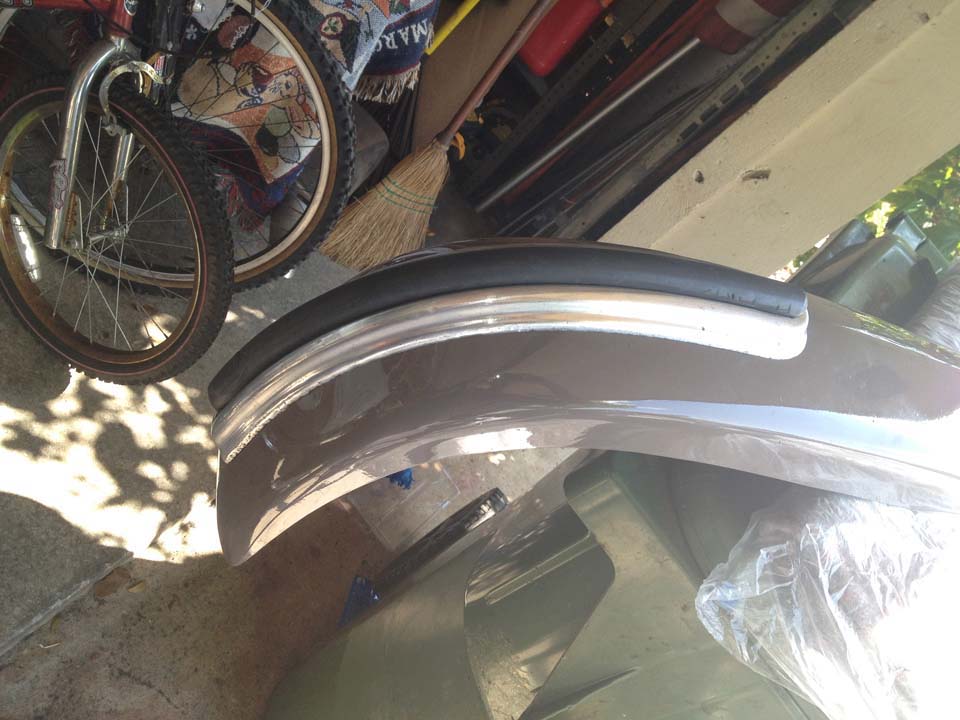
Tank, Rear Bumper Trim
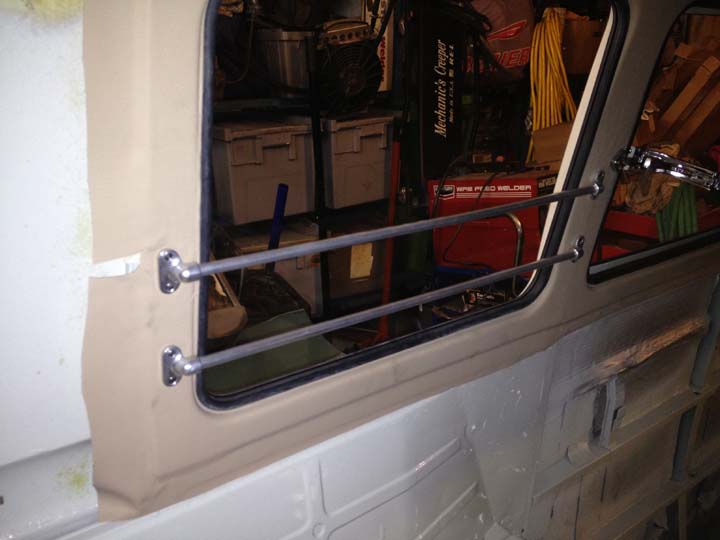
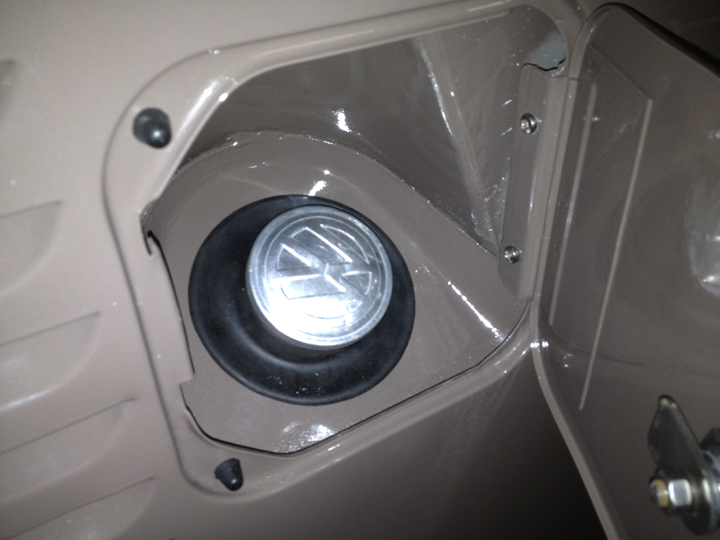
After I got back from the show, I installed the sending unit with a new seal and filter screen I picked up at the show. Installed gas tank and neck seal, and polished the gas cap. Mocked up the deluxe trim on the rear bumper to drill the holes. Once drilled, I polished the trim the best I could. Trim has deep pitting that I sanded down to eliminate most of it but wasn't going to be perfect. Polished both sides, installed with the OG black trim as well. Also polished the front nose deluxe trim and installed the side luggage bars.
After I got back from the show, I installed the sending unit with a new seal and filter screen I picked up at the show. Installed gas tank and neck seal, and polished the gas cap. Mocked up the deluxe trim on the rear bumper to drill the holes. Once drilled, I polished the trim the best I could. Trim has deep pitting that I sanded down to eliminate most of it but wasn't going to be perfect. Polished both sides, installed with the OG black trim as well. Also polished the front nose deluxe trim and installed the side luggage bars.


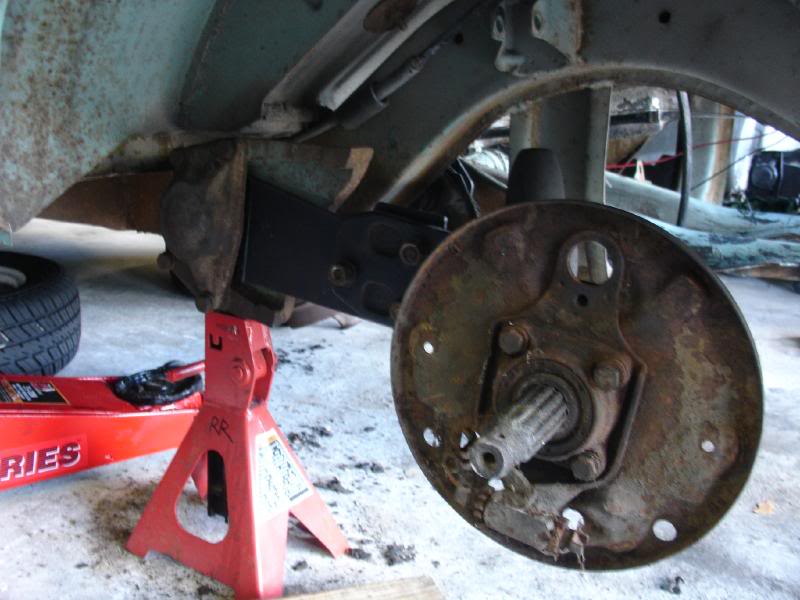
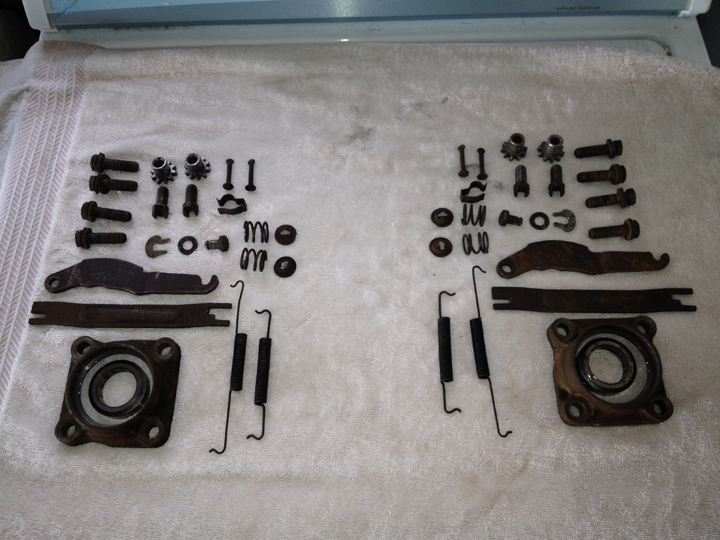
Rear Brakes
The rear driver side drum was locking up and the fluid in the reservoir had drained out, so off came the drums to look at what's going on. Once the drums were off, there was a whole mess up in there! The drum, shoes and mechs were all coated with grease! I guess I put too much grease in the bearing or I didn't put the grease seals on correctly but the damage was done! Time to disassemble, clean and fix it correctly! Cleaned up the rear brake parts. Sprayed the backing plates with some satin black for a clean look.
The rear driver side drum was locking up and the fluid in the reservoir had drained out, so off came the drums to look at what's going on. Once the drums were off, there was a whole mess up in there! The drum, shoes and mechs were all coated with grease! I guess I put too much grease in the bearing or I didn't put the grease seals on correctly but the damage was done! Time to disassemble, clean and fix it correctly! Cleaned up the rear brake parts. Sprayed the backing plates with some satin black for a clean look.

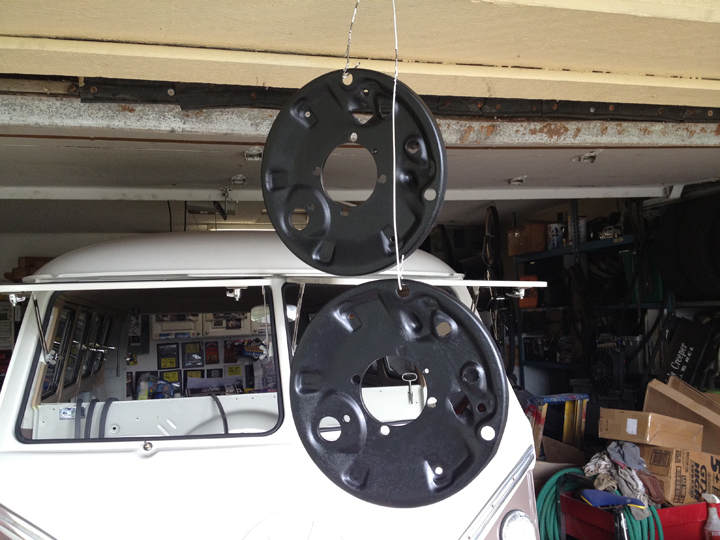
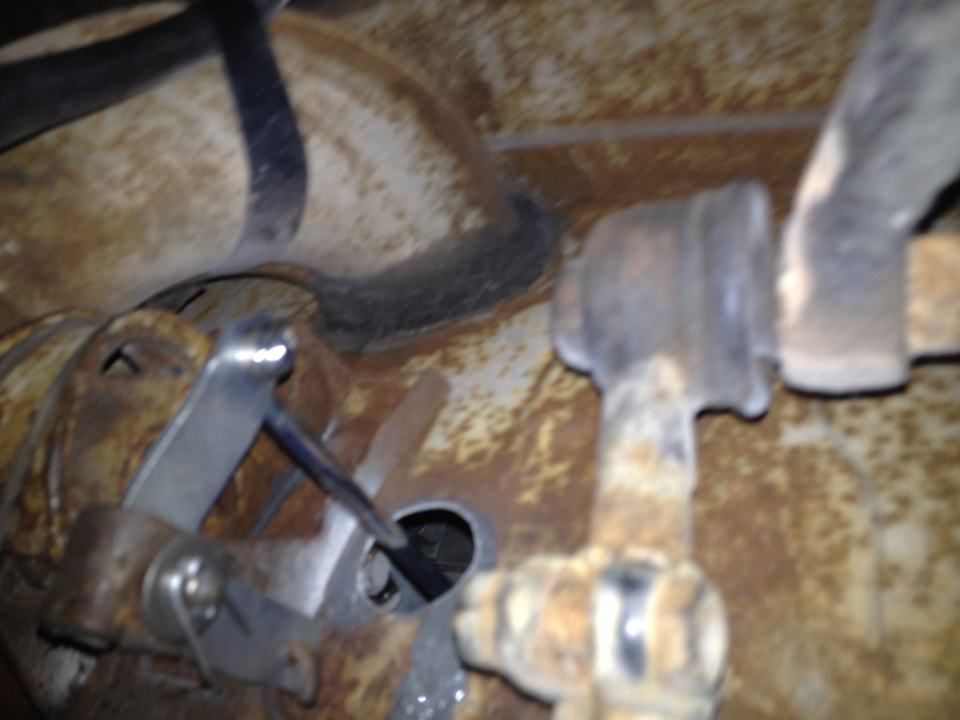
E-Brake Cables
Years ago when the IRS swap was done, I read up that the backing plates should be flipped and e-brake tube extenders should be installed to allow the e-brake cables to work. Never got them to work! I even cut them down some thinking that would work. After reading up on it, I realized I never had to flip the backing plates in the first place! This time around since everything needs to be replaced/cleaned, the backing plates were again flipped and correctly installed to finally get the ebrake cables to work. So...fitted and cut down the tension spring and added the extension tubes. Didn't have the shoes yet, so I moved on to something else.
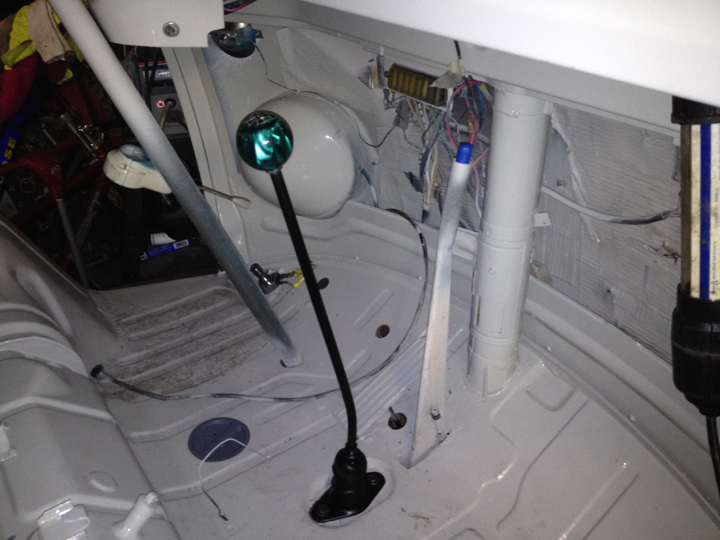
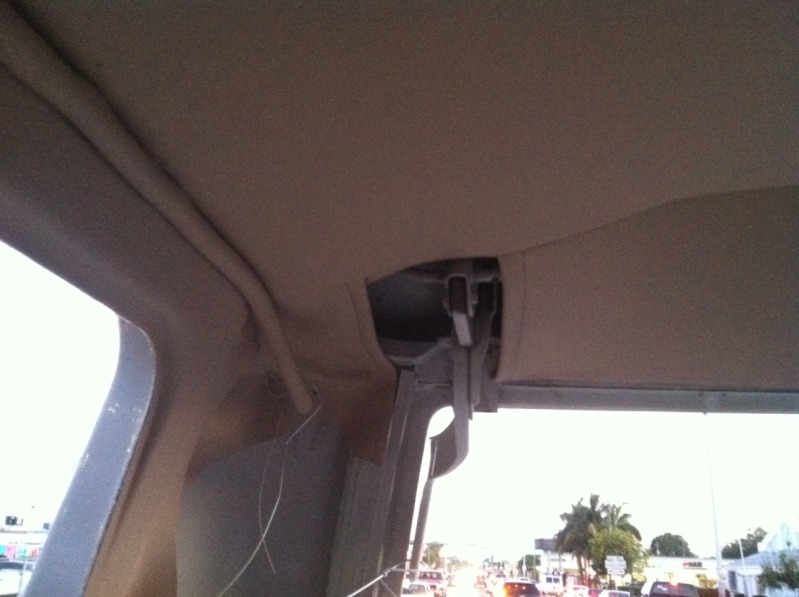
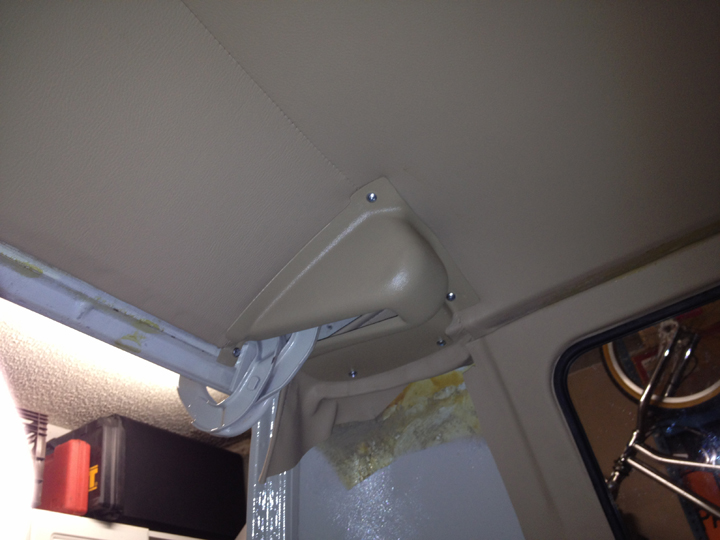
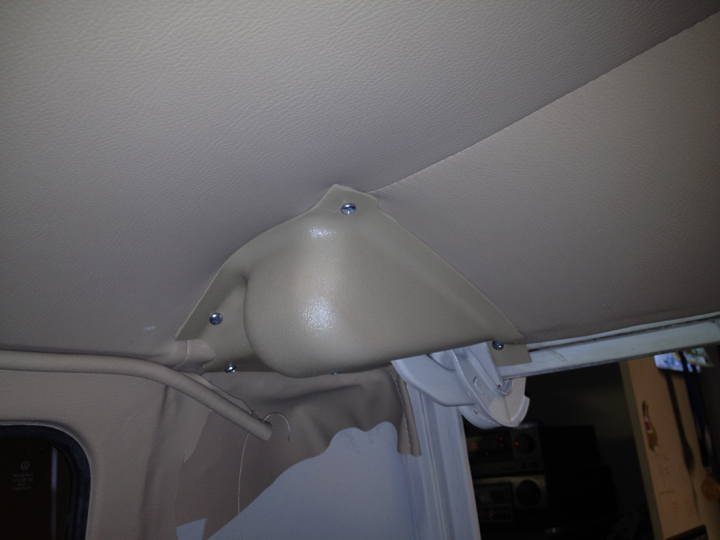
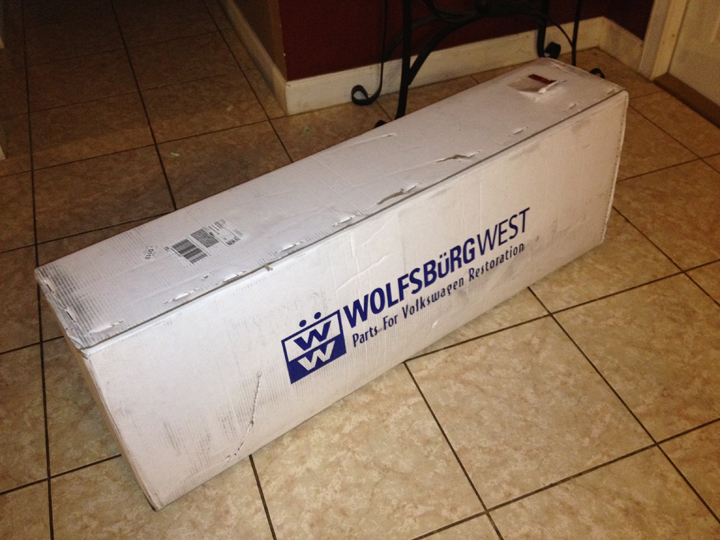
Installed the shifter and new accelerator linkage kit from Wolfsburg West. Still have to install the tranny, but the shifter feels nice and tight compared to how sloppy it was before and the accelerator pedal now sits like it should!! Planning on going with black pedals, shifter, steering column and e-brake handle. Once it's in, I'll determine if I like the black or not. Other option is to paint it all the same color as the dash. Oh yeah, the green shifter ball stays! It will be the only reminder of its former "green" history.
Years ago when the IRS swap was done, I read up that the backing plates should be flipped and e-brake tube extenders should be installed to allow the e-brake cables to work. Never got them to work! I even cut them down some thinking that would work. After reading up on it, I realized I never had to flip the backing plates in the first place! This time around since everything needs to be replaced/cleaned, the backing plates were again flipped and correctly installed to finally get the ebrake cables to work. So...fitted and cut down the tension spring and added the extension tubes. Didn't have the shoes yet, so I moved on to something else.
Installed the shifter and new accelerator linkage kit from Wolfsburg West. Still have to install the tranny, but the shifter feels nice and tight compared to how sloppy it was before and the accelerator pedal now sits like it should!! Planning on going with black pedals, shifter, steering column and e-brake handle. Once it's in, I'll determine if I like the black or not. Other option is to paint it all the same color as the dash. Oh yeah, the green shifter ball stays! It will be the only reminder of its former "green" history.

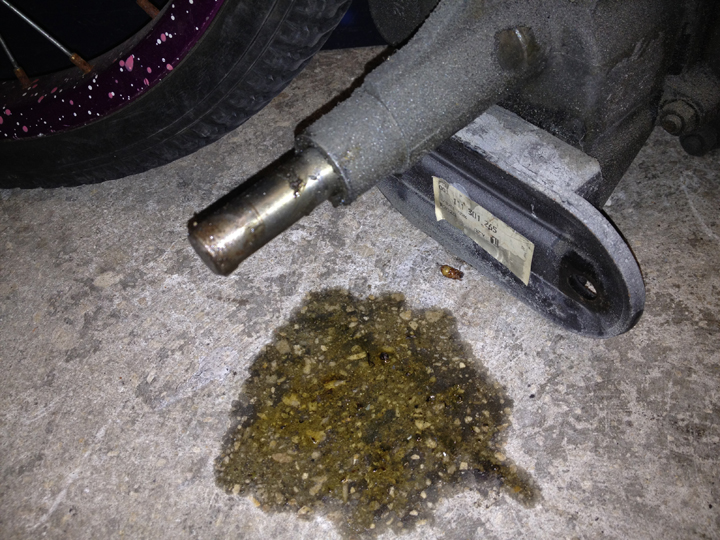
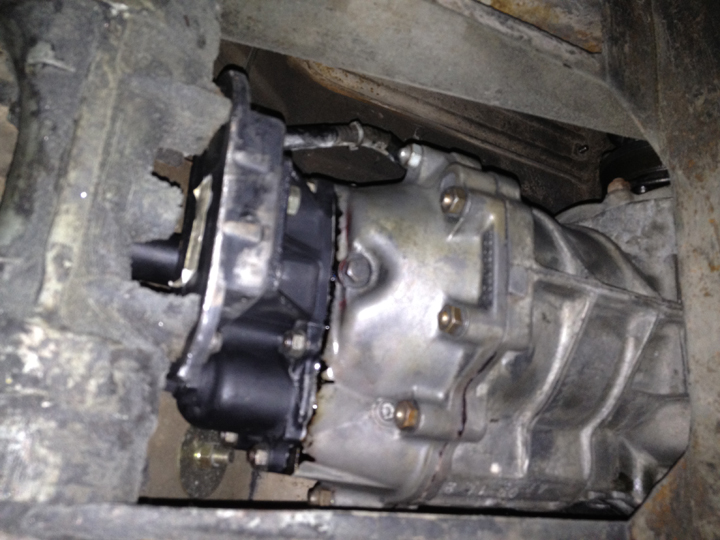
Rear Brakes / Tranny Install / E-Brake Handle
Finished the rear brake install with working ebrakes!! Woo-hoo!! First time in 5 years, the bus will have working ebrakes!! Tranny had been sitting for a few days and the tranny fluid was leaking out the hockey stick, so went and bought a new hockey stick seal. Began to press the old seal out and the nosecone cracked! Following day, went and bought a "newsed" cone from McNabs that had been taken off a Rancho rebuild. Went home and put the new nosecone on with a new seal. Installed tranny into bus and connected the shifter rod with new shifter bushings, grease seals for shifter tube, and new shifter coupler. Moved on to the e-brake lever. Tried every possible mean to get the ebrake lever out! Thought about heating up the pin but didn't want to bubble the paint on floor. So decided to chemically strip, clean and paint lever in bus instead. Came up with a plastic bag to contain the old paint/overspray from the stripper and paint. Worked out pretty good! El Arod, now you know why I had a blue button!
Finished the rear brake install with working ebrakes!! Woo-hoo!! First time in 5 years, the bus will have working ebrakes!! Tranny had been sitting for a few days and the tranny fluid was leaking out the hockey stick, so went and bought a new hockey stick seal. Began to press the old seal out and the nosecone cracked! Following day, went and bought a "newsed" cone from McNabs that had been taken off a Rancho rebuild. Went home and put the new nosecone on with a new seal. Installed tranny into bus and connected the shifter rod with new shifter bushings, grease seals for shifter tube, and new shifter coupler. Moved on to the e-brake lever. Tried every possible mean to get the ebrake lever out! Thought about heating up the pin but didn't want to bubble the paint on floor. So decided to chemically strip, clean and paint lever in bus instead. Came up with a plastic bag to contain the old paint/overspray from the stripper and paint. Worked out pretty good! El Arod, now you know why I had a blue button!


Oil Cooler / Pedals
Installed the external oil cooler under the frame rails, routed the hoses to engine compartment and finished the brake/clutch pedals with new floorboard seals.
Installed the external oil cooler under the frame rails, routed the hoses to engine compartment and finished the brake/clutch pedals with new floorboard seals.
Hinge Covers
Although the upholstery guy made a finish to the hinge area, I wasn't too happy with it. Decided to use the plastic hinge covers from WCM. I found an aerosol can with a similar color at Lowes that was pretty close to the headliner color! Also picked up some new screws for the install. Before going in to work, I cleaned the plastics well and lightly sprayed layers of paint til it covered. Let it sit to dry all day and installed them when I returned from work the same day. Major improvement! Now it looks finished.
Although the upholstery guy made a finish to the hinge area, I wasn't too happy with it. Decided to use the plastic hinge covers from WCM. I found an aerosol can with a similar color at Lowes that was pretty close to the headliner color! Also picked up some new screws for the install. Before going in to work, I cleaned the plastics well and lightly sprayed layers of paint til it covered. Let it sit to dry all day and installed them when I returned from work the same day. Major improvement! Now it looks finished.
Rubber Mats
Placed an order last week from Wolfsburg West for my rubber mats and other misc stuff. Come home from work today and it was like Christmas! Couldn't wait to lay the mats down to see how they look in the bus! The quality in the rubber floor mats and pedestal mats is superb! I was very surprised how thick and heavy the cargo mat is.
Placed an order last week from Wolfsburg West for my rubber mats and other misc stuff. Come home from work today and it was like Christmas! Couldn't wait to lay the mats down to see how they look in the bus! The quality in the rubber floor mats and pedestal mats is superb! I was very surprised how thick and heavy the cargo mat is.

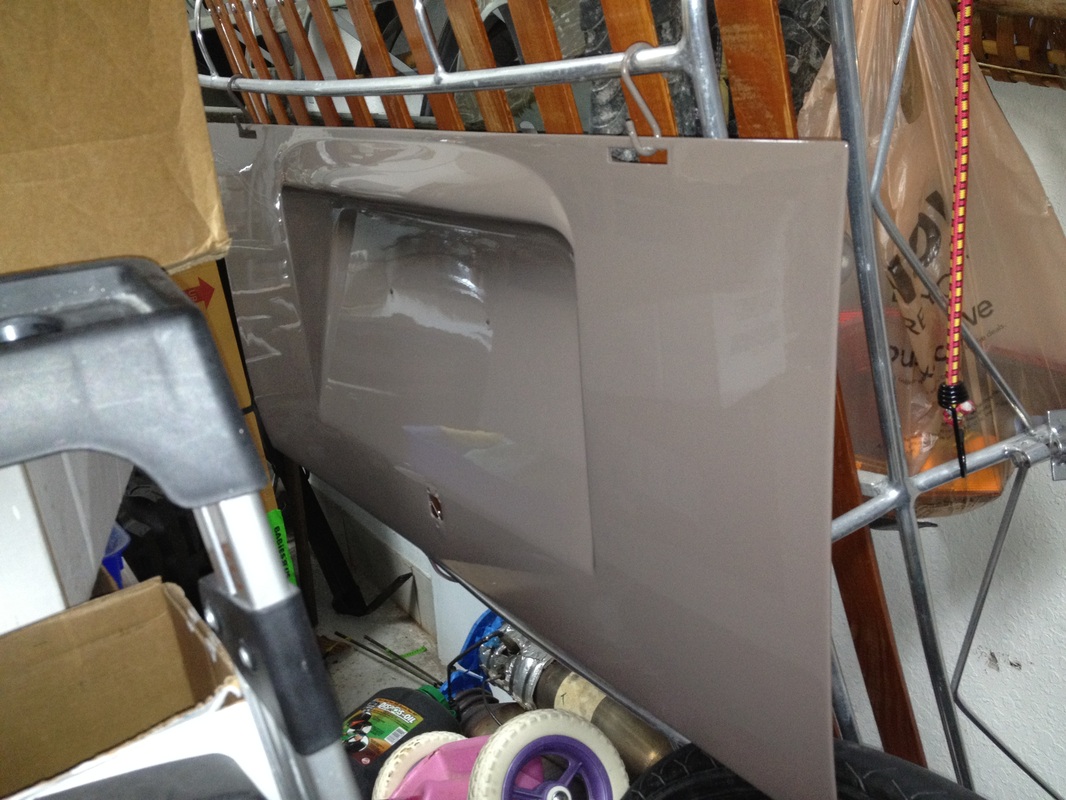
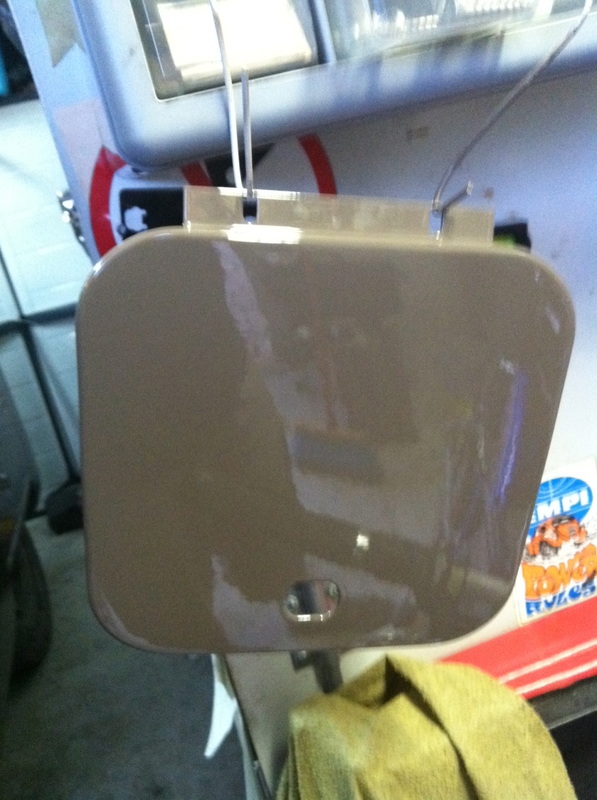
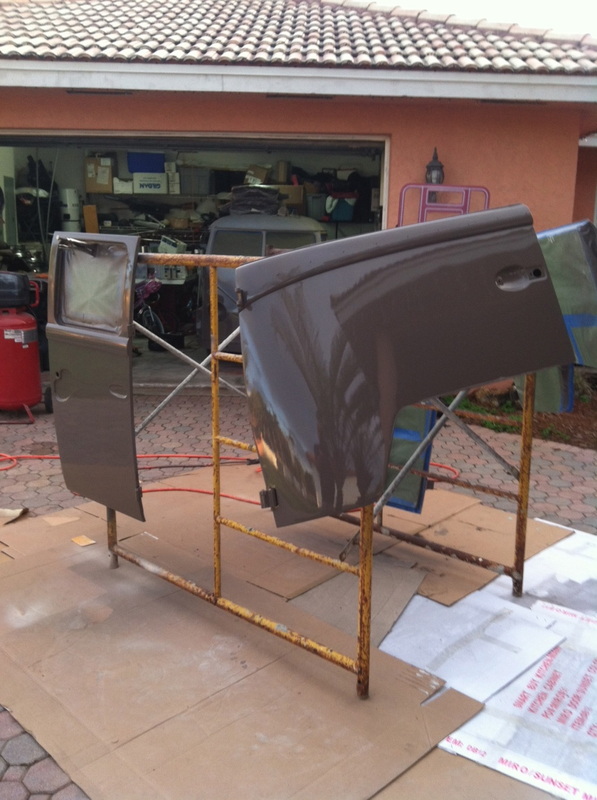
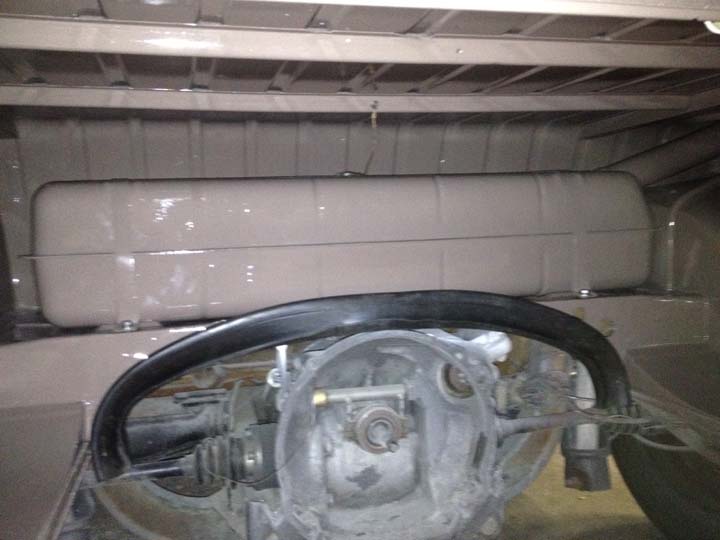
Rear Hatch and Engine Lid
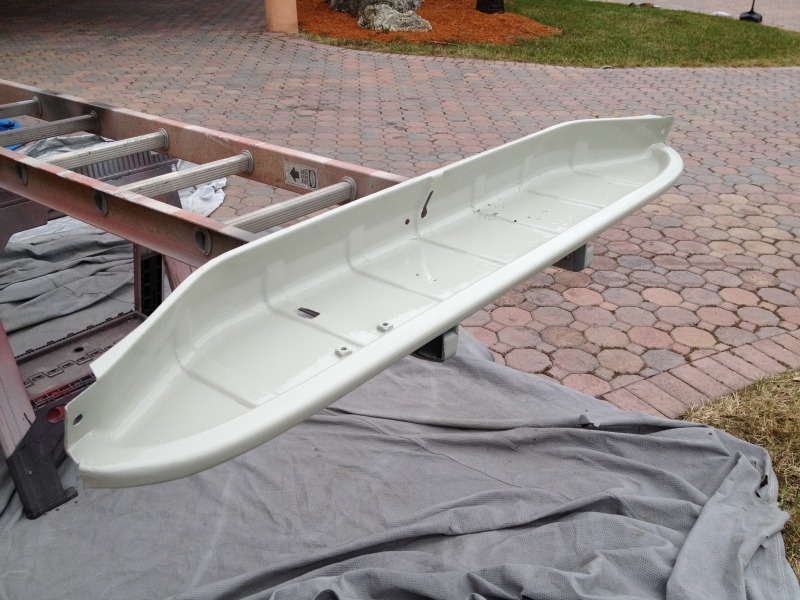
Been eating away on the build little by little. Trying to get all the little stuff done and out of the way! Finally got the rear hatch and engine lid on with the help of my brother Alex. Ceasar had dropped them off the day before. Installed rear glass, jail bars, engine seals, engine decklid seal, latches, license light lense and seal, and apron. Just need to polish and install deluxe trim with insert on hatch, install license plate bracket and connect license light and be done with the rear. Also threw on a pedestal mat up front to see how it looks.
Been eating away on the build little by little. Trying to get all the little stuff done and out of the way! Finally got the rear hatch and engine lid on with the help of my brother Alex. Ceasar had dropped them off the day before. Installed rear glass, jail bars, engine seals, engine decklid seal, latches, license light lense and seal, and apron. Just need to polish and install deluxe trim with insert on hatch, install license plate bracket and connect license light and be done with the rear. Also threw on a pedestal mat up front to see how it looks.


Fresh Air Flap Seal and Cover
Haven't done much lately since I've been feeling sick and the rain down here doesn't stop! I did drill out the rivets, cleaned up the flap and put together again with a new flap seal and rivets. Installed both the air flap seal and cover but forgot to take the after pics with the new seal. All I have are the before pics...Errr! Applied some oil to the rivets so the drill bit would bite and not screw up my bit!
Haven't done much lately since I've been feeling sick and the rain down here doesn't stop! I did drill out the rivets, cleaned up the flap and put together again with a new flap seal and rivets. Installed both the air flap seal and cover but forgot to take the after pics with the new seal. All I have are the before pics...Errr! Applied some oil to the rivets so the drill bit would bite and not screw up my bit!


Parcel Tray / Steering Box & Column
Installed the under dash parcel tray, speedo cable, rear hatch deluxe trim with insert, VOLKSWAGEN badge on hatch and license plate. Removed the steering box/column and stripped it to bare metal. Need to spray it black and reinstall. Finally with this down time I was able to get the front doors that were still at my friend's house. Next step is to strip the seats down to the frames to get blasted and painted.
Installed the under dash parcel tray, speedo cable, rear hatch deluxe trim with insert, VOLKSWAGEN badge on hatch and license plate. Removed the steering box/column and stripped it to bare metal. Need to spray it black and reinstall. Finally with this down time I was able to get the front doors that were still at my friend's house. Next step is to strip the seats down to the frames to get blasted and painted.


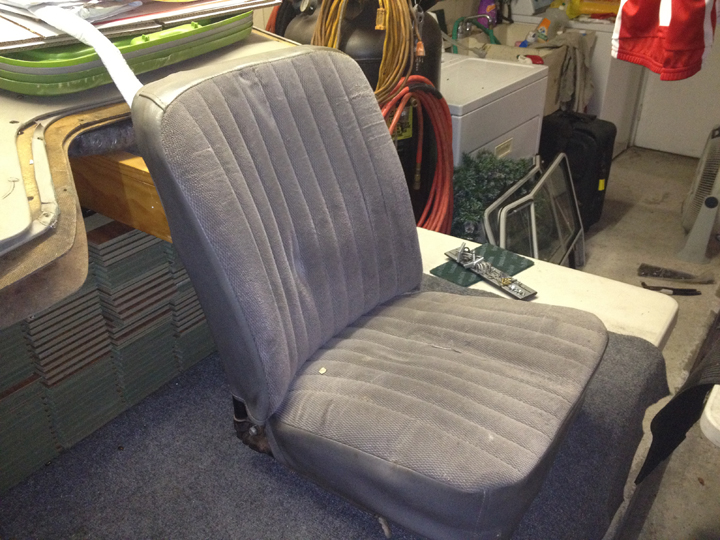
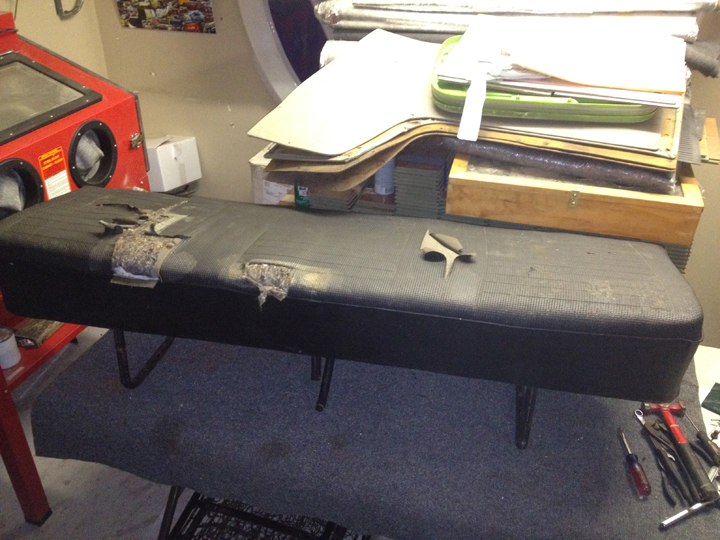
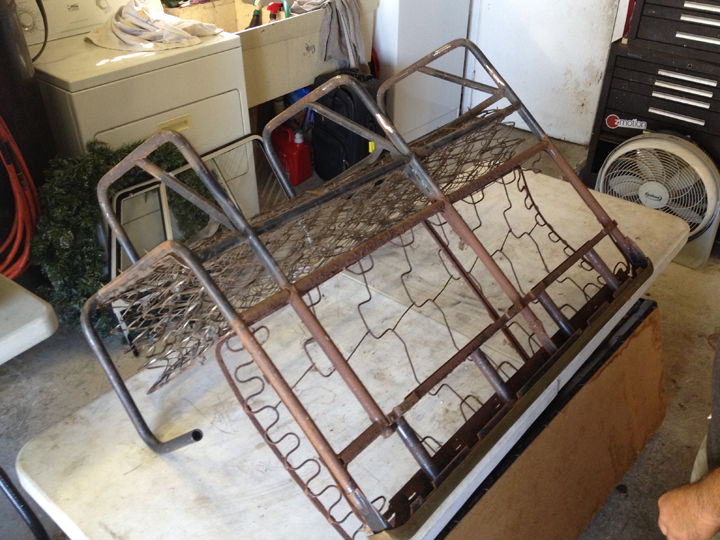
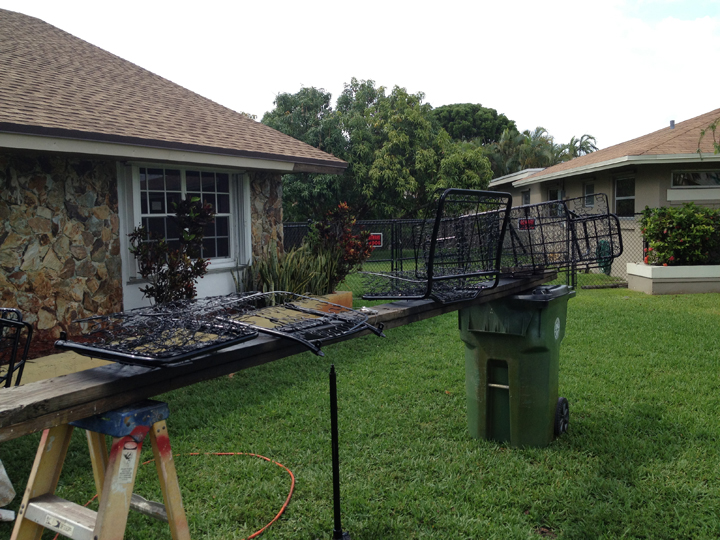
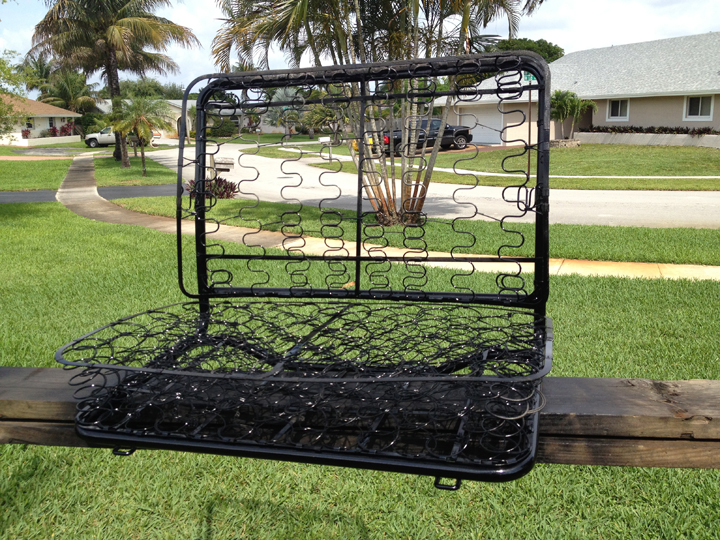
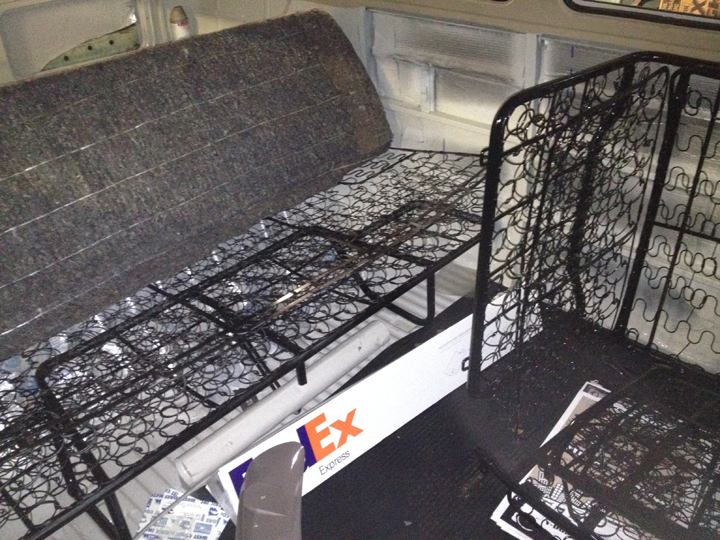
Seats
Got home from work today and began to strip all the seats to their frames. I was surprised to see what was uncovered! The seats were pretty comfortable but after seeing the "padding", I'm shocked it was! The middle bench had buildup of dirt mixed with the deteriorated horsehair. Found some broken springs that need attention. Should get all the frames blasted on Wednesday.
Got home from work today and began to strip all the seats to their frames. I was surprised to see what was uncovered! The seats were pretty comfortable but after seeing the "padding", I'm shocked it was! The middle bench had buildup of dirt mixed with the deteriorated horsehair. Found some broken springs that need attention. Should get all the frames blasted on Wednesday.

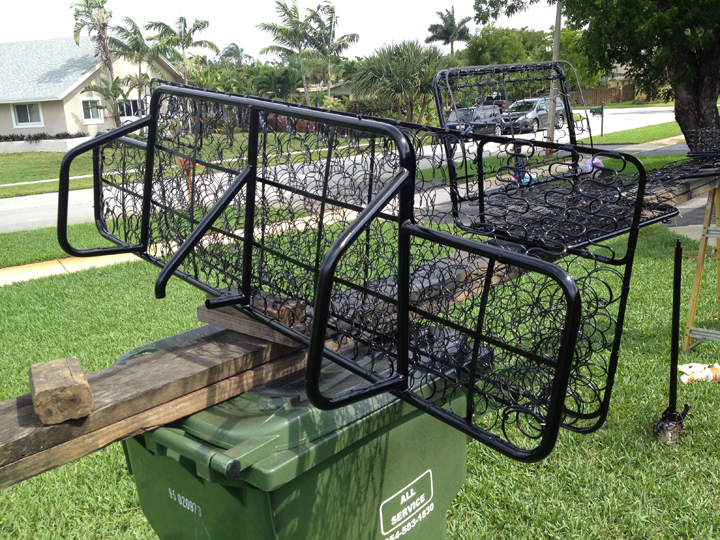
Seat Frames
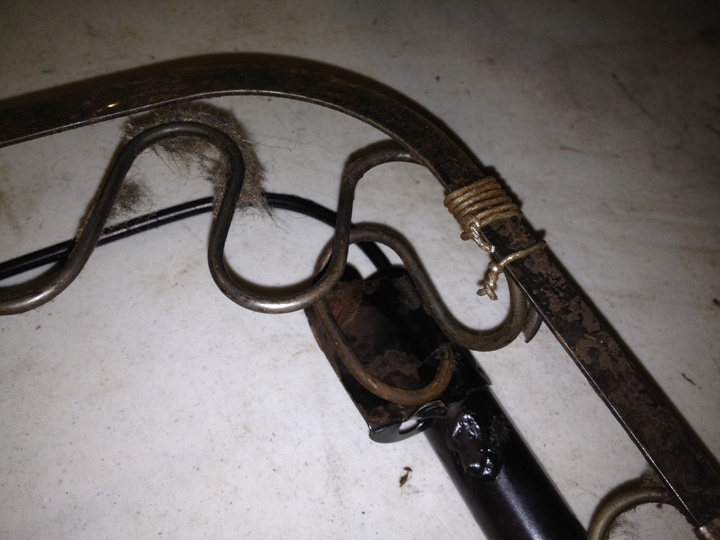
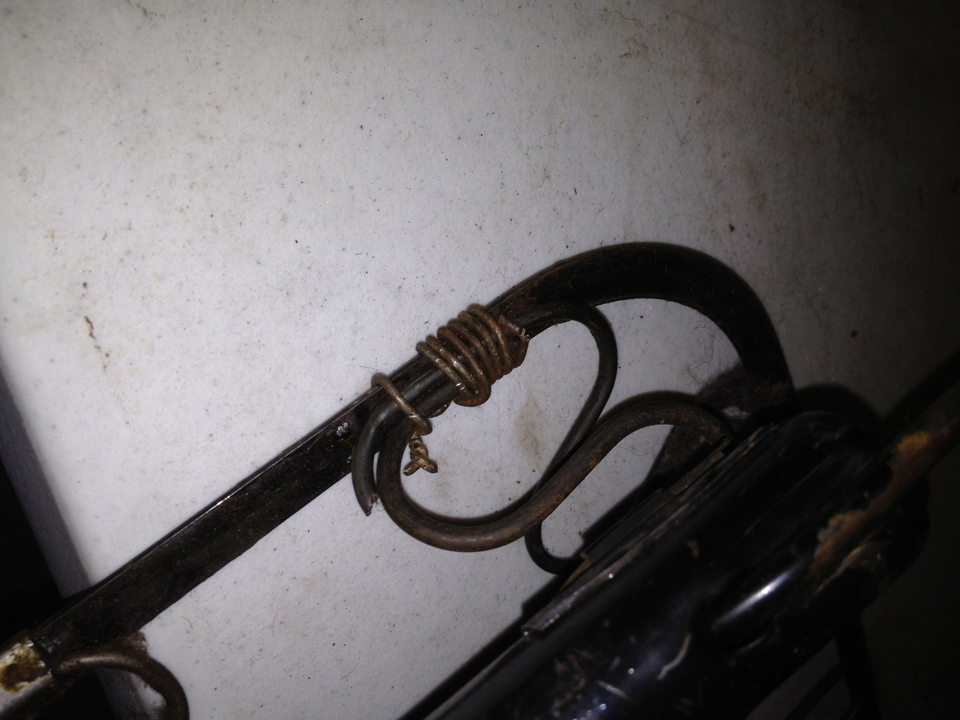
Finally got all the upholstery removed from the frames. The driver's seat backrest had both tension springs broken off at the top. I looked through some Beetle rear seats I had laying around in the shed and noticed I could use a part of the springs as a donor piece since it had the same curves I needed. Cut the tension springs out of the donor seat and installed them on my bus front seat backrest! I wanted to weld it on but decided to wire tie it instead. VW "clamps" the springs onto the spring frame, so I figured wire tying it would work just as well. Also mocked my wheel up to see how they'd look.
Finally got all the upholstery removed from the frames. The driver's seat backrest had both tension springs broken off at the top. I looked through some Beetle rear seats I had laying around in the shed and noticed I could use a part of the springs as a donor piece since it had the same curves I needed. Cut the tension springs out of the donor seat and installed them on my bus front seat backrest! I wanted to weld it on but decided to wire tie it instead. VW "clamps" the springs onto the spring frame, so I figured wire tying it would work just as well. Also mocked my wheel up to see how they'd look.
Seat Frames Blasted
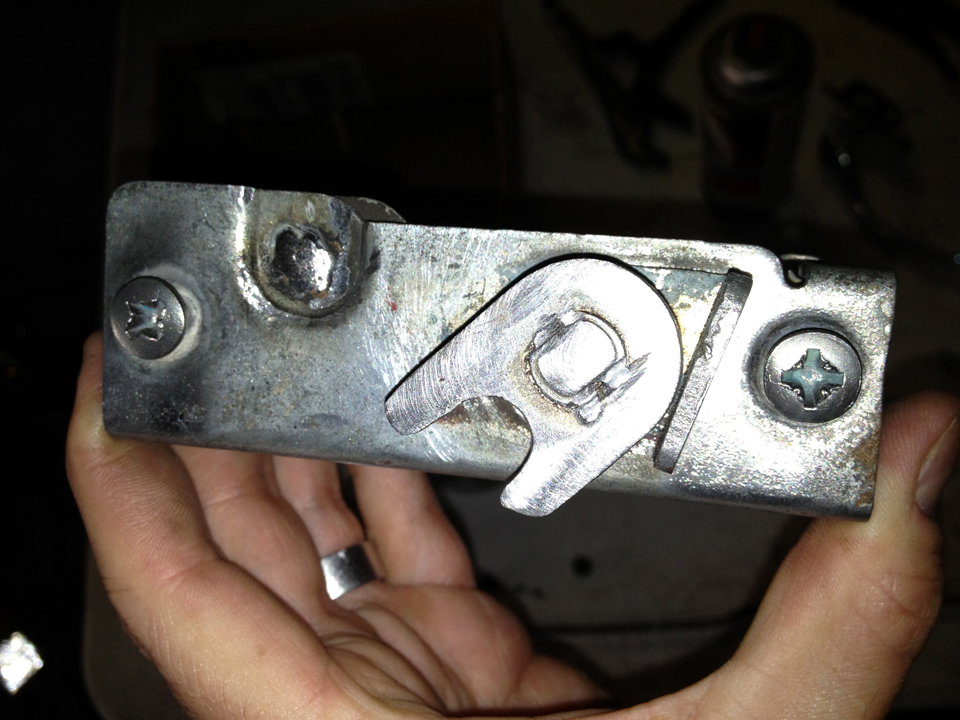
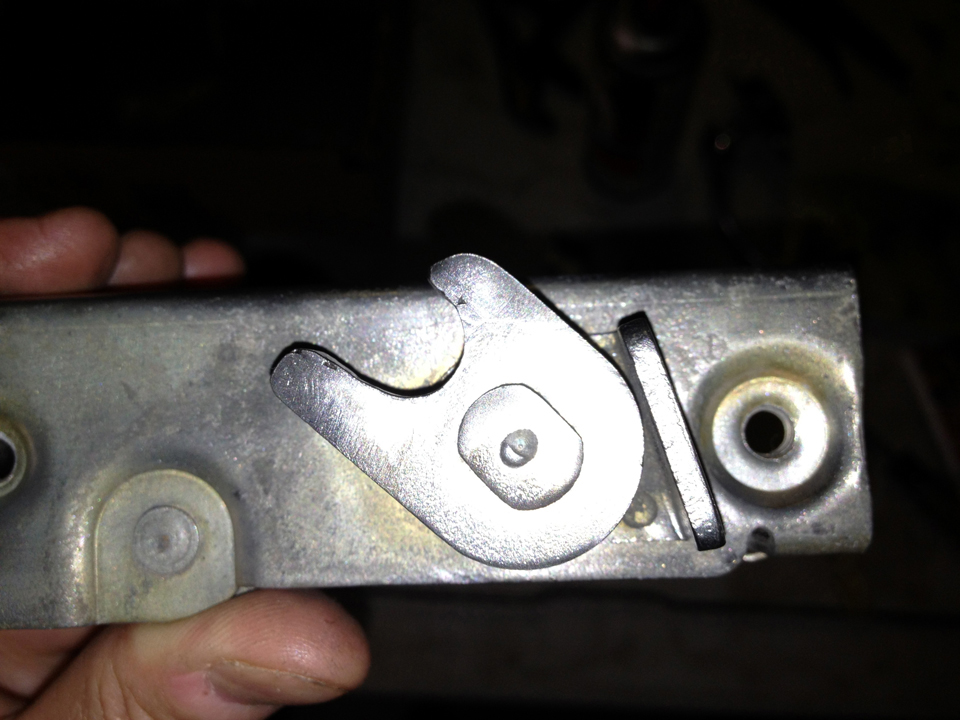
Took the seat frames to get sandblasted this week. Thanks to Joe at A-Best Sandblasting for the great work as always! Gonna get them painted this weekend so I can get them over to the upholstery guy. Also had my friend Luis go over my latches. The striker latch was worn out on both. He welded them up to build up the metal and re-formed the catch. They look and work great!
Took the seat frames to get sandblasted this week. Thanks to Joe at A-Best Sandblasting for the great work as always! Gonna get them painted this weekend so I can get them over to the upholstery guy. Also had my friend Luis go over my latches. The striker latch was worn out on both. He welded them up to build up the metal and re-formed the catch. They look and work great!
Seat Frames Painted
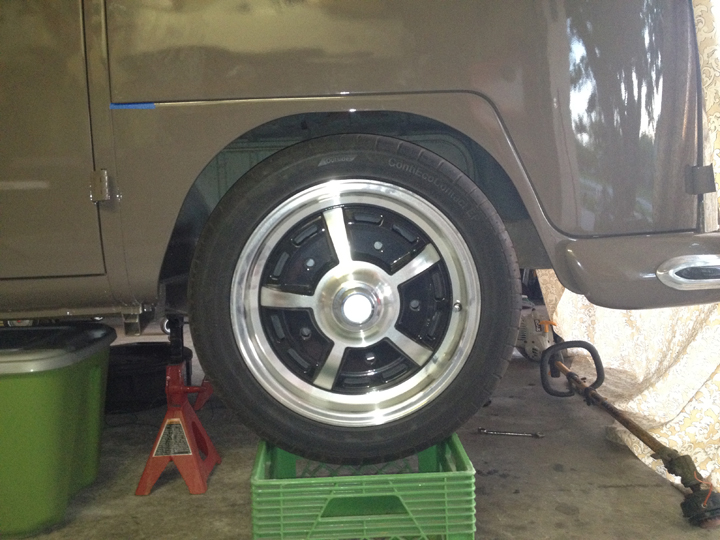
Woke up early today and painted the seat frames gloss black. Came out pretty good just a pain trying to get all the angles! Painted the steering column as well and installed it later on in the day when it was dry. Ran a new horn wire through the tube and finally set the bus on the floor with its "new" shoes. Got tired of seeing the bus up in the air with those nasty oversprayed steelies!! Took some pics on the floor with the sprints, I'm really liking the look! Gonna get the driver door on during this week and make the panels for interior so they can be upholstered along with the frames.
Woke up early today and painted the seat frames gloss black. Came out pretty good just a pain trying to get all the angles! Painted the steering column as well and installed it later on in the day when it was dry. Ran a new horn wire through the tube and finally set the bus on the floor with its "new" shoes. Got tired of seeing the bus up in the air with those nasty oversprayed steelies!! Took some pics on the floor with the sprints, I'm really liking the look! Gonna get the driver door on during this week and make the panels for interior so they can be upholstered along with the frames.


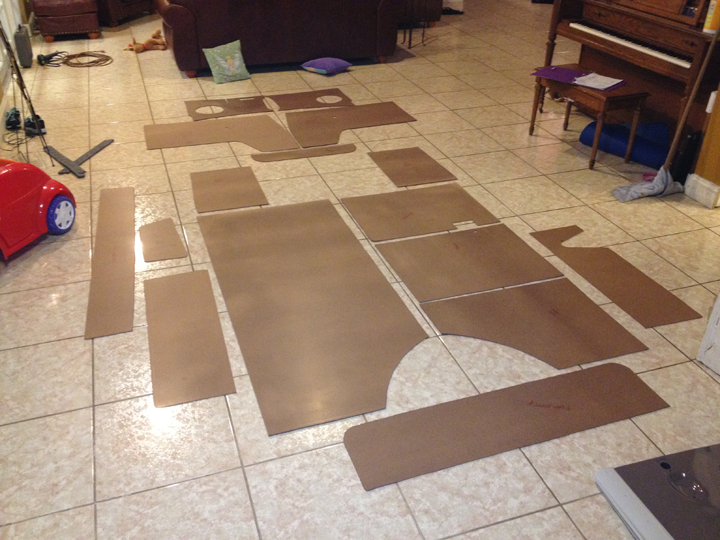
Door Panels
Was able to buy some masonite sheets at HD for the panels. Traced them all out and cut them out. Test fit each piece to make sure they fit before sending out to get covered. Painted the panels on one side to protect against water/moisture. I'll put plastic barrier on doors/body for more protection when the time comes.
Was able to buy some masonite sheets at HD for the panels. Traced them all out and cut them out. Test fit each piece to make sure they fit before sending out to get covered. Painted the panels on one side to protect against water/moisture. I'll put plastic barrier on doors/body for more protection when the time comes.

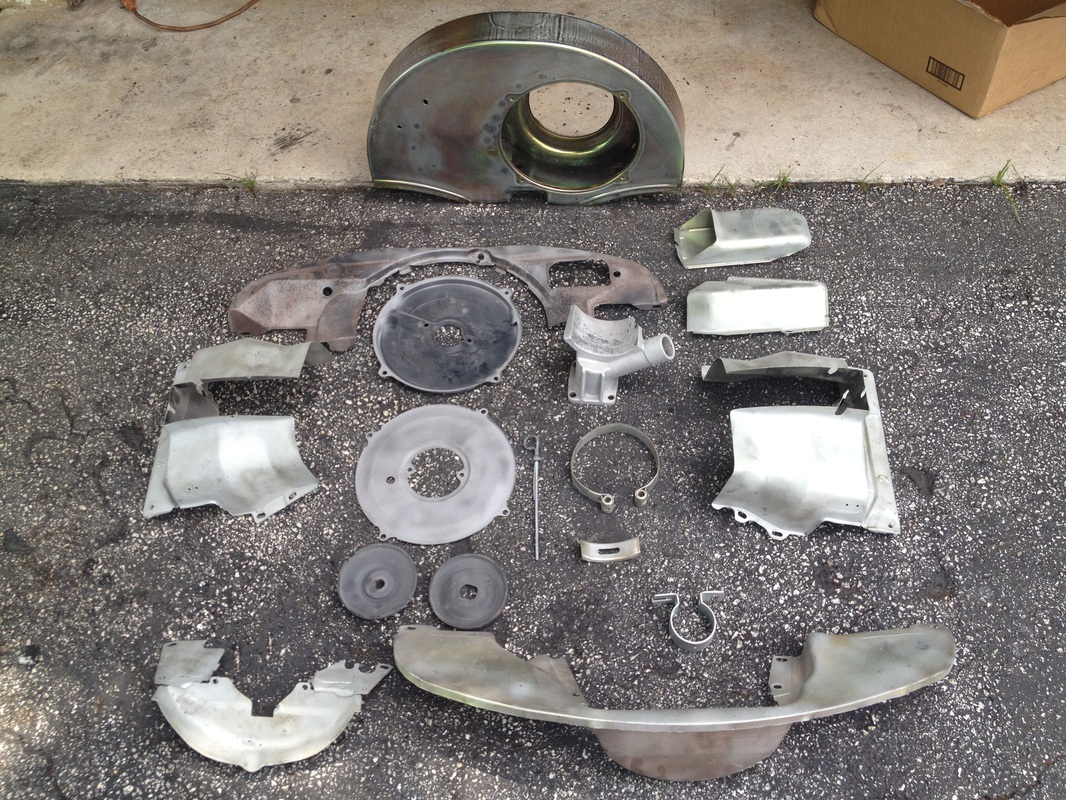
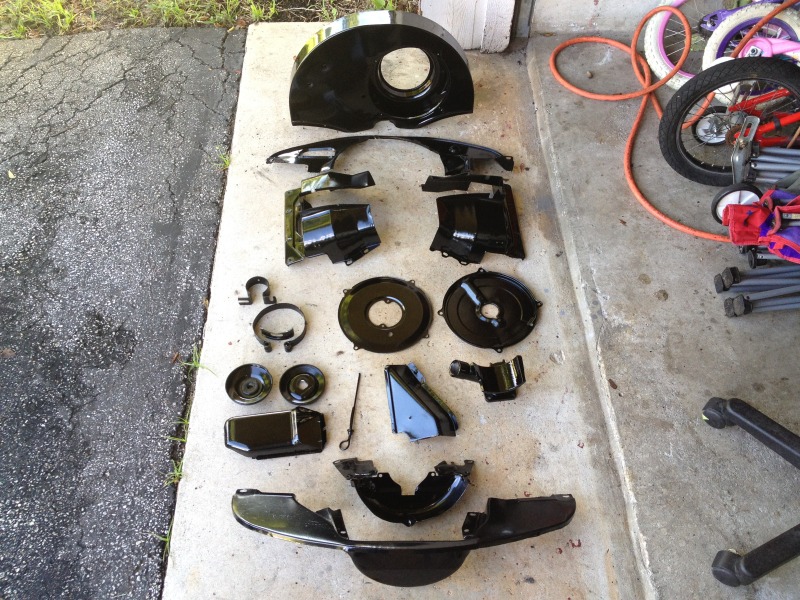
Powder-Coated Engine Tins
Been a while since I get any update on here. Been doing a lot of detail work that goes unnoticed and not really camera-worthy. Basically running around town during my lunch breaks to gather the misc stuff needed to put the engine back together. Besides the running around, I feel like I've been slacking to say the least! Anyway, here are some updates... Sent the tins out to get powdercoated black.
Been a while since I get any update on here. Been doing a lot of detail work that goes unnoticed and not really camera-worthy. Basically running around town during my lunch breaks to gather the misc stuff needed to put the engine back together. Besides the running around, I feel like I've been slacking to say the least! Anyway, here are some updates... Sent the tins out to get powdercoated black.

Upholstery Shop Visit
Stopped by the upholstery shop and picked out the interior colors. Gonna go with a leatherette type vinyl. With kids, I have to to keep it simple and easy maintenance!
Stopped by the upholstery shop and picked out the interior colors. Gonna go with a leatherette type vinyl. With kids, I have to to keep it simple and easy maintenance!
Engine Build...Again!
Began putting the engine back together.
Began putting the engine back together.

Rear Bumper, Brackets and Apron
Put the bumper brackets, rear bumper, and apron on. Did some final adjustments and took it for it's first drive in a year! Rides so much quieter and smoother with all the new seals...well almost everything new!! haha! Her official born-again date is July 4th, 2012!!! That will be an easy date to remember. Her new life began with 00000 miles on the speedo. I drove 2 miles between the test runs and the family rides with the girls!
Put the bumper brackets, rear bumper, and apron on. Did some final adjustments and took it for it's first drive in a year! Rides so much quieter and smoother with all the new seals...well almost everything new!! haha! Her official born-again date is July 4th, 2012!!! That will be an easy date to remember. Her new life began with 00000 miles on the speedo. I drove 2 miles between the test runs and the family rides with the girls!
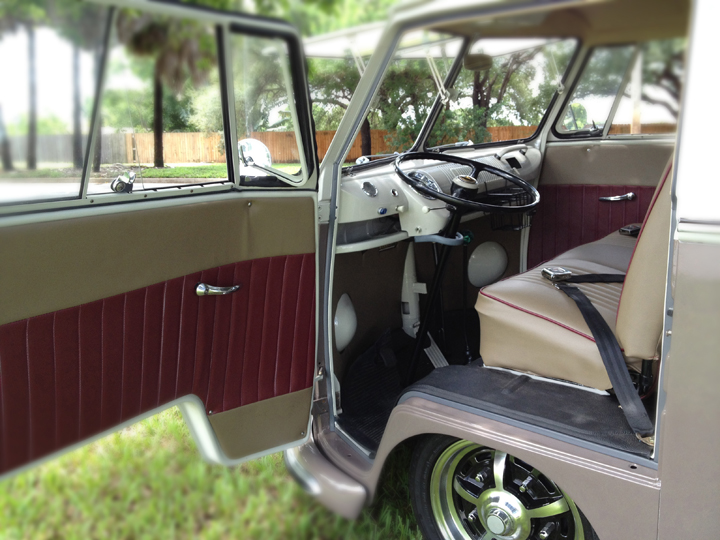
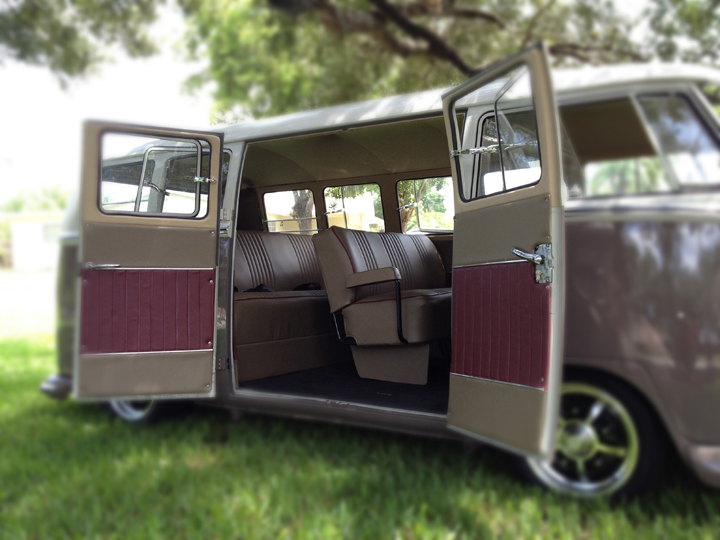
Interior
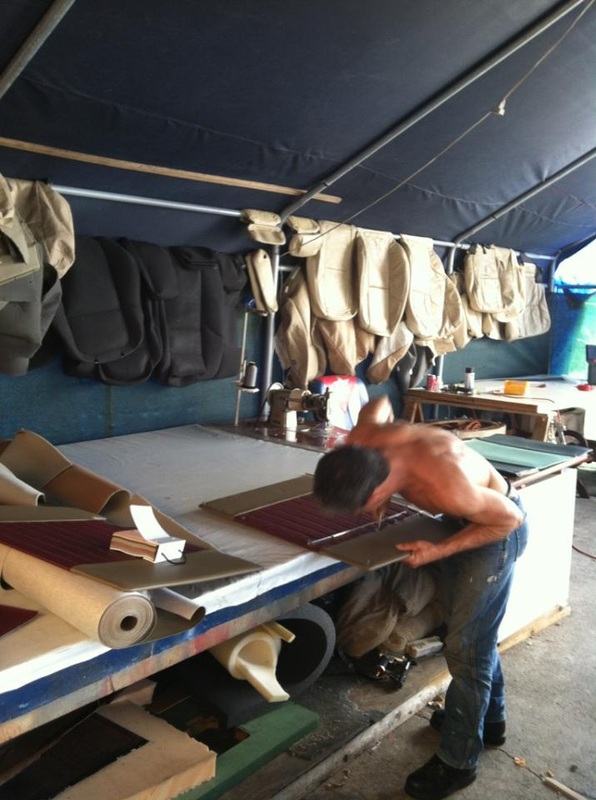
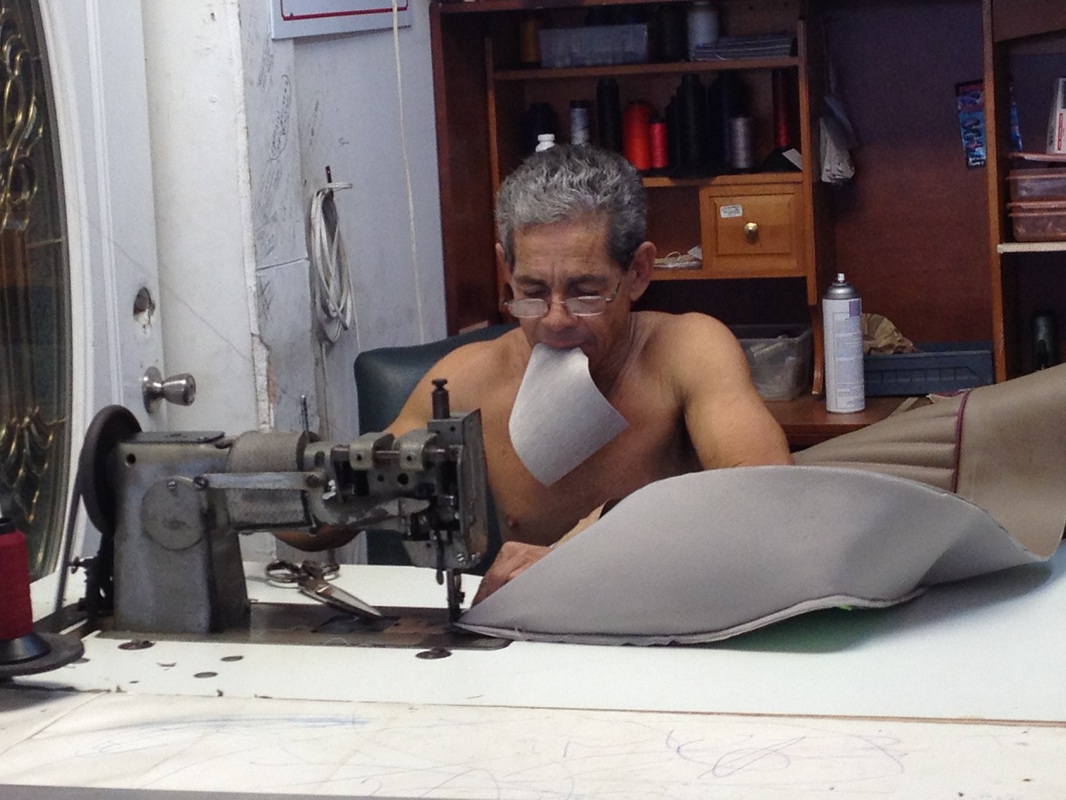
After two weeks at the upholstery shop, the interior is finally done! The upholsterer kept putting off my bus after he had promised me within a few days. I was hoping to get it a week before our annual cruise event our club hosts. Turns out I had to babysit the guy this past Friday & Saturday in order to make sure the interior got done by Saturday night!
Anyway, the plan for the interior is a two-tone combo of brown with red inserts on the panels. All stitch work in red as well as the piping to compliment the panel inserts. Originally I had chosen a darker brown but supplier was out of stock so I made a last minute decision to go with a lighter brown. I really like the end result and most importantly...so does my family!

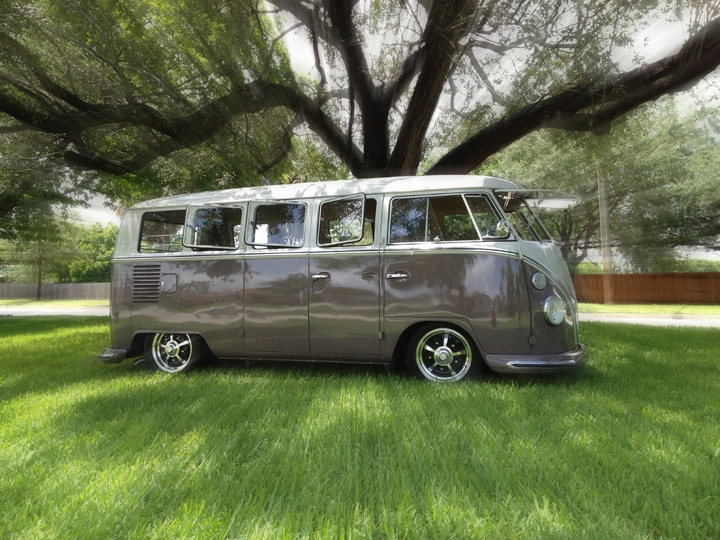
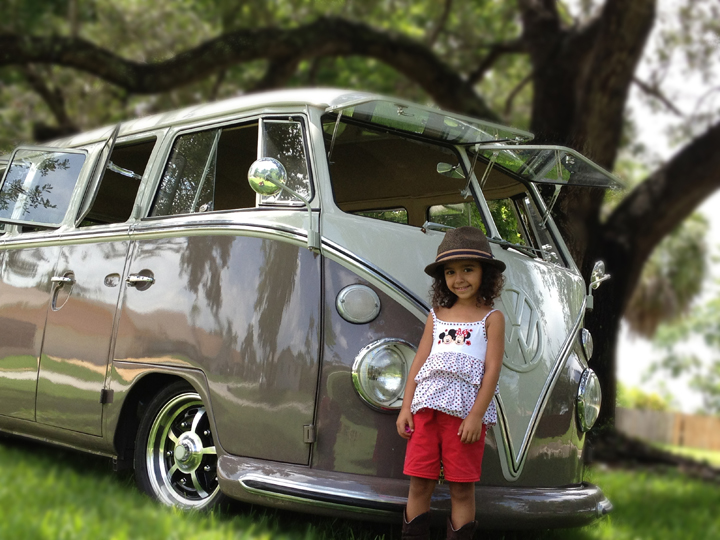
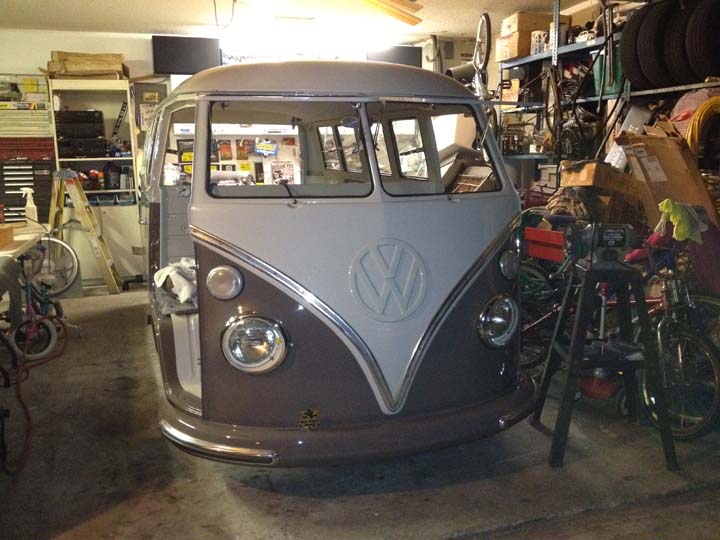
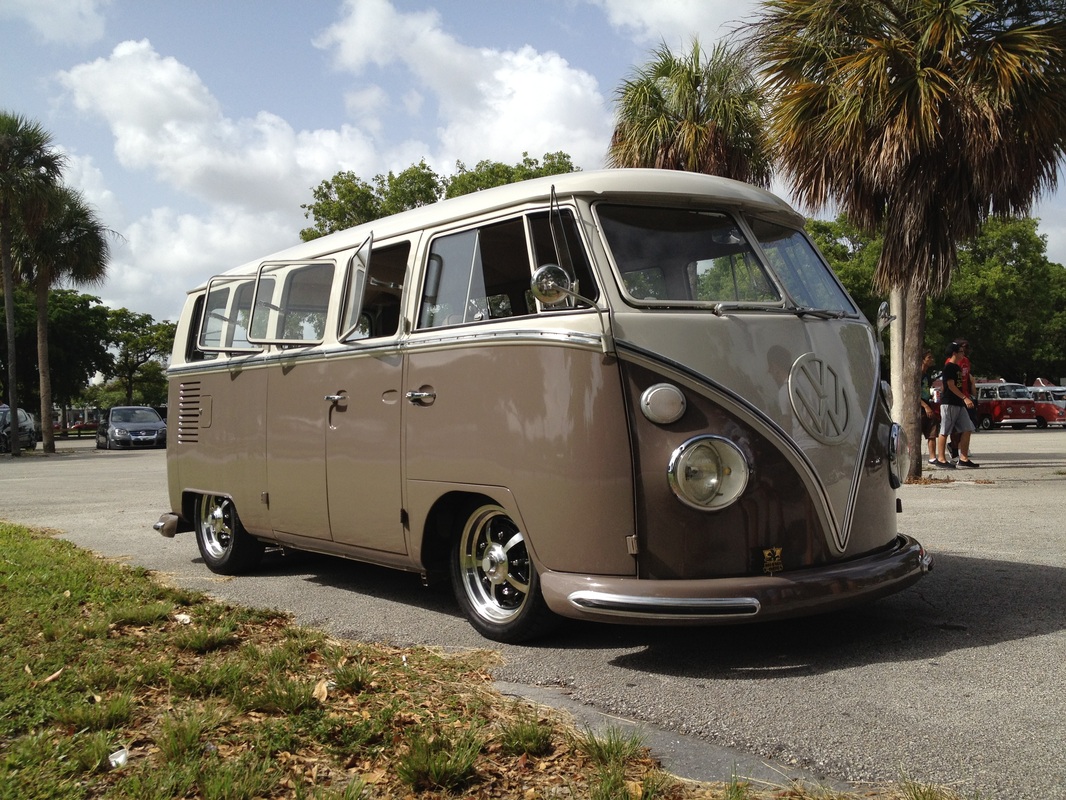
Debut at local Club Cruise Event (Dubs on the Bay)
With only 4 hours of sleep the previous Friday night, it was finally done by 1pm and I was able to drive back home, wash the bus, take a shower and drive to the event by 4pm!! Cut it close but I was able to debut my bus at our event! Bus drove great! Nothing like having everything new. I wanted to take some glamour shots but was too tired to do anything! I just sat back and hoped others took pics.
Gonna try to get a photo shoot together within the next few weeks to get better detailed pics of everything. Rains here everyday, so planning is almost impossible, more of a spur of the moment when the weather is good!
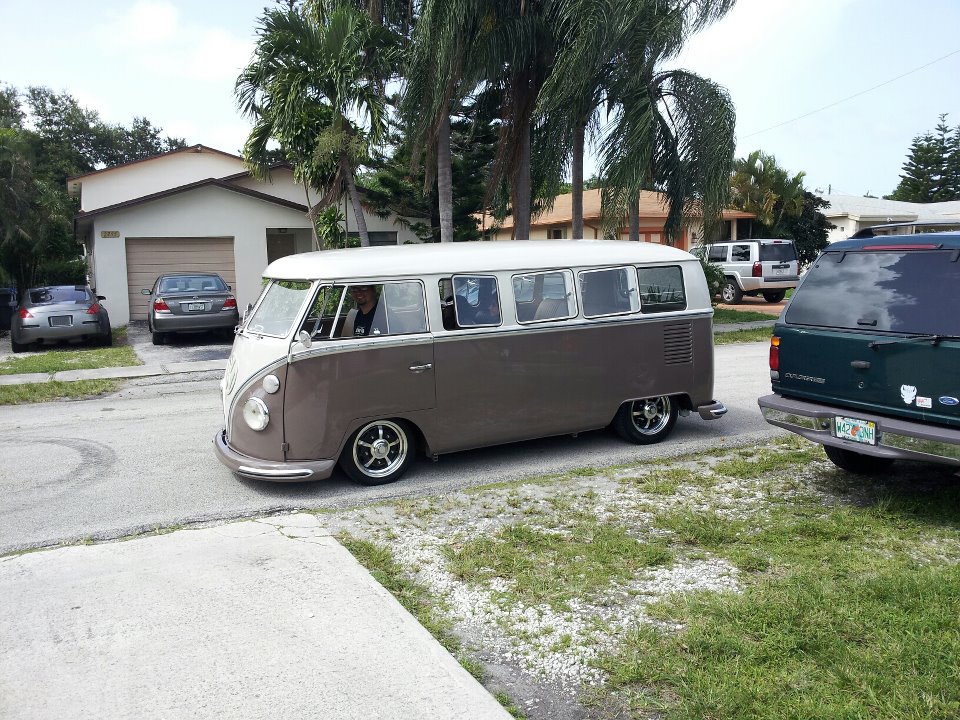


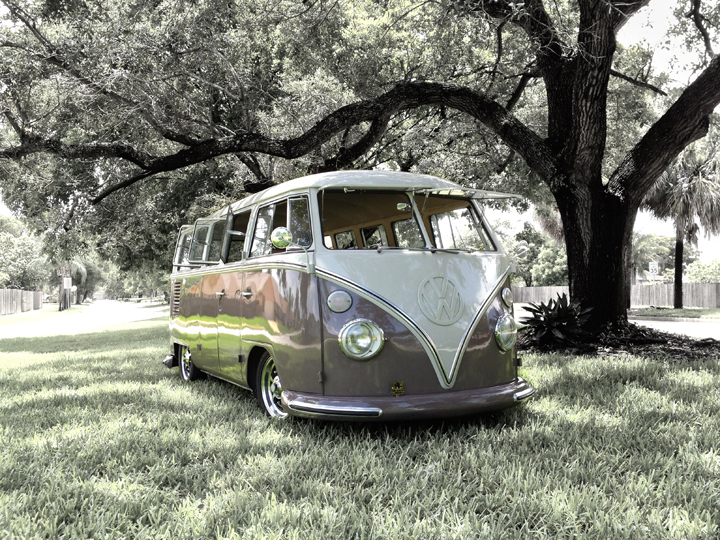
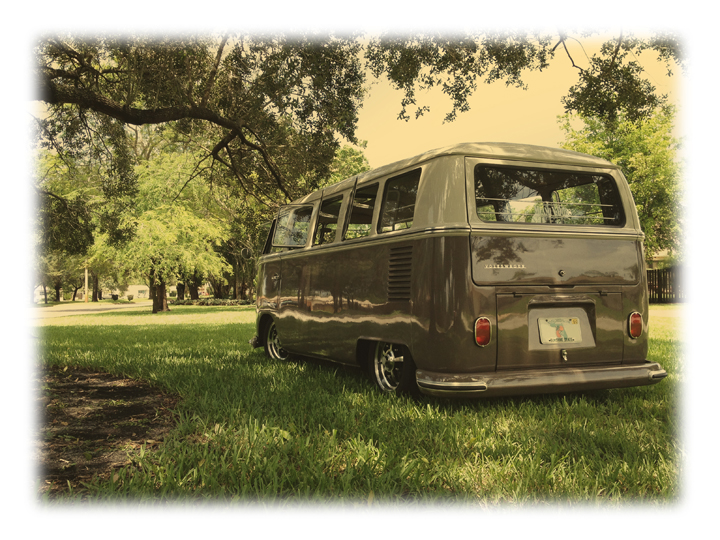
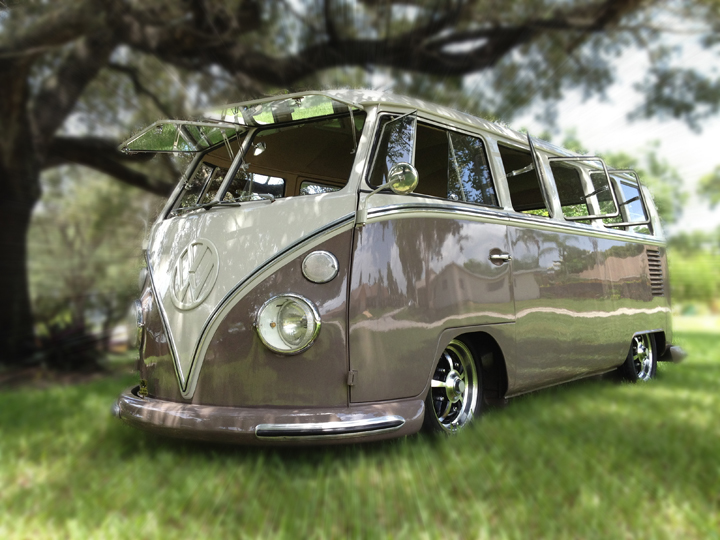
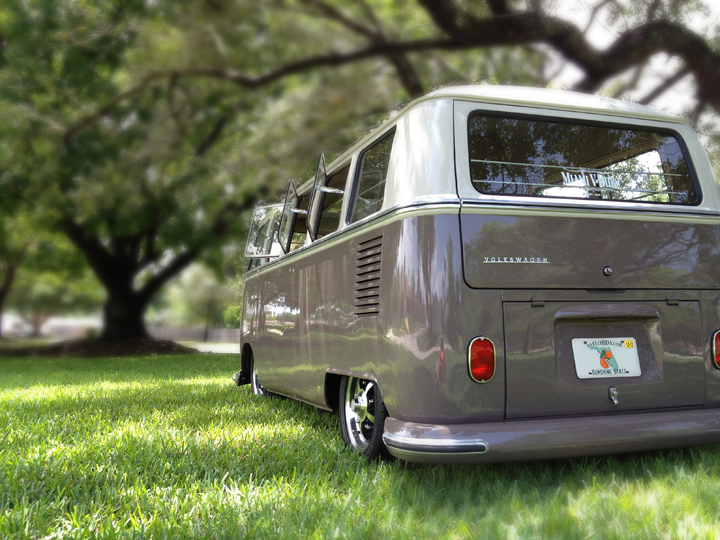
Finally stopped raining here so I went with my youngest down the street to some community grassy burms for some pics. Took these pics with my phone and brought them into photoshop and retouched them. I'm not a photographer but I do know how to use photoshop...haha!